How to Install Drywall: Pro Tips for Beginners
Installing drywall is one of the most rewarding DIY projects you can tackle, transforming bare studs into finished walls that define your living space. Whether you’re finishing a basement, renovating a bedroom, or completing a new construction project, understanding the fundamentals of drywall installation will save you money and deliver professional results. This comprehensive guide walks you through every step, from material selection to final finishing touches, ensuring your project succeeds from start to finish.
Drywall installation requires patience, precision, and the right techniques. Many beginners underestimate the complexity of this task, but with proper preparation and knowledge of industry best practices, you’ll find the process manageable and highly satisfying. We’ll cover everything from selecting the correct drywall type to mastering the taping and mudding techniques that separate amateur work from professional finishes.
Understanding Drywall Types and Materials
Before beginning your installation, you must understand the different drywall types available and their specific applications. Standard drywall, also called wallboard or gypsum board, is the most common choice for interior walls and ceilings. It consists of a gypsum core sandwiched between two layers of paper, providing fire resistance and sound dampening properties that meet building codes across North America.
Moisture-resistant drywall, commonly known as green board, contains additives that resist water absorption, making it ideal for bathrooms, kitchens, and laundry rooms. The Gypsum Association recommends moisture-resistant drywall in areas where humidity levels exceed 85 percent or where direct water exposure is possible. Fire-rated drywall provides enhanced fire protection and is required in specific locations according to local building codes, including garages, basements, and walls separating living spaces from mechanical rooms.
Soundproof drywall contains special sound-dampening materials that reduce noise transmission between rooms, making it excellent for home offices, bedrooms, and entertainment spaces. Lightweight drywall weighs approximately 13 pounds per sheet compared to standard drywall at 15 pounds, reducing installer fatigue during overhead work. When selecting materials, consult your local building inspector or review the International Building Code (IBC) to ensure compliance with regional requirements.

Tools and Equipment You’ll Need
Successful drywall installation depends heavily on having the correct tools. Essential hand tools include a drywall taping knife (available in 4-inch, 6-inch, 10-inch, and 12-inch widths), a drywall saw, a utility knife with sharp blades, a taping pan, a sponge, and a level. A drywall T-square helps you mark precise cuts on sheets, while a drywall lift or jack dramatically reduces the physical strain of positioning sheets overhead.
Power tools streamline the installation process significantly. A drywall screw gun with adjustable depth control prevents over-driving screws through the paper face. A drywall sander with dust collection capability makes finishing work faster and cleaner. A power drill with mixing paddle speeds up joint compound preparation, ensuring consistent texture. For cutting, a drywall router or circular saw equipped with a drywall blade provides clean, precise edges.
Safety equipment cannot be overlooked when undertaking basement finishing projects or any drywall work. Wear a dust mask or respirator rated for drywall dust (N95 minimum), safety glasses to protect against flying debris, work gloves, and sturdy footwear. Knee pads protect your knees during kneeling work, and a hard hat is essential when working overhead or in confined spaces. Proper ventilation with fans or open windows reduces dust accumulation and improves air quality during the sanding phase.
Preparing Your Space
Preparation determines whether your drywall installation succeeds or fails. Begin by inspecting the framing structure, ensuring all studs and joists are properly spaced at 16 inches on center, which is the standard spacing required by the National Fire Protection Association (NFPA). Verify that studs are straight and plumb using a level, addressing any bowing or warping before hanging drywall. Crooked framing will create visible imperfections in your finished walls.
Install all electrical boxes, plumbing access points, and HVAC openings before hanging drywall. This prevents cutting around obstacles and ensures clean, professional-looking installations. Mark stud locations on the floor and ceiling using chalk lines or pencil, making it easier to locate framing when fastening drywall. This step is crucial because fasteners must penetrate studs to provide secure attachment.
Check moisture levels in the space, particularly if you’re finishing a basement or working in traditionally damp areas. Moisture problems must be resolved before drywall installation to prevent mold growth and material degradation. Install vapor barriers if recommended by your building code or if the space has historical moisture issues. Ensure adequate ventilation throughout the project, maintaining indoor humidity between 30 and 50 percent.
Hanging Drywall Sheets
The hanging phase requires careful planning and execution. Start by determining your layout strategy. Hanging sheets horizontally (parallel to the floor) is preferred because it requires fewer sheets, creates stronger walls with fewer seams, and reduces the amount of taping required. For walls, position the first sheet with its top edge at ceiling height, ensuring it’s perfectly plumb and level before fastening.
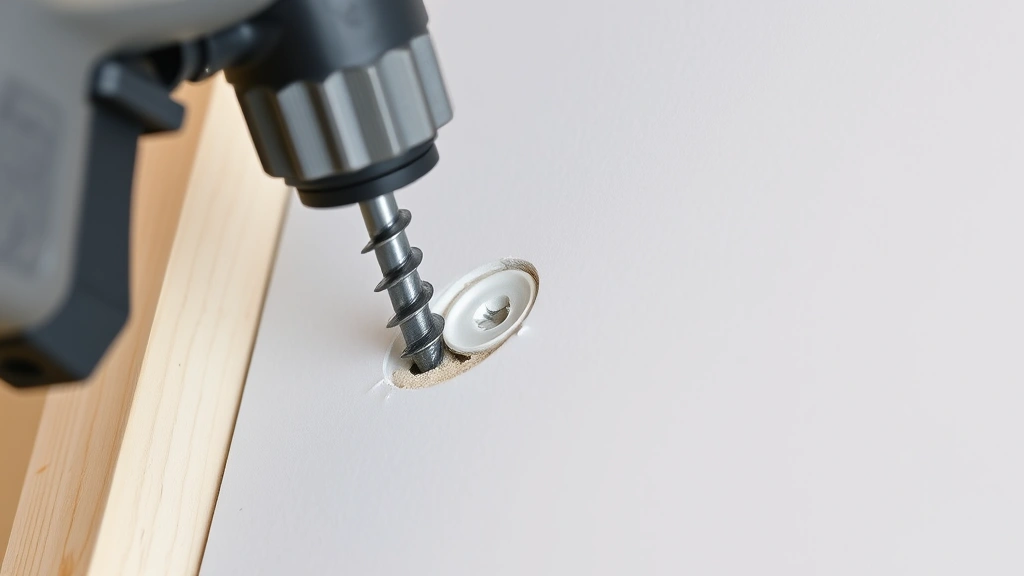
Use drywall screws spaced every 12 inches on studs and every 16 inches on ceilings, maintaining a distance of 3/8 inch from sheet edges. Position fasteners approximately 1/2 inch to 5/8 inch from edges to avoid breaking through the paper. Drive screws so the head creates a slight dimple in the drywall surface without breaking the paper—this is called “countersinking” and provides space for joint compound.
For ceiling installation, a drywall lift is invaluable, supporting the weight while you fasten sheets. Position sheets perpendicular to joists, maintaining the same fastening pattern as walls. Work systematically from one corner, completing one wall or section before moving to the next. Stagger seams between rows to create a stronger, more stable wall assembly that resists cracking.
Cutting drywall requires precision. For straight cuts, score the paper face with a utility knife using a T-square as a guide, then snap the sheet over a bench edge. For openings around electrical boxes or irregular shapes, use a drywall saw, which has a pointed blade that pierces the sheet without requiring a pre-drilled hole. Always wear safety glasses when cutting, as dust and debris can cause eye irritation.
Taping and Mudding Process
Joint compound (mud) transforms drywall seams into invisible transitions. The process involves three distinct coats, each serving a specific purpose. The first coat, called the “tape coat,” uses a thinner consistency to embed drywall tape into the seams. Mix joint compound to a consistency similar to peanut butter, neither too thick nor too thin.
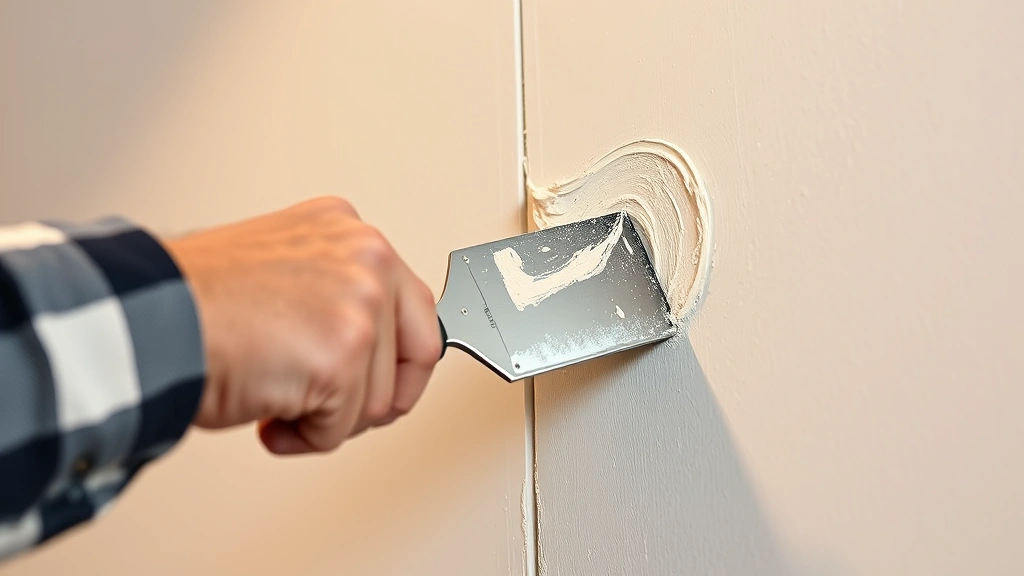
Apply a thin layer of compound across the seam using a 4-inch taping knife, then center drywall tape over the seam and press it firmly into the mud. Use your knife to squeeze out excess compound, leaving tape fully embedded but not overly wet. Feather the edges 2 to 3 inches beyond the tape on both sides, creating a gradual transition.
The second coat, the “fill coat,” bridges gaps and builds thickness. After the tape coat dries completely (typically 24 hours), apply a second layer using a 6-inch or 8-inch knife, extending the feathered edge to 6 to 8 inches on each side of the seam. This coat should be slightly thicker than the tape coat but still applied smoothly. Allow this coat to dry fully before proceeding.
The final coat, the “finish coat,” creates the smooth surface you see in completed walls. Apply this thin coat using a 10-inch or 12-inch knife, extending it 10 to 12 inches beyond the seam center. This requires skill and patience—the compound should be applied so thinly that the tape beneath is barely visible. Multiple thin coats are preferable to one thick coat, which is prone to cracking and shrinkage.
Inside corners require special attention. Apply compound to both sides of the corner, embed corner tape (which has a reinforcing crease), and feather edges smoothly. Outside corners use corner bead, a metal or plastic channel that provides a clean, straight edge. Secure corner bead with fasteners or adhesive, then cover with three coats of joint compound, feathering edges to blend with the wall.
Sanding and Finishing
Once all three coats are completely dry (typically 48 to 72 hours after the final coat), sanding transforms rough, uneven surfaces into smooth, paintable walls. Use 120-grit sandpaper for initial sanding, working in circular motions to smooth high spots and blend compound transitions. Progress to 150-grit or 180-grit sandpaper for final finishing, creating a surface ready for primer and paint.
Dust control is essential during sanding. Use a drywall sander with integrated dust collection, or sand with a pole sander fitted with a dust collection bag. If sanding by hand, maintain proper ventilation with fans and open windows. Wear a dust mask rated for fine particles—drywall dust is extremely fine and can irritate respiratory systems.
After sanding, inspect the surface under bright lighting to identify any remaining imperfections. Minor depressions may require additional joint compound and sanding. Check for fastener pops (where drywall screws push through the surface due to wood framing shrinkage), which require driving the fastener deeper and covering with additional compound.
Priming is crucial before painting. Primer seals the porous joint compound and provides a uniform base for paint. Use a primer specifically formulated for drywall, which prevents bleed-through and improves paint coverage. After priming, you can proceed with your chosen house painting techniques to complete the aesthetic transformation.
Common Mistakes to Avoid
Spacing fasteners too far apart is a frequent beginner mistake that results in buckling, popping fasteners, and weak walls. Always maintain the recommended 12-inch spacing on walls and 16-inch spacing on ceilings. Conversely, spacing fasteners too close together wastes materials and creates unnecessary fastener pops.
Over-driving fasteners breaks the paper face and reduces holding power. Fastener heads should create a slight dimple, not penetrate the paper. Under-driven fasteners leave heads protruding, making them difficult to cover with joint compound. Adjustable drywall screw guns solve this problem by stopping at the correct depth.
Applying joint compound too thickly creates problems during sanding and drying. Thick coats shrink excessively, requiring multiple additional coats, extending the project timeline. Thick coats are also prone to cracking, particularly in high-traffic areas where vibration and movement occur. Multiple thin coats applied with proper feathering produce superior results.
Insufficient drying time between coats leads to compound shrinkage, cracking, and poor adhesion. Allow each coat to dry completely before sanding or applying the next coat. Temperature and humidity significantly affect drying time—cold, humid conditions extend drying periods by 24 hours or more. Maintain indoor temperatures above 50 degrees Fahrenheit and humidity below 85 percent for optimal drying.
Poor surface preparation before painting results in paint failure. Failure to prime all joint compound, fastener dimples, and corner bead causes uneven paint absorption, creating visible blotchy areas. Proper priming ensures uniform paint coverage and superior adhesion.
Neglecting safety precautions leads to injuries and health problems. Drywall dust contains silica, which causes respiratory issues with prolonged exposure. Always wear appropriate respiratory protection, eye protection, and work gloves. When working overhead, use proper support systems and never work alone in case of accidents.
FAQ
How long does it take to hydrate joint compound?
Joint compound doesn’t require hydration in the traditional sense, but it must be mixed properly with water before use. Mix dry joint compound with clean water until it reaches the desired consistency—typically 15 to 20 minutes of stirring achieves proper mixing. Pre-mixed joint compound comes ready to use and requires no water addition. Drying time for applied compound varies: tape coat typically dries in 24 hours, fill coat in 24 hours, and finish coat in 24 to 48 hours, depending on temperature, humidity, and compound thickness.
What’s the difference between drywall tape and corner bead?
Drywall tape, a mesh or paper reinforcement, is embedded in joint compound over flat seams to prevent cracking and provide structural integrity. Corner bead is a metal or plastic channel that protects and straightens outside corners while providing a clean edge. Both require covering with joint compound, but corner bead creates a defined corner edge while tape creates seamless flat transitions.
Can I install drywall over existing walls?
Yes, you can install drywall over existing walls if they’re structurally sound and properly prepared. Remove any loose paint, wallpaper, or protrusions, and ensure the surface is clean and dry. Use adhesive or fasteners to secure new drywall to the existing surface. This approach works well for home renovation projects where removing existing walls would be impractical. However, this reduces room dimensions and may affect door and window openings.
How do I repair drywall damage after installation?
Small holes (less than 1 inch) can be filled with spackling compound applied with a putty knife. For larger holes, cut a square around the damage, install backing, secure a new piece of drywall, and tape and mud the seams using standard techniques. For holes larger than 12 inches, use a drywall repair kit with self-adhesive mesh backing and lightweight compound for faster repairs.
What’s the best way to achieve professional-looking corners?
Inside corners require careful application of joint compound with proper feathering on both sides. Use a corner tool or taping knife to press compound firmly into the corner crease. Outside corners benefit from corner bead installation, which provides a straight reference line. Apply three thin coats of compound, feathering edges progressively wider with each coat. Sand carefully with fine-grit paper once fully dry. Lighting during sanding helps identify remaining imperfections.
Can I paint drywall without priming?
Painting without primer is not recommended. Joint compound is extremely porous and absorbs paint unevenly, resulting in blotchy, dull finishes requiring multiple paint coats. Primer seals the porous surface, providing uniform paint coverage with fewer coats. Quality primer designed for drywall prevents bleed-through and improves adhesion, ultimately saving time and money.
What should I do if drywall fasteners pop after installation?
Fastener pops occur when wood framing shrinks after installation, causing fasteners to push through drywall. Once framing has stabilized (typically 6 to 12 months after construction), you can address pops by driving fasteners deeper and covering with joint compound. Install new fasteners slightly offset from original locations. Apply compound, sand smooth, and prime and paint. Multiple fastener pops throughout a wall suggest framing moisture issues requiring investigation.


