Build a Shed? Pro Tips for Success
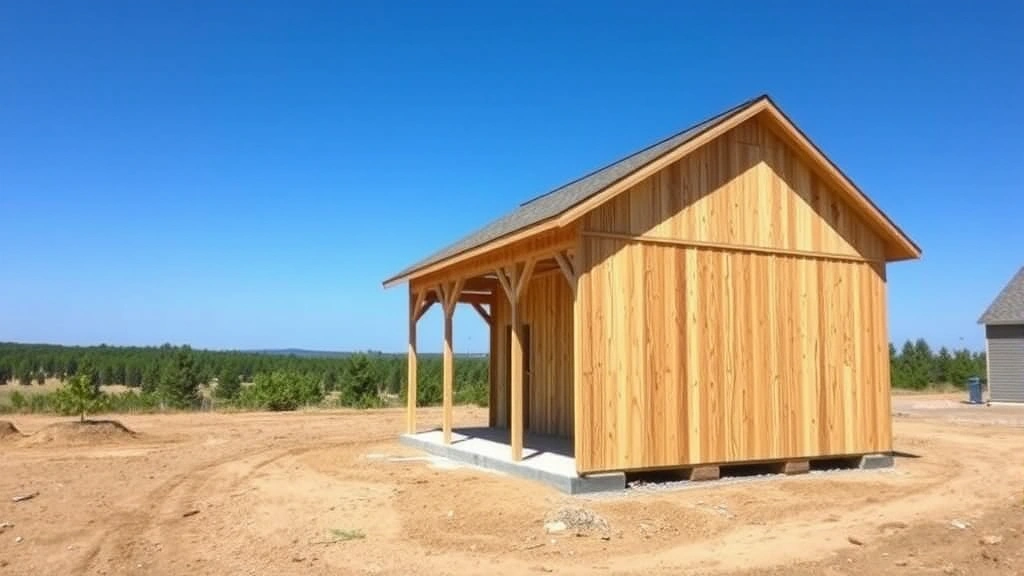
Building a shed is one of the most rewarding DIY projects you can tackle. Whether you need extra storage, a workshop, or a garden retreat, a well-constructed shed adds functionality and value to your property. This comprehensive guide walks you through every phase of shed construction, from initial planning through final touches, ensuring your project succeeds from start to finish.
A shed project typically requires 2-4 weeks of active work, depending on size and complexity. Unlike learning a new skill like how long it takes to learn piano, shed building demands hands-on problem-solving and physical effort. However, the satisfaction of completing a functional structure makes every hour worthwhile. This guide provides the professional insights you need to avoid costly mistakes and build a shed that lasts decades.

Planning and Permits
Before you purchase a single board, invest time in proper planning. Check your local International Building Code (ICC) requirements and municipal zoning regulations. Many jurisdictions require permits for sheds larger than 100-200 square feet, and some have setback requirements dictating how far structures must sit from property lines.
Create detailed plans showing dimensions, materials, and construction methods. Document roof pitch, wall heights, door placement, and window locations. Consider your shed’s purpose—a storage shed has different requirements than a workshop or studio space. Calculate the total square footage and verify it complies with local regulations. Many homeowners discover permit requirements too late, resulting in costly modifications or demolition.
Visit your local building department in person. Speak with inspectors about your specific project. They provide invaluable guidance on setback distances, foundation requirements, and material specifications. This conversation often prevents expensive rework later. Request information about required inspections at foundation, framing, and final stages. Understanding the inspection process beforehand eliminates surprises.
Budget for permits, which typically cost $50-500 depending on your location and shed size. While this seems like an expense you might skip, permits protect you legally and ensure your structure meets safety standards. If you ever sell your home, unpermitted structures create title issues and insurance complications.
Site Preparation
Selecting the right location determines your shed’s longevity. Choose a spot with good drainage—never place a shed in a low area where water collects. Standing water causes foundation rot and structural failure. Ideally, the ground should slope away from your shed at least 6 inches over 10 feet. If natural drainage is poor, consider installing a French drain or gravel bed before construction.
Clear the area of vegetation, rocks, and debris. Remove any roots that might interfere with your foundation. For larger sheds, rent a small excavator to level the ground. An uneven foundation causes doors to bind, walls to rack, and roofing problems. Invest in proper site prep—it’s the most economical insurance policy you can buy.
Mark the footprint using stakes and string. Verify square corners using the 3-4-5 triangle method: measure 3 feet along one side, 4 feet along an adjacent side, and the diagonal should measure exactly 5 feet. This mathematical relationship ensures your corners are truly 90 degrees. Double-check measurements multiple times before breaking ground.
Consider sun exposure, wind direction, and accessibility. A south-facing shed receives maximum light, which is beneficial for workshops. Position doors away from prevailing winds to reduce drafts. Ensure you can access all four sides for maintenance and repairs. Think about future needs too—can you expand parking or storage nearby?
Foundation Fundamentals
Your shed’s foundation is absolutely critical. Poor foundation work causes more shed failures than any other factor. The three primary options are concrete slabs, piers, and treated wood skids. Each has advantages and disadvantages.
Concrete slabs provide excellent durability and rodent protection. Dig down 4 inches below grade, add 4 inches of gravel for drainage, then pour 4 inches of concrete. This prevents frost heave in cold climates and keeps moisture away from wooden components. Use ready-mix concrete from certified suppliers to ensure proper strength ratings. Slabs require proper slope for water runoff—typically 1/8 inch per foot.
Concrete piers work well in areas with significant frost lines. Dig holes below the frost line depth for your region (typically 3-4 feet in northern climates), set concrete piers at each corner and midpoints, then build your shed on top. This prevents frost heave that pushes structures upward in winter. Piers also allow air circulation underneath, reducing moisture problems.
Treated wood skids offer budget-friendly solutions for small sheds on level ground. Use 6×6 pressure-treated timbers rated for ground contact. Pressure-treated lumber resists rot far better than untreated wood. However, skids eventually rot and require replacement. Never use untreated wood directly on soil—it will fail within 5-10 years.
Whichever method you choose, ensure proper drainage and ventilation. Standing water destroys foundations rapidly. Allow air to circulate under your shed to prevent moisture accumulation. Install gutters and downspouts to direct roof water away from the foundation perimeter.
Check local frost line depths at your county extension office or building department. In cold climates, foundations must extend below this depth to prevent frost heave. Ignoring this requirement causes structural damage as soil expands during freezing cycles. This is one area where local knowledge is absolutely essential.
Framing Your Walls
Wall framing is where your shed’s structural integrity is established. Use pressure-treated lumber for the bottom plates to resist moisture and rot. Standard 2×4 lumber spaced 16 inches on center provides adequate strength for typical storage sheds. Larger structures or those in high-wind areas may require 2×6 framing or closer spacing.
Build wall frames on the ground, then raise them into position. This is much safer and more efficient than fastening pieces in place at height. Construct frames with a bottom plate, top plate, and vertical studs. Add diagonal bracing to prevent racking. Use 3-inch deck screws or 16-penny nails for fastening—these provide superior holding power compared to smaller fasteners.
Position door and window openings carefully. Headers above openings must span the opening width plus 12 inches on each side. A 3-foot door opening requires at least a 5-foot header. Use doubled 2×6 or 2×8 lumber for headers depending on opening width. Inadequate headers cause sagging and binding doors and windows.
Install diagonal bracing in wall frames before raising them. This prevents racking—the parallelogram distortion that occurs when walls aren’t properly braced. Racking causes doors to bind and creates stress points that lead to failure. Proper bracing is non-negotiable for structural integrity.
Ensure walls are truly plumb using a 4-foot level. Check both directions before fastening walls to the foundation. Plumb walls ensure straight walls, proper roof fit, and functional doors. Crooked walls compound problems throughout construction. Invest time in getting this right.
Spacing wall studs 16 inches on center is standard practice. This spacing provides adequate support for roofing loads and allows standard sheet material to fit properly. If you use 24-inch spacing to save materials, you must use larger lumber to maintain strength. Consult American Wood Council span tables for proper sizing.
Roofing Essentials
A quality roof is your shed’s primary defense against weather damage. The roof must shed water quickly and withstand wind and snow loads. Choose between gable roofs, shed roofs, or gambrel roofs based on your climate and aesthetic preferences. Gable roofs shed water efficiently in most climates. Shed roofs work well for small structures. Gambrel roofs maximize interior space but are more complex to build.
Roof pitch is critical for water management. Minimum pitch is 4:12 (4 inches of rise per 12 inches of run). Steeper pitches shed water more quickly and handle snow better. In areas with heavy snow, 6:12 or steeper is preferable. Flat or very low-pitch roofs collect water and fail prematurely.
Install proper roof framing using rafters or trusses. Trusses are engineered assemblies that provide excellent strength and allow open interior space. Rafters require collar ties and ridge bracing to prevent spreading. Either method works, but trusses simplify construction for most DIYers. Ensure adequate overhang—typically 12-24 inches—to protect walls from rain.
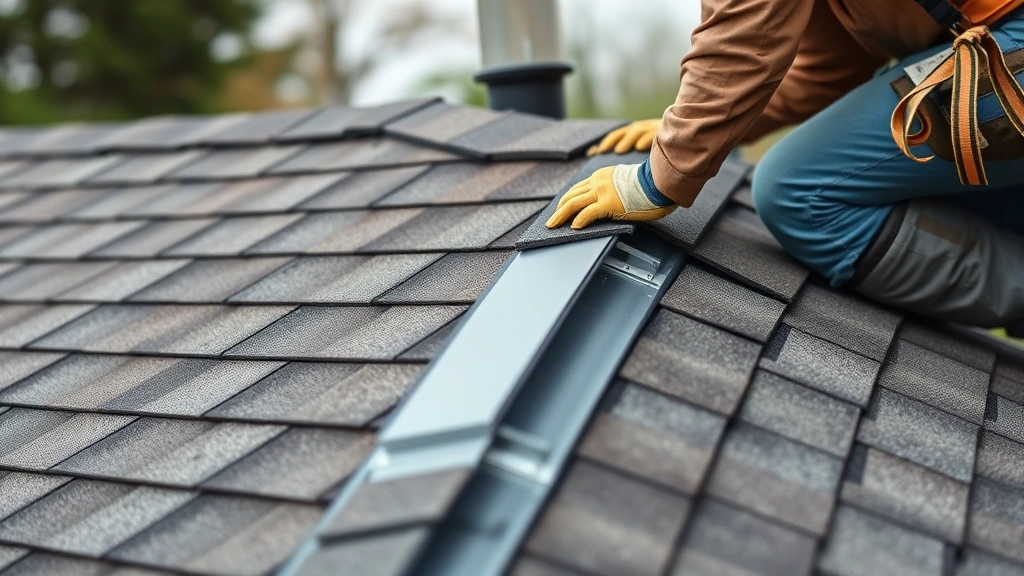
Ventilation prevents moisture accumulation in the roof assembly. Install soffit vents at the bottom and ridge vents at the top to create continuous airflow. This prevents condensation and extends shingle life significantly. Many shed builders skip ventilation, resulting in premature failure and interior moisture problems.
Use quality roofing materials. Asphalt shingles are affordable and durable when properly installed. Metal roofing costs more but lasts 40+ years. Rubber and composite materials offer longevity and aesthetic options. Regardless of material, proper installation is critical. Follow manufacturer specifications exactly—improper nailing or fastening causes premature failure.
Install ice and water shield along the roof perimeter before shingling. This self-adhering membrane prevents water backup during ice dam formation in cold climates. It’s inexpensive insurance against expensive water damage. Don’t skip this step in areas with winter weather.
Finishing Touches
After the basic structure is complete, finishing work makes your shed functional and protected. Install windows to provide natural light and ventilation. Use tempered safety glass in any shed that might house power tools. Windows also prevent the interior from feeling like a dark cave.
Choose doors appropriate for your shed’s purpose. Single swing doors work for small sheds, while double doors allow equipment access. Sliding barn doors are popular for aesthetic appeal. Whatever style you choose, ensure doors hang plumb and operate smoothly. A binding door indicates wall or header issues that need correction.
Install exterior siding to protect the frame from weather. Common options include wood siding, metal panels, or vinyl. Wood siding requires maintenance but offers classic appearance. Metal panels are durable and require minimal upkeep. Vinyl offers low maintenance but may not suit all architectural styles. Whatever you choose, ensure proper underlayment and fastening according to manufacturer specifications.
Insulation is optional but beneficial if you plan to use the shed year-round or for temperature-sensitive storage. Fiberglass batts or blown-in cellulose work well. Include a vapor barrier on the warm side of insulation to prevent moisture problems. Proper insulation also reduces temperature fluctuations that damage stored items.
Interior finishing depends on your shed’s purpose. A storage shed might need only concrete flooring and shelving. A workshop requires electrical service—hire a licensed electrician for safety and code compliance. A studio or guest space needs drywall, proper HVAC, and utilities. Match finishing to your intended use.
Install gutters and downspouts to direct roof water away from the foundation. This is one of the most important maintenance items you can add. Water running down walls causes rot, mold, and foundation problems. Ensure downspouts extend at least 4-6 feet from the structure.
Paint or stain exterior surfaces within 6 months of completion. Exposed wood deteriorates rapidly without protection. A quality exterior paint or stain protects wood and enhances appearance. Reapply every 5-7 years depending on climate. This regular maintenance extends your shed’s lifespan by decades.
Consider adding exterior lighting and secure locking mechanisms. Proper lighting improves safety and security. Quality locks protect valuable tools and equipment. Motion-activated lighting deters intruders and improves nighttime safety.
Just as you would approach DIY basement finishing, a shed project benefits from planning and attention to detail. The same principles apply—proper foundation, moisture control, and quality materials ensure longevity. Whether you’re building storage space or a creative retreat, these fundamentals apply.
Your shed project is similar in scope to other home projects covered on DIY Nests Hub Blog, where homeowners tackle ambitious projects successfully. With proper planning and execution, you’ll create a structure that serves your needs for decades. The key is understanding each phase thoroughly before beginning work.
FAQ
Do I need a permit to build a shed?
Most jurisdictions require permits for sheds larger than 100-200 square feet. Some areas require permits for any permanent structure. Check with your local building department. Permits protect you legally and ensure your structure meets safety codes. Unpermitted structures create problems when selling your home or filing insurance claims.
How long does it take to build a shed?
A typical 10×12 shed takes 2-4 weeks of active work for one person. With a helper, you might complete it in 10-14 days. Larger or more complex structures take longer. Timeline depends on your skill level, available time, weather conditions, and material availability. Don’t rush—quality workmanship prevents costly problems later.
What’s the best foundation for a shed?
Concrete slabs and piers are most durable. Slabs provide excellent protection and prevent rodent access. Piers work well in cold climates with deep frost lines. Treated wood skids are budget-friendly for small sheds but require eventual replacement. Choose based on your climate, soil conditions, and budget. Consult your local building department for recommendations specific to your area.
Can I build a shed without a foundation?
No. A proper foundation is essential for longevity and structural integrity. Without a foundation, wood contacts soil directly, leading to rapid rot and failure. Even simple skid foundations provide necessary separation from ground moisture. Skipping the foundation is false economy that results in complete failure within 5-10 years.
What roof pitch should I use?
Minimum pitch is 4:12 for adequate water shedding. In areas with heavy rain or snow, 6:12 or steeper is preferable. Steeper pitches shed water faster and handle snow loads better. Consult your local building department for minimum requirements in your area. Proper pitch is critical for roof longevity.
Do I need ventilation in my shed?
Yes, ventilation prevents moisture accumulation and extends structure life. Install soffit vents at the bottom and ridge vents at the top to create continuous airflow. Even small sheds benefit from ventilation. This is one area where the minimal cost provides maximum protection against expensive damage.
What materials do I need for a basic shed?
A basic 10×12 shed requires lumber for framing, roofing materials, siding, doors, windows, fasteners, and foundation materials. Create a detailed materials list based on your plans. Visit National Ready Mixed Concrete Association for concrete specifications. Get quotes from multiple suppliers—prices vary significantly.
Should I hire a contractor instead?
That depends on your skills, available time, and budget. Building a shed yourself saves significant money but requires physical effort and problem-solving. If you’ve completed other DIY projects successfully, you can handle shed construction. If you lack experience or time, hiring a contractor ensures quality work and proper permits. Either way, understanding the process helps you make informed decisions and verify quality work.


