What’s a Fair Budget? DIY Expert’s Cost Breakdown
Understanding how to allocate your building budget effectively is crucial for any DIY project, whether you’re tackling a small renovation or a major construction undertaking. The phrase “cents to the dollar” refers to how much of every dollar you spend actually goes toward materials, labor, and contingencies—and knowing this breakdown can save you thousands in wasted money and poor planning decisions.
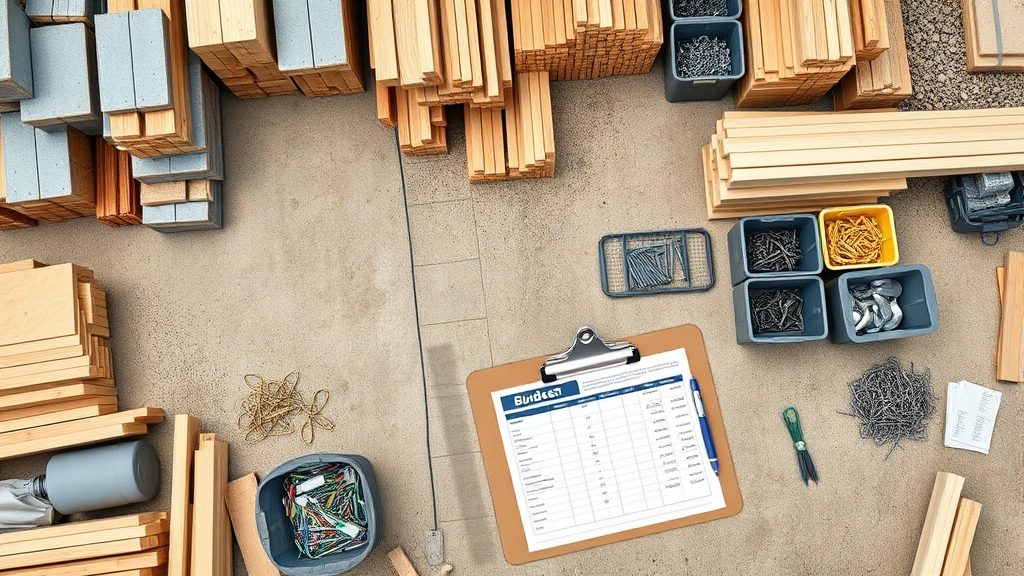
When most DIYers begin a project, they focus on the obvious costs: lumber, fasteners, paint, and tools. However, a truly fair budget requires understanding the hidden expenses, overhead allocation, and contingency percentages that separate successful projects from financial disasters. This comprehensive guide breaks down the real-world cost structure that professional builders use, adapted for the DIY enthusiast who wants to understand exactly where their money goes.
Understanding the Cents-to-Dollar Concept
In construction and building terminology, “cents to the dollar” describes the actual allocation of costs within a project budget. For every dollar you invest, understanding how many cents go to materials, labor, overhead, and profit margins helps you make informed decisions about your project scope and timeline.
Professional contractors typically work with this breakdown: approximately 40-50 cents goes directly to materials, 30-40 cents covers labor costs (whether your own time or hired help), 10-15 cents addresses overhead and contingencies, and the remaining percentage represents profit or buffer for unforeseen expenses. As a DIY builder, your allocation differs significantly because you’re eliminating contractor profit margins and potentially reducing labor costs by doing the work yourself.
The key to creating a fair budget is recognizing that not all dollars are created equal. A dollar spent on quality materials that last decades provides different value than a dollar spent on tools you’ll use once. Understanding these distinctions helps you prioritize spending and avoid budget overruns that plague DIY projects.
When planning your how long to build a house timeline, you’ll discover that time directly impacts your costs. Extended project timelines increase material waste, tool rental fees, and the opportunity cost of your labor.
Material Costs: The Foundation of Your Budget
Materials typically represent the largest single expense category in DIY building projects, accounting for approximately 45-55 cents of every dollar spent. This includes all physical components: lumber, fasteners, electrical supplies, plumbing fixtures, insulation, drywall, paint, sealants, and finishing materials.
Breaking down material costs requires itemizing every component of your project. Create a detailed list by room or section, then price each item from multiple suppliers. Building material costs fluctuate seasonally—lumber prices peak in spring and summer, while winter often brings better deals on heating-related materials.
For DIY beginner woodworking projects, material selection significantly impacts both costs and project success. Premium materials cost more upfront but reduce waste and rework expenses. A $15 sheet of quality plywood might waste 5% of material, while a $8 sheet could waste 20% due to defects and splitting.
Consider these material cost strategies:
- Buy in bulk when possible—volume discounts often reduce per-unit costs by 10-20%
- Source materials seasonally to take advantage of sales cycles
- Purchase quality grades appropriate for the application—don’t overspend on hidden structural components, but invest in visible finishing materials
- Account for waste factors—add 10-15% to your material quantities for cutting waste, damage, and mistakes
- Compare unit prices across different package sizes, not just total cost
Material costs also include delivery fees, which can add $50-300+ depending on order size and location. Many suppliers offer free delivery on orders exceeding certain thresholds, so consolidating orders strategically saves money.

Labor and Time Investment
For DIY projects, labor costs represent your personal time investment. Even if you’re not paying yourself an hourly wage, understanding the time commitment helps you assess whether DIY makes financial sense compared to hiring professionals. Professional labor typically costs $35-150+ per hour depending on trade specialization and location.
Calculate your labor allocation by estimating hours needed for each project phase: preparation, installation, finishing, and cleanup. Multiply estimated hours by your opportunity cost (what you could earn doing something else) to understand the true financial impact of your time investment.
Factors affecting labor time include:
- Skill level—experienced DIYers work 30-50% faster than beginners
- Tool availability—proper tools reduce labor time dramatically; hand tools require 3-5 times longer than power tools for many tasks
- Project complexity—simple installations take predictable time; complex projects with multiple dependencies create compounding delays
- Learning curve—your first project in a new skill takes significantly longer than subsequent projects
- Physical demands—fatigue reduces efficiency and increases error rates, requiring rework
When allocating labor costs, be honest about your skill level. Underestimating time leads to rushed work, mistakes, and safety issues. A professional carpenter might frame a wall in 4 hours; a DIY beginner might need 10-12 hours including setup, measuring, and corrections.
Tools and Equipment Allocation
Tools represent a significant but often underestimated budget category. Many DIYers buy tools they need immediately without considering whether to purchase or rent, and whether to buy premium or budget versions.
Categorize tools into three groups:
- Essential tools you’ll use repeatedly—invest in quality. A $120 cordless drill you’ll use for 20 projects over 10 years costs $6 per project. A $40 cheap drill that fails after 3 projects costs $13 per project plus frustration.
- Specialized tools for specific projects—rent unless you’ll use them 5+ times. A tile saw costs $200-400; renting costs $30-50 per day. If you’re doing one bathroom renovation, renting saves money.
- Safety equipment—never compromise. Safety glasses, work gloves, hearing protection, and dust masks cost $30-50 but prevent injuries costing thousands in medical expenses and lost work time.
For tool allocation in your budget, account for 5-10 cents per dollar on tools, depending on whether you’re starting from scratch or already own equipment. Existing tools should be inventoried and maintained properly to maximize their lifespan.
Tool rental services often provide better economics than purchasing for single-use items. A concrete mixer rents for $40-60 daily but costs $300-600 to purchase. Unless you’re pouring concrete regularly, renting makes financial sense.

Contingency Planning and Hidden Costs
Professional builders allocate 10-20% of total project costs as contingency for unforeseen expenses—and this is where most DIY projects exceed their initial budgets. Hidden costs appear unexpectedly: structural damage discovered during demolition, electrical wiring that doesn’t meet code, plumbing complications, material price increases, and scope creep where small additions accumulate.
Common hidden costs include:
- Permits and inspections—$100-2000+ depending on project scope and location. Building codes require permits for most structural, electrical, and plumbing work. Check with your local International Code Council for requirements.
- Disposal and waste removal—demolition creates significant debris. Renting a dumpster costs $300-600 for a week
- Temporary utilities—extended projects may require temporary electrical service or water access
- Rework and corrections—mistakes requiring material replacement and additional labor
- Material price fluctuations—commodity prices change; budget 5-10% buffer for increases
- Accessibility and mobility—parking, material handling, and workspace setup take time and money
When building your budget, allocate at least 15% contingency. For renovation projects involving unknown existing conditions (hidden structural issues, asbestos, mold), increase contingency to 20-25%. New construction with known specifications might justify 10% contingency.
The National Association of Home Builders recommends detailed contingency planning, especially for projects involving structural modifications or building system upgrades.
Creating Your Detailed Budget Breakdown
Start with a comprehensive project scope document listing every component, material, and task. Organize by construction phase: site preparation, foundation/framing, utilities, weatherization, finishing, and cleanup.
For each phase, create line items with:
- Quantity—exact amounts needed
- Unit cost—price per unit from suppliers
- Total material cost—quantity × unit cost
- Labor hours—estimated time needed
- Labor cost—hours × your hourly rate or market rate
- Tool requirements—new tools needed, allocated cost
- Subtotal—material + labor + tools for that line item
Create a spreadsheet organizing these items by category. Most projects break down as:
- Materials: 45-55%
- Labor: 30-40%
- Tools: 5-10%
- Contingency: 10-20%
Your DIY Nest Hub Blog offers additional project planning resources to help structure your budget documentation.
Compare your budget to similar completed projects. If your estimate is 30% higher or lower than comparable projects, investigate why. Significant discrepancies often indicate missed items or unrealistic time estimates.
Real-World Project Examples
Understanding how the cents-to-dollar breakdown applies to actual projects clarifies budgeting principles:
Example 1: 12×16 Deck Project ($3,200 total budget)
- Materials (lumber, fasteners, stain): $1,600 (50%)
- Labor (40 hours at $20/hour): $800 (25%)
- Tools (new saw, drill bits, safety gear): $400 (12.5%)
- Contingency: $400 (12.5%)
This allocation assumes you already own basic tools. If starting from zero, tool costs increase to 20%, reducing contingency. The 50% material allocation is typical for outdoor projects where structural materials dominate.
Example 2: Master Bedroom Addition ($25,000 total budget)
- Materials (framing, drywall, electrical, HVAC, flooring, finishing): $12,500 (50%)
- Labor (200 hours at $30/hour): $6,000 (24%)
- Tools and equipment rental: $2,000 (8%)
- Permits and inspections: $1,500 (6%)
- Contingency: $3,000 (12%)
Larger projects often have lower contingency percentages because you can estimate more accurately with detailed planning. However, additions involving existing structure modifications warrant higher contingency due to unknowns.
Example 3: Kitchen Renovation ($8,000 total budget)
- Materials (cabinets, counters, backsplash, appliances, fixtures): $4,400 (55%)
- Labor (120 hours at $25/hour): $3,000 (37.5%)
- Tools (specialized kitchen tools): $400 (5%)
- Contingency: $200 (2.5%)
This example shows the risk of inadequate contingency. Kitchen renovations frequently encounter unexpected structural issues, hidden plumbing problems, or electrical code violations discovered during work. Increasing contingency to $1,200 (15%) would be more prudent, reducing material or labor allocation accordingly.
For timing-sensitive projects, review how long does it take to walk 6 miles to understand pace and project duration impacts.
Budget Optimization Strategies
After establishing your baseline budget, apply optimization techniques to improve value without compromising quality:
Material Optimization—source materials strategically. Contact suppliers about contractor discounts; many offer 10-15% reductions with proof of project scope. Purchase discontinued colors or styles at significant markdowns if aesthetics aren’t critical. Buy seasonal materials during off-peak periods.
Labor Optimization—focus your paid labor or skilled trades on specialized work requiring expertise. Handle simple tasks yourself: demolition, painting, cleanup. Hire professionals for electrical, plumbing, and structural work requiring permits and inspections. This allocation optimizes your labor dollars.
Tool Optimization—invest in versatile tools serving multiple purposes. A combination square works for carpentry and masonry; a multi-tool replaces several specialized implements. Borrow or rent rarely-used specialized tools rather than purchasing.
Timing Optimization—extending projects across seasons captures material sales. Spring lumber sales precede summer projects; winter heating system sales reduce winter renovation costs. However, weigh savings against extended contingency needs and weather impacts.
The Construction Dive publication regularly tracks material cost trends helping DIYers time major purchases strategically.
Understanding Cost Control Mechanisms
Professional builders employ cost control mechanisms that DIYers should adopt. Implement change order procedures: any modification to your original scope requires written documentation of cost and timeline impacts before proceeding. This prevents scope creep where small additions accumulate into major budget overruns.
Track actual costs against budgeted costs weekly. Create a simple spreadsheet comparing planned versus actual spending by category. When actual costs exceed budget by 5%, investigate why and adjust remaining phases accordingly. This real-time monitoring prevents surprises at project completion.
Implement value engineering—systematically reviewing each budget line to determine whether the specified material, method, or quality level provides appropriate value. Can you achieve the same result with less expensive materials? Are you over-specifying for this application?
For DIY home security projects and other system installations, understand that some components justify premium investment (security system reliability) while others tolerate budget alternatives (mounting hardware).
The American Institute of Architects publishes cost estimating guidelines applicable to DIY projects, providing industry-standard allocation percentages for various project types.
FAQ
What percentage of my budget should go to materials versus labor?
Typically 45-55% materials and 30-40% labor for most DIY projects. However, this varies significantly: labor-intensive projects like finish carpentry might run 35% materials and 50% labor, while material-heavy projects like deck building run 55% materials and 25% labor.
How much contingency should I really allocate?
Minimum 15% for new construction with known specifications. Increase to 20-25% for renovations with unknown existing conditions. Projects involving structural modifications, asbestos abatement, or historical preservation warrant 25-30% contingency.
Should I buy tools or rent them?
Buy tools you’ll use 5+ times. Rent specialized tools for single projects. For example, buy a cordless drill (versatile, frequent use); rent a concrete mixer (specialized, occasional use). Calculate break-even point: if rental cost × frequency of use exceeds purchase price, buying makes economic sense.
How do I account for material price increases?
Build 5-10% buffer into material costs for price increases. Track commodity prices; lumber, steel, and copper fluctuate significantly. Time large material purchases strategically. Lock in prices with quotes valid for 30+ days when possible.
What’s included in permits and inspection costs?
Permits required for structural modifications, electrical work, plumbing changes, and additions. Costs range $100-2000+ depending on project scope and location. Inspections verify code compliance; plan for multiple inspection visits. Consult your local building department for specific requirements.
How can I reduce my project budget without sacrificing quality?
Reduce scope—eliminate optional features. Source materials strategically—compare prices, buy seasonal sales, purchase discontinued items. Optimize labor—do simple work yourself, hire specialists for complex tasks. Extend timeline—spread purchases across sales periods. Increase contingency slightly—rushing work to save money creates costly mistakes.
Why do my actual costs exceed my budget estimates?
Common reasons: underestimated labor hours, scope creep, material waste exceeding estimates, unforeseen structural issues, inefficient tool usage, and inadequate contingency. Review completed projects to identify patterns, then adjust future estimates accordingly.


