DIY Wine Rack: Age-Appropriate Building Tips
Building a wine rack is one of the most rewarding DIY projects for home enthusiasts of all skill levels. Whether you’re crafting a simple wall-mounted design or an elaborate freestanding display, this project combines woodworking fundamentals with practical storage solutions. But before you pick up a hammer, it’s important to understand the legal and safety considerations surrounding alcohol service and storage—especially if you’re building this project as a young person or in a household with minors.
This comprehensive guide walks you through everything you need to know about constructing a functional, attractive wine rack while addressing age-related responsibilities and legal requirements. We’ll cover materials selection, construction techniques, design variations, and the important question of how old do you have to be to serve alcohol in various jurisdictions. Whether you’re a seasoned DIYer or picking up your first power tool, this guide ensures you build safely and legally.
Understanding Legal Age Requirements for Alcohol Service
Before diving into the construction of your wine rack, it’s essential to address the legal framework surrounding alcohol in your jurisdiction. The question of how old do you have to be to serve alcohol varies significantly depending on where you live, but understanding these regulations is crucial for responsible wine storage and service.
In the United States, the legal drinking age is 21 years old across all states. However, the age requirement to serve alcohol differs from the age to consume it. Generally, servers must be at least 18 years old to serve alcoholic beverages in most states, though some states impose stricter requirements of 21. This distinction matters if you’re building a wine rack for a restaurant, bar, or commercial establishment versus personal home use.
For personal home use, age restrictions are more relaxed. You can legally build and maintain a wine rack in your home at any age, but you should only serve wine to guests who meet the legal drinking age. Parents may choose to educate minors about wine and its cultural significance without allowing consumption—a practice common in wine-producing countries.
Understanding these legal nuances protects you from liability and ensures responsible alcohol management. If you’re a young DIY enthusiast building this project, focus on the craftsmanship and storage functionality rather than the service aspects. The construction skills you develop apply to countless other home improvement projects like basement finishing.
Essential Tools and Materials for Wine Rack Construction
Successful wine rack building begins with gathering the right tools and materials. The specific items you need depend on your chosen design, but most projects require a similar foundational toolkit.
Essential Hand Tools:
- Tape measure (minimum 25 feet)
- Pencil or marking knife for layout
- Carpenter’s square or combination square
- Hammer and rubber mallet
- Screwdrivers (Phillips and flathead)
- Clamps (at least 4-6 for assembly)
- Circular saw or miter saw for cutting
- Drill with assorted bits
- Chisel set for mortise work
- Sandpaper in 80, 120, and 220 grit
Power Tools:
- Cordless drill-driver
- Orbital sander
- Table saw (for ripping boards to width)
- Miter saw (for crosscutting)
Materials Selection:
Wood choice significantly impacts your wine rack’s appearance and durability. Popular options include:
- Hardwoods: Walnut, oak, and cherry provide beautiful grain patterns and excellent durability
- Softwoods: Pine and fir offer budget-friendly options suitable for painted finishes
- Plywood: Quality birch plywood works well for modern, minimalist designs
- Reclaimed wood: Salvaged barn wood or old flooring creates rustic character
Hardware needs include wood screws (1.25 to 2.5 inches), wood glue, dowels for reinforcement, and finishing nails. If you’re mounting to drywall, invest in quality wall anchors or locate studs for secure fastening. For wine bottle holders, consider adding dowels, wooden pegs, or rope wrapped around wooden frames.

Design Options: From Simple to Sophisticated
Wine racks range from minimalist wall-mounted designs to elaborate freestanding cabinets. Your choice depends on available space, storage capacity needs, and your woodworking skill level.
Wall-Mounted Horizontal Design:
The simplest approach uses a single board with angled dowels or pegs. This design holds 4-8 bottles and requires minimal materials. Cut your main board to desired length (typically 24-36 inches), then drill angled holes at 45 degrees to accommodate standard wine bottle diameters (approximately 3 inches). Insert wooden dowels or purchase pre-made wine bottle holders. This straightforward project teaches fundamental drilling and measurement skills applicable to other home security installation projects.
Diagonal Grid Pattern:
More experienced builders can create a lattice or grid design using interlocking wooden strips. This method involves cutting multiple pieces at 45-degree angles and assembling them to form diamond-shaped or square compartments. Each compartment cradles a single bottle, creating an elegant display. This design requires precise angle cuts and careful assembly but produces stunning visual impact.
Freestanding Tower Design:
A vertical tower holds 12-20 bottles and serves as a statement piece. Construct a sturdy base frame, then add multiple horizontal shelves or angled slots. This design requires more advanced joinery techniques, including mortise-and-tenon joints or pocket hole construction for stability. The tower must be properly weighted and anchored to prevent tipping.
Wine Fridge Companion Rack:
If you own a wine cooler or refrigerator, build a coordinating rack nearby for display purposes. This design can incorporate open shelving, glass-front cabinets, or hybrid approaches combining storage and display. Ensure proper spacing for air circulation around wine bottles and maintain appropriate temperature and humidity conditions.
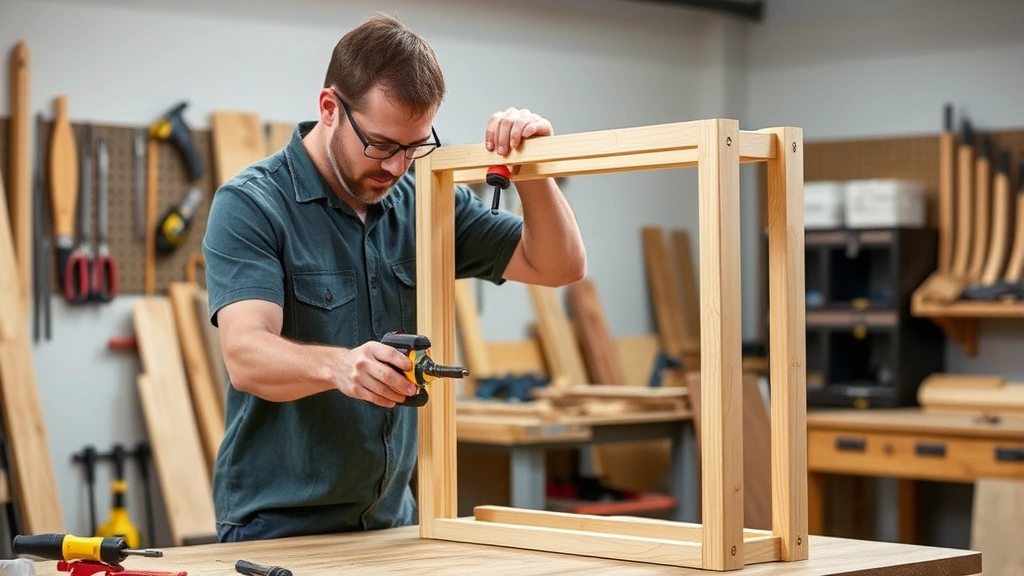
Step-by-Step Construction Guide
This section provides detailed instructions for building a beginner-friendly wall-mounted horizontal wine rack holding six bottles.
Step 1: Prepare Your Workspace
Set up a clean, well-lit work area with adequate ventilation. Lay out all tools and materials before beginning. Wear safety glasses and work gloves throughout the project. If you’re young and building this as a learning experience, have an experienced adult supervise power tool use.
Step 2: Cut Your Main Board
Select a quality hardwood board measuring 1.5 inches thick by 8 inches wide by 30 inches long. Use a table saw or miter saw to ensure straight edges and clean cuts. Sand all surfaces smooth using 120-grit sandpaper, then progress to 220-grit for a refined finish.
Step 3: Mark Dowel Locations
Measure and mark dowel hole centers at 4-inch intervals along the board’s length. Use a carpenter’s square to ensure marks are perpendicular to the board’s edge. For a 30-inch board, position holes at 3, 7, 11, 15, 19, and 23 inches from one end.
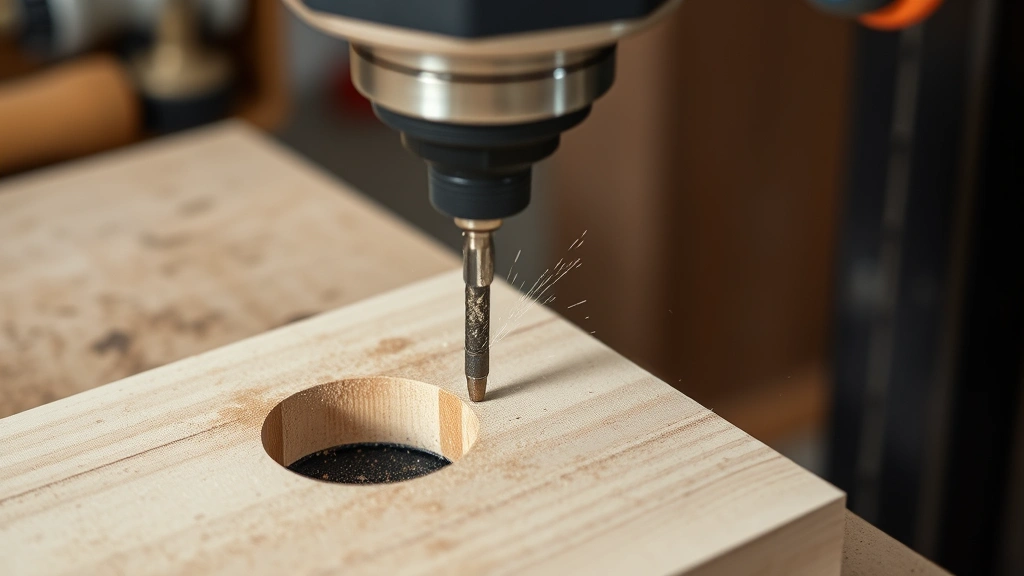
Step 4: Drill Angled Holes
Set your drill press or handheld drill to a 45-degree angle. This angle allows bottles to rest securely while remaining accessible. Use a 3-inch spade bit or Forstner bit matched to your dowel diameter. Drill slowly and steadily, backing out frequently to clear wood chips. Depth should be approximately 2-3 inches into the board.
Step 5: Insert and Secure Dowels
Cut dowels to appropriate length (typically 6-8 inches). Apply wood glue to dowel ends and insert them into drilled holes. Use a rubber mallet to seat them fully. Wipe away excess glue with a damp cloth. Allow glue to cure for 24 hours before moving forward.
Step 6: Add Mounting Hardware
Locate wall studs using a stud finder, or plan to use heavy-duty wall anchors if mounting to drywall. Drill pilot holes on the back side of your wine rack board, then install 2.5-inch wood screws or lag bolts. For drywall mounting, use toggle bolts or molly bolts rated for at least 30 pounds per anchor (you’ll need at least three anchors for safety).
Step 7: Mount to Wall
With a helper holding the rack level, drive mounting fasteners securely. Use a level to ensure the rack sits perfectly horizontal—this prevents bottles from rolling. Double-check fastener tightness before loading bottles.
Safety Considerations During Building
Woodworking safety should never be compromised, regardless of your age or experience level. Young builders especially must follow strict safety protocols.
Personal Protective Equipment (PPE):
- Safety glasses protect eyes from wood chips and dust
- Hearing protection guards against power tool noise
- Dust masks or respirators prevent inhalation of fine particles
- Work gloves protect hands during handling and assembly
- Closed-toe shoes with good grip prevent slips
- Long hair should be tied back away from rotating tools
Power Tool Safety:
Never operate power tools while fatigued, distracted, or under the influence of any substance. Young builders should only use power tools under direct adult supervision. Always read manufacturer instructions before using unfamiliar equipment. Keep hands clear of blade paths, never reach under moving saw blades, and maintain firm footing and balance while operating tools.
Structural Safety:
Your wine rack must support significant weight—a full bottle of wine weighs approximately 1.5-2 pounds, so six bottles represent 10-12 pounds plus the board’s weight. Ensure wall mounting uses appropriate fasteners for your wall type. Drywall requires toggle bolts or heavy-duty anchors; concrete requires masonry anchors; studs accept wood screws or lag bolts. Never skimp on mounting hardware quality.
Chemical Safety:
Wood glue, stains, and finishes contain chemicals requiring proper handling. Work in well-ventilated areas, never inhale fumes directly, and follow product safety data sheets (SDS). Keep materials away from children and pets. Dispose of used materials according to local regulations.
Finishing and Installation Techniques
The finishing process transforms raw wood into a beautiful, protected display piece. Your choice of finish affects both appearance and durability.
Staining Options:
Water-based stains dry quickly and produce minimal odor, making them ideal for beginners. Oil-based stains penetrate deeper and create richer color, but require longer drying times and better ventilation. Test stain colors on scrap wood first—stain appearance varies dramatically between wood species. Apply stain with foam brushes or lint-free cloths, working with the grain. Allow proper drying time (typically 4-8 hours depending on product) before applying topcoats.
Protective Topcoats:
Polyurethane varnish offers excellent protection against moisture and wine spills. Apply 2-3 thin coats, sanding lightly between coats with 220-grit paper. Wipe away dust with a tack cloth before applying subsequent coats. For a more natural look, consider Danish oil or tung oil finishes, though these require more frequent reapplication.
Installation Best Practices:
Before mounting, verify wall surface condition—patch holes, sand rough spots, and clean thoroughly. Mark stud locations using a reliable stud finder, or use an online resource like the International Code Council to understand building standards. Mount your rack at eye level for easy access and attractive display. Ensure adequate clearance above for removing bottles easily.
If building a larger installation in a home where you’re considering how long house construction takes, understand that your wine storage should complement your overall design aesthetic and structural considerations.
Maintenance and Care for Your Wine Rack
Proper maintenance extends your wine rack’s lifespan and keeps it looking beautiful for years.
Regular Cleaning:
Dust your wine rack monthly using a soft cloth. For stubborn dust, use a soft-bristled brush. Avoid spraying water directly on wood, as moisture causes warping and finish damage. If spills occur, immediately blot with a damp cloth and dry thoroughly.
Preventative Care:
Maintain consistent temperature and humidity in your storage area—ideally 45-65% humidity and 45-65 degrees Fahrenheit. Excessive temperature fluctuations and humidity changes damage both wood and wine. Keep your rack away from direct sunlight, which fades finishes and degrades wine quality.
Finish Maintenance:
Inspect your finish annually for wear. Reapply topcoat as needed, typically every 2-3 years depending on exposure. For oil finishes, apply fresh coats annually to maintain protection. Sand lightly before reapplication to promote adhesion.
Load Management:
Don’t exceed your rack’s weight capacity. A properly constructed rack holds its rated weight indefinitely, but overloading causes sagging and potential failure. If you’ve built a wall-mounted rack, periodically check mounting fasteners for tightness—vibration and temperature changes can loosen hardware over time.
FAQ
How old do you have to be to build a wine rack?
There’s no legal age requirement to build a wine rack—it’s a woodworking project accessible to young people of all ages. However, those under 18 should work under adult supervision, especially when using power tools. Building this project teaches valuable carpentry skills applicable to countless other home improvement projects.
Can I build a wine rack if I’m a beginner?
Absolutely. Start with the simple wall-mounted horizontal design described in this guide. It requires basic tools and straightforward techniques. As your skills develop, progress to more complex designs like diagonal grids or freestanding towers. Each project builds confidence and capability.
What’s the best wood for a wine rack?
Hardwoods like walnut and cherry provide beautiful aesthetics and excellent durability. Pine offers budget-friendly options for painted finishes. Consider your décor style, budget, and desired maintenance level when selecting wood. Reclaimed wood creates unique character if you enjoy rustic aesthetics.
How much weight can a properly installed wall-mounted wine rack hold?
A correctly installed rack using appropriate wall anchors or studs safely holds 20-30 pounds. Standard wine bottles weigh 1.5-2 pounds each, so a six-bottle rack handles approximately 10-12 pounds comfortably. Always use fasteners rated for at least double your expected load.
Do I need special tools to build a wine rack?
Basic hand tools suffice for simple designs—hammer, screwdrivers, tape measure, and saw. Power tools like drills and sanders make the project easier and produce better results. If you don’t own tools, consider borrowing from friends, renting from tool libraries, or purchasing a basic starter kit.
How long does a wine rack project typically take?
A simple wall-mounted design takes 3-5 hours from start to finish, including drying time for finishes. More complex designs may require 10-20 hours spread over multiple days. Most of this time involves drying between coats rather than active building.
Can I paint my wine rack instead of staining it?
Yes. Paint offers excellent color options and hides wood grain if you prefer solid colors. Use quality wood primer followed by 2-3 coats of paint. Allow proper drying between coats. Painted finishes are more forgiving of wood imperfections and easier to touch up when damaged.
What’s the difference between serving alcohol and storing it?
Storage refers to keeping wine bottles in proper conditions until consumption. Serving means providing wine to others for drinking. Age requirements for serving (typically 18-21 depending on jurisdiction) differ from drinking age (21 in the United States). Building a storage rack has no legal age restrictions, but serving wine to minors is illegal.
Should I build a wine rack if I’m under 21?
Definitely. Wine racks are functional furniture pieces regardless of your age. Building one teaches valuable woodworking skills, develops problem-solving abilities, and creates a useful home item. You can store wine for future use or as gifts for adults. The craftsmanship skills you develop apply to numerous other projects beyond wine storage.


