How to Build a Deck: Expert Tips Inside
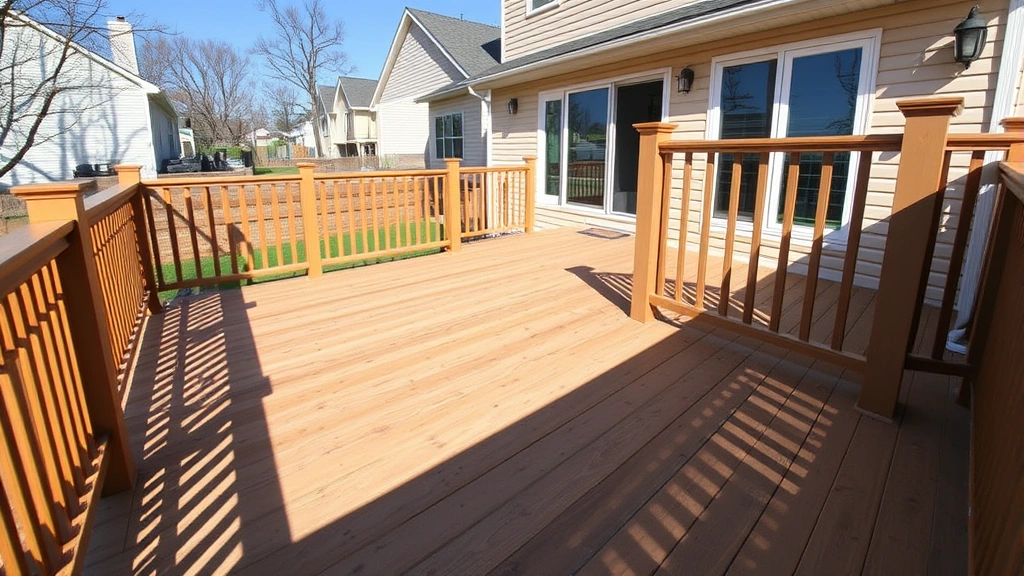
Building a deck is one of the most rewarding DIY projects you can undertake, transforming your outdoor space into a functional entertainment area while adding significant value to your home. Whether you’re a seasoned builder or tackling your first major project, understanding the fundamentals of deck construction ensures a safe, durable, and beautiful result that will serve your family for decades.
A well-built deck requires careful planning, proper material selection, and adherence to local building codes. This comprehensive guide walks you through every step of the process, from initial design considerations to final finishing touches, equipping you with the knowledge and confidence to create an outdoor oasis.
Planning and Permits: The Foundation of Success
Before driving a single nail, you must invest time in planning and understanding local requirements. Contact your International Code Council (ICC) or local building department to obtain specific codes for your area. Most jurisdictions require permits for decks, especially those elevated more than 30 inches from grade.
Start by sketching your deck design, considering factors like size, height, traffic flow, and proximity to utilities. Measure your space carefully, accounting for existing structures, trees, and drainage patterns. A well-planned outdoor space design prevents costly mistakes and ensures optimal functionality.
Obtain all necessary permits before construction begins. This protects you legally, ensures your deck meets safety standards, and facilitates future home sales. Inspections at critical stages—footings, framing, and completion—verify compliance with building codes and structural requirements.
Materials Selection and Essential Tools
Choosing appropriate materials is crucial for durability and appearance. Pressure-treated lumber remains popular for its affordability and rot resistance, though composite materials offer lower maintenance and enhanced longevity. Pressure-treated wood typically contains copper-based preservatives meeting American Wood Council (AWC) standards.
For materials, consider:
- Pressure-Treated Lumber: Most economical, requires periodic maintenance, suitable for structural components and framing
- Cedar or Redwood: Naturally rot-resistant, aesthetically appealing, requires regular staining or sealing
- Composite Decking: Low-maintenance, longer lifespan, higher initial cost, available in varied colors
- Tropical Hardwoods: Extremely durable, premium pricing, excellent for visible surfaces
Essential tools include a circular saw, power drill, level, tape measure, post level, string line, and safety equipment. Renting specialized equipment like a power auger for post holes saves time and physical strain. Proper home improvement planning includes budgeting for quality tools that ensure precision and safety.
Foundation and Footings: Building on Solid Ground
The foundation determines your deck’s stability and longevity. Posts must rest on footings that extend below the frost line—typically 36 to 48 inches deep in northern climates. Frost heave, caused by freezing and thawing cycles, can shift improperly installed posts, compromising structural integrity.
Follow these critical steps:
- Mark Post Locations: Use batterboards and string lines to establish precise post positions according to your design plans
- Dig Post Holes: Holes must reach below the frost line and be appropriately sized for footings. Use a power auger for consistent results
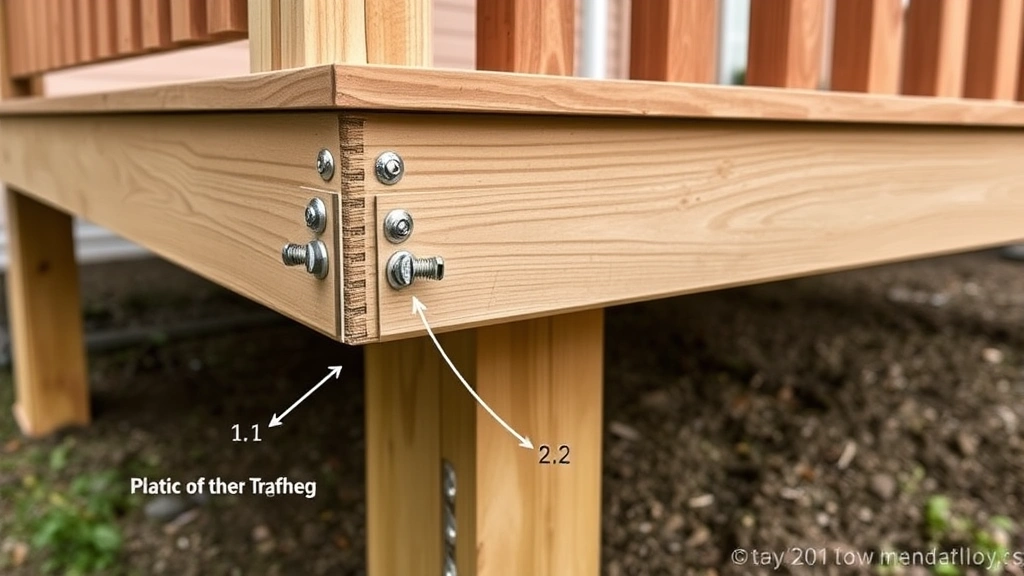
- Install Footings: Place concrete footings or adjustable post bases at the bottom of each hole. Concrete should be above-grade to prevent water accumulation
- Set Posts: Use pressure-treated 4×4 posts or larger, ensuring they’re perfectly vertical. Check with a level in multiple directions
- Verify Height: Measure from the finished deck surface down to ensure consistent post height across the entire structure
Concrete footings should be at least 12 inches above grade, preventing soil contact and moisture wicking. Many builders use adjustable post bases that allow fine-tuning of height without cutting posts. This approach reduces waste and accommodates minor variations in footing depth.
Framing the Structure: Creating the Skeleton
Once footings and posts are set, construct the primary frame. The ledger board connects your deck to the house, requiring careful installation to prevent water intrusion and structural failure. This connection point experiences significant stress and must be properly flashed and bolted.
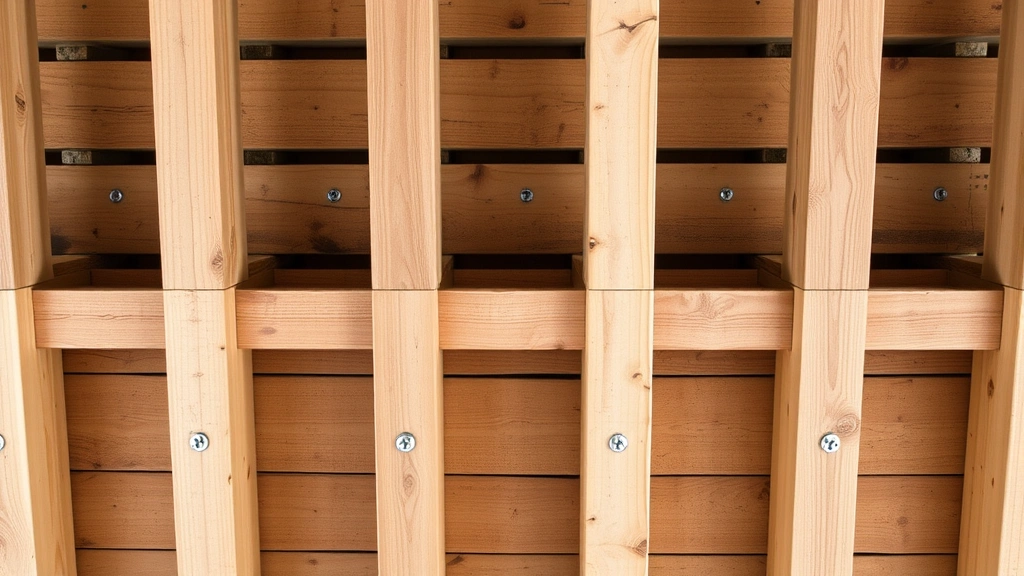
Key framing components include:
- Ledger Board: Attached directly to the house rim board with flashing to direct water away. Use bolts (not nails) spaced 16 inches apart
- Beam: Spans between posts, supporting joists. Size depends on span and joist spacing, typically 2×8, 2×10, or 2×12
- Joists: Run perpendicular to the beam, typically 2×8 or 2×10, spaced 16 inches on center. Joist spacing affects deck strength and deflection
- Rim Joist: Closes the frame perimeter, providing structural support and a finished appearance
Use galvanized or stainless steel fasteners to prevent rust and corrosion, especially in humid climates. National Association of Certified Home Inspectors (NACHI) recommends 3-inch deck screws or galvanized nails for all structural connections.
Check local building codes for joist spacing and beam sizing requirements. Many jurisdictions reference the AWC Deck Construction Guide, which provides prescriptive requirements for various conditions. Improper joist spacing or undersized beams can result in excessive deflection or failure.
Decking Installation: The Visible Surface
Decking boards create the walking surface and significantly impact your deck’s appearance. Space boards appropriately to allow water drainage and wood movement—typically 1/8 to 1/4 inch gaps for pressure-treated lumber, slightly more for composites in cold climates.
Installation best practices:
- Start Straight: Snap a chalk line along the first course, ensuring it’s parallel to the house or ledger board
- Stagger Joints: Avoid aligning end joints in consecutive rows, which weakens the structure and appears sloppy
- Secure Fasteners: Use two fasteners per joist per board, placed 1.5 inches from edges to prevent splitting
- Maintain Spacing: Use spacers between boards to ensure consistent gaps for drainage and expansion
- Cut Edges: Use a circular saw for straight cuts and a jigsaw for curves around posts or obstacles
Composite decking requires slightly different techniques. Pre-drill holes to prevent splitting and use manufacturer-recommended fasteners, typically stainless steel or composite-specific screws. Composite materials expand and contract more than wood, requiring larger gaps and careful fastening to prevent buckling.
For a polished appearance, consider edge treatments like fascia boards that hide rim joists and joist ends. Fascia protects the structure from weather exposure and creates a finished look that enhances curb appeal.
Railings and Safety Features: Protection Matters
Building codes mandate railings for decks elevated more than 30 inches. Railings prevent falls, protecting children and adults. Code requirements specify minimum heights (typically 36-42 inches), baluster spacing (no more than 4 inches), and load-bearing capacity (200 pounds of force applied horizontally).
Railing options include:
- Wood Balusters: Traditional appearance, requires maintenance, typically 2×2 or 2×4 spaced 4 inches apart
- Metal Balusters: Aluminum or steel, low-maintenance, modern aesthetic, excellent durability
- Cable Railings: Contemporary design, unobstructed views, requires careful installation for code compliance
- Composite Railings: Matches decking, low-maintenance, integrated appearance
Stairs require special attention, with code-specific requirements for rise, run, tread depth, and handrail specifications. Consistent step heights prevent tripping hazards. Handrails must support 200 pounds of downward force and feature graspable profiles. Many DIYers prefer pre-fabricated stair systems that simplify installation while ensuring code compliance.
Ensure all fasteners connecting railings to the deck structure are galvanized or stainless steel and properly torqued. A loose railing is a safety hazard and structural liability.
Finishing and Long-Term Maintenance
Proper finishing protects your investment and enhances appearance. For pressure-treated lumber, wait 3-6 months before staining or sealing, allowing the wood to weather and dry. This timing ensures better product adhesion and longevity.
Maintenance schedule:
- Year 1: Inspect fasteners quarterly, tighten as needed, remove debris regularly
- Annual: Clean decking, inspect for rot or damage, check ledger board flashing, verify railing integrity
- Every 2-3 Years: Reseal or restain decking, inspect and replace damaged boards, check post bases for moisture
- As Needed: Replace damaged fasteners, repair loose boards, address drainage issues
Consider your home improvement maintenance routine and incorporate deck care into seasonal tasks. Proper maintenance extends deck life by 10-20 years compared to neglected decks.
For composite decking, manufacturer instructions vary, but generally require less maintenance. Some composites need occasional cleaning with mild soap and water, while others benefit from annual protective treatments. Review specific product guidelines before selecting materials.
Frequently Asked Questions
How deep should deck footings be?
Footings must extend below the frost line, which varies by location. Northern climates typically require 36-48 inches, while southern areas may need only 12-18 inches. Contact your local building department for specific requirements in your area.
Can I attach a deck directly to my house without a ledger board?
No. Building codes require a properly installed and flashed ledger board for structural integrity and to prevent water intrusion. Improper attachment is a leading cause of deck failures and water damage to homes.
What’s the best material for a deck?
Material choice depends on budget, maintenance tolerance, and aesthetic preferences. Pressure-treated lumber offers affordability, composites provide low-maintenance durability, and tropical hardwoods deliver premium appearance and longevity. Evaluate your priorities before deciding.
How often should I seal my deck?
Pressure-treated wood typically requires resealing every 2-3 years, depending on climate and foot traffic. Composite materials may require annual cleaning but less frequent protective treatments. Review manufacturer recommendations and inspect your deck annually.
Do I need a permit to build a deck?
Most jurisdictions require permits for elevated decks, especially those over 30 inches high. Permits ensure your deck meets safety codes and facilitates inspections. Building without permits creates legal liability and complications during home sales.
What size posts do I need?
Post size depends on height, load, and spacing. Typically 4×4 posts work for most residential decks under 12 feet tall with standard spacing. Taller decks or wider spans may require 4×6 or 6×6 posts. Check code tables or consult a structural engineer for your specific situation.


