Grill Perfect Burgers: Chef-Approved Gas BBQ Tips
Mastering the art of grilling burgers on a gas BBQ requires more than just tossing patties on hot grates. Whether you’re hosting a backyard gathering or perfecting your weekend cooking routine, understanding the fundamentals of gas grill operation, temperature control, and burger preparation will elevate your results dramatically. Gas grills offer consistent heat, quick ignition, and precise temperature management—advantages that make them ideal for achieving restaurant-quality burgers at home.
This comprehensive guide walks you through every step of the burger-grilling process, from selecting the right meat and forming perfect patties to mastering heat zones and achieving that coveted crust. You’ll discover chef-approved techniques that transform ordinary ground beef into extraordinary burgers, complete with practical safety considerations and maintenance tips to keep your grill performing optimally.
Selecting Quality Ground Beef for Superior Burgers
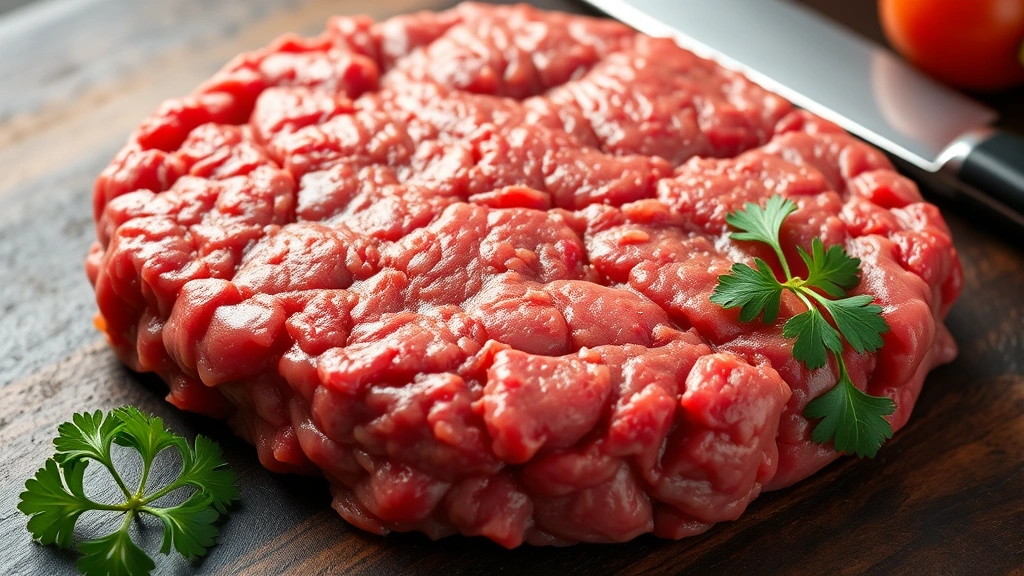
The foundation of an exceptional burger starts with quality ground beef. Professional chefs universally recommend using ground chuck with an 80/20 meat-to-fat ratio as the gold standard for burger preparation. This ratio provides optimal flavor development and moisture retention during cooking, preventing the common problem of dry, dense burgers that result from leaner cuts.
Ground beef quality varies significantly based on the grind size and freshness. Visit your butcher rather than relying exclusively on pre-packaged supermarket options—request a fresh grind if possible. The texture should appear slightly coarse, indicating larger fat particles that melt during cooking and create those desirable flavor pockets. Avoid finely ground beef, which tends to compact and produce dense, hockey-puck-like results.
Consider blending different cuts for enhanced complexity. Many professional burger chefs combine 50% ground chuck with 25% ground sirloin and 25% ground short rib, creating a more nuanced flavor profile. Store ground beef at 32°F or below and use within two days of purchase for optimal food safety and flavor.
Preparing and Forming the Perfect Patty
Proper patty formation directly impacts cooking results and final texture. Begin by removing ground beef from refrigeration 15-20 minutes before forming patties, allowing it to reach approximately 55°F. Cold meat is more difficult to work with and won’t bind properly, while room-temperature beef forms superior cohesion.
Handle the meat minimally during patty formation—overworking compacts the structure and creates dense, tough burgers. Gently shape patties with your hands or use a burger press, forming discs approximately ¾-inch thick. Professional chefs recommend creating a slight depression in the center of each patty using your thumb, approximately ½-inch deep. This depression prevents the burger from puffing during cooking and ensures even thickness throughout.
Season patties immediately before grilling with kosher salt and freshly ground black pepper. Avoid seasoning too far in advance, as salt begins breaking down muscle proteins and can result in a mushy texture. For additional flavor, consider adding minced garlic, Worcestershire sauce, or finely chopped herbs directly into the meat mixture before forming patties, ensuring even distribution.
Form patties to a consistent size—typically 4-5 inches in diameter for standard burgers, or 3-4 inches for sliders. Uniform sizing ensures all patties cook at the same rate, eliminating the challenge of managing multiple doneness levels simultaneously.
Gas Grill Setup and Temperature Control
Proper grill setup establishes the foundation for burger-grilling success. Begin by ensuring your grill is clean—residual debris from previous cooking sessions can impart off-flavors and create uneven heat distribution. Brush grates thoroughly with a grill brush, then wipe with a damp cloth to remove any loose particles.
Check fuel levels before beginning and verify that your propane tank contains sufficient gas for the entire cooking session. A standard 20-pound propane tank typically provides 18-20 hours of grilling time at medium heat. For consistent results, consider maintaining a backup tank on hand.
Preheat your gas grill for 10-15 minutes with all burners set to high. This preheating period allows the grill to reach optimal cooking temperature and burns off any residual debris from the grates. Most gas grills reach approximately 400-450°F during this preheating phase, which is ideal for burger cooking. Consult your grill’s manual for specific temperature recommendations, as different models vary in heating capacity.
Verify grate temperature using an infrared thermometer if your grill lacks a built-in temperature gauge. The sweet spot for burger grilling ranges from 375-425°F, providing sufficient heat for crust development while allowing adequate cooking time for proper doneness throughout the patty.
Mastering Two-Zone Cooking Technique
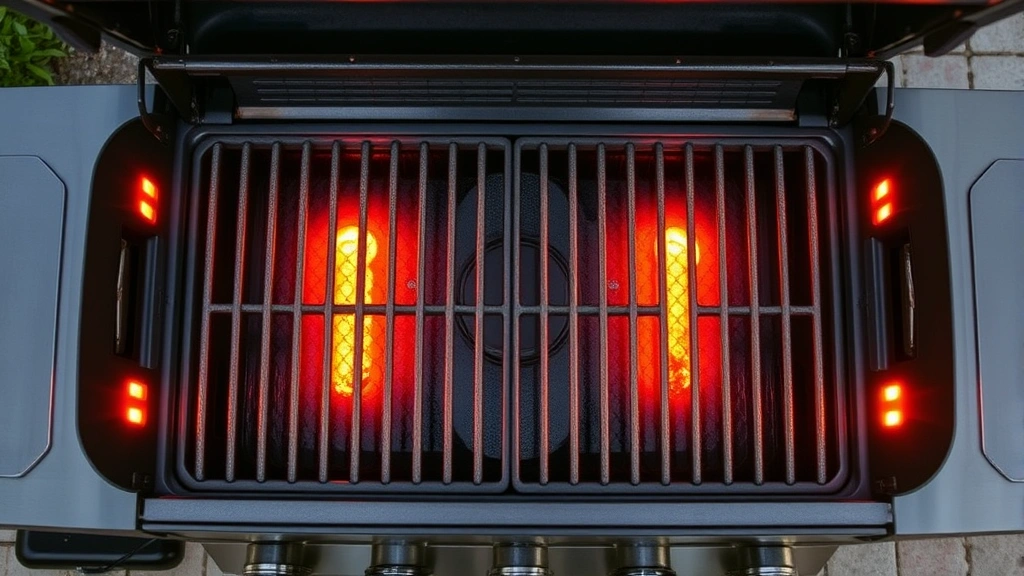
The two-zone cooking method represents the most effective approach for gas grill burger preparation. This technique involves creating distinct temperature zones on your grill—a high-heat searing zone and a medium-heat finishing zone.
To establish two-zone cooking, light only one or two burners (depending on your grill’s configuration) and leave the remaining burners off. If your grill has three burners, ignite the left and right burners, leaving the center off. This creates a hot zone directly over the lit burners and a cooler zone over the unlit burner. Alternatively, if your grill features two burners, light only one side.
The high-heat zone should reach 400-425°F and serves exclusively for initial searing, developing the flavorful crust. The cooler zone maintains approximately 300-350°F and functions as a finishing area where burgers cook through without excessive external charring. This technique prevents the frustrating scenario where burgers achieve a beautiful crust on the exterior but remain undercooked internally.
Allow 3-5 minutes for temperature stabilization after establishing your two-zone setup. Use your hand to gauge temperature by holding your palm 4-6 inches above the grates. You should be able to hold your hand over the hot zone for only 2-3 seconds before discomfort forces you to withdraw it.
Grilling Technique and Timing
Position seasoned patties directly over the high-heat zone with the slight depression facing upward. Resist the urge to press down on burgers—this common mistake forces flavorful juices out of the meat and creates dry results. Professional chefs emphasize the importance of maintaining hands-off cooking once patties hit the grates.
Sear burgers for 2-3 minutes on the first side without moving them. This uninterrupted cooking period allows the Maillard reaction to occur—a chemical process that creates the desirable brown crust and complex flavors. Flip burgers only once, then sear the opposite side for an additional 2-3 minutes.
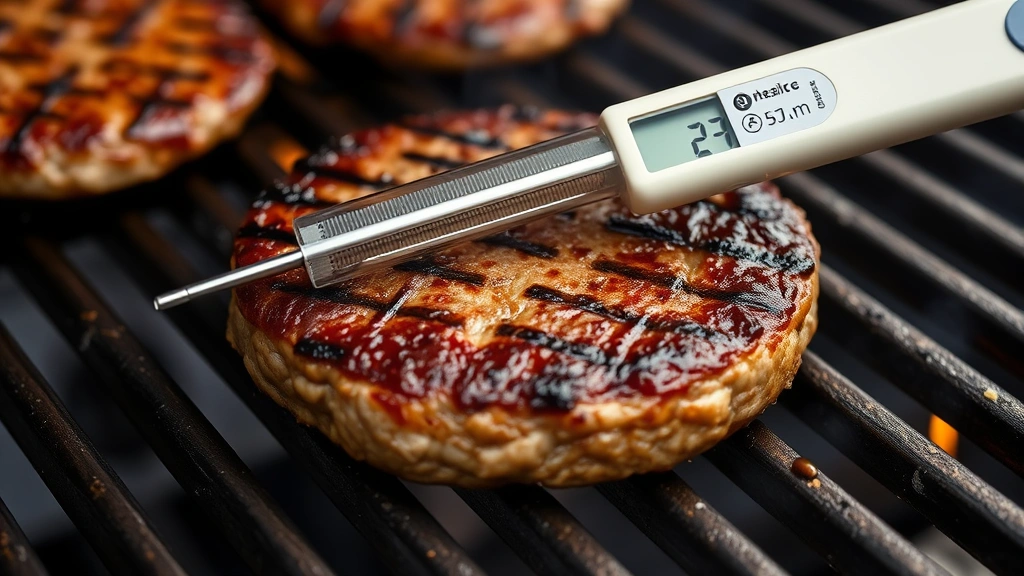
After the second sear, transfer burgers to the cooler zone and close the grill lid. Finish cooking for 3-5 minutes, depending on desired doneness and burger thickness. Use an instant-read meat thermometer to determine doneness accurately. Insert the thermometer horizontally into the center of the burger, avoiding the depression you created earlier.
Target internal temperatures following USDA food safety guidelines: 160°F for well-done burgers, 145°F for medium burgers, and 140°F for medium-rare. Ground beef requires higher temperatures than whole cuts due to potential bacterial contamination throughout the meat.
Achieving the Perfect Crust and Doneness
The distinction between an exceptional burger and a mediocre one often comes down to crust development. A properly seared burger features a caramelized exterior that crackles slightly when bitten, contrasting beautifully with the juicy interior. This textural contrast emerges from the Maillard reaction—a complex chemical interaction between amino acids and reducing sugars at high temperatures.
Achieving optimal crust requires several conditions: adequate heat (375°F minimum), dry meat surfaces (pat patties with paper towels before grilling), and sufficient searing time without movement. Moisture on the meat’s surface inhibits browning and creates steaming rather than searing.
Resist checking doneness prematurely. Opening the grill lid releases heat and extends cooking time. Many home cooks struggle with inconsistent results because they constantly peek, flip burgers multiple times, or press down on patties—all practices that compromise final quality. Trust the process and use an instant-read thermometer for accurate doneness assessment rather than relying on appearance or the finger-touch method.
Consider carryover cooking when removing burgers from heat. Residual heat continues cooking the burger’s interior for 2-3 minutes after removal from the grill. Remove burgers at 3-5°F below your target temperature to account for this continued cooking.
Toppings, Assembly, and Serving
Proper burger assembly elevates the entire experience. Toast buns on the cooler side of your grill for 30-60 seconds, creating a barrier that prevents condiments from saturating the bread. This step, often overlooked by casual cooks, dramatically improves the burger’s structural integrity and eating experience.
Layer components strategically: place the patty on the bottom bun first, then add cheese (if using) while the burger is still hot, allowing residual heat to melt it slightly. Follow with lettuce, tomato, onion, pickles, and condiments. Position lettuce directly against the patty to create a moisture barrier between the burger and bun.
Cheese selection matters considerably. American cheese melts most readily due to its emulsifier content, while cheddar, Swiss, and muenster provide more sophisticated flavor profiles. Place cheese on the patty immediately after removing it from the grill, covering the burger with the grill lid for 30 seconds to facilitate melting.
Serve burgers immediately after assembly. Allowing them to sit for extended periods permits heat loss and bun sogginess. If hosting larger gatherings, establish an assembly line approach where guests customize their own burgers immediately after cooking, ensuring optimal temperature and freshness.
Gas Grill Maintenance for Longevity
Regular maintenance extends your gas grill’s lifespan and ensures consistent performance. After each use, while grates remain warm, brush them thoroughly with a stainless steel grill brush to remove residual food particles and grease buildup. This practice prevents corrosion and maintains heat distribution efficiency.
Clean the firebox monthly by removing the grates and scraping accumulated grease from the interior surfaces. Allow grease to drain into the drip pan, which should be emptied regularly. Inspect burners for debris or blockages that might impede gas flow, and consult your grill’s manual for specific cleaning instructions.
Check gas connections quarterly for leaks using a soapy water solution. Apply the solution to all connection points—if bubbles form, tighten the connection or replace the regulator. Never use an open flame to test for leaks, as this creates serious safety hazards.
Cover your grill when not in use to protect against weather-related damage and UV degradation. Quality grill covers prevent rust formation and extend the lifespan of painted surfaces and stainless steel components significantly. Store propane tanks in cool, well-ventilated areas away from direct sunlight, following all NFPA propane storage guidelines.
Inspect ignition systems annually. If your grill fails to light consistently or produces weak sparks, replace the ignition battery or have the system serviced by a qualified technician. Reliable ignition is essential for safe, consistent grill operation.
For comprehensive maintenance guidance, consult resources like the BBQ Guys maintenance library, which provides manufacturer-specific instructions and troubleshooting advice. When considering protecting your outdoor cooking investment, proper maintenance ranks alongside security measures.
FAQ
What’s the ideal thickness for burger patties?
Professional chefs recommend ¾-inch thick patties as the optimal thickness for gas grill cooking. This thickness provides adequate time for interior cooking while allowing sufficient surface area for crust development. Thinner patties (½-inch) cook too quickly and tend toward dryness, while thicker patties (1+ inch) require extended cooking that risks burning the exterior before the interior reaches proper doneness.
How often should I flip burgers on the grill?
Flip burgers only once—after 2-3 minutes on the first side. This single flip approach maximizes crust development through uninterrupted Maillard reaction and prevents juice loss from multiple flips. Resist the temptation to flip frequently, which is a primary cause of dry, disappointing burgers.
Can I use ground beef from the supermarket, or should I visit a butcher?
While supermarket ground beef works adequately, butcher-ground beef typically offers superior quality and freshness. Butchers can grind meat to your specifications and provide information about the cut composition. If using supermarket beef, select packages with an 80/20 ratio and use within one day of purchase for optimal results.
Should I add oil to the grill grates before cooking?
Oil application is unnecessary and potentially problematic on gas grills. Proper preheating and grate cleaning provide sufficient non-stick properties. Applying oil to hot grates can create excessive smoke and impart undesirable flavors. If concerned about sticking, ensure your grates are completely clean and properly preheated.
What’s the best way to tell when burgers are done without cutting into them?
An instant-read meat thermometer is the most reliable method, eliminating guesswork and ensuring food safety. Insert the thermometer horizontally into the burger’s center, targeting 160°F for well-done, 145°F for medium, and 140°F for medium-rare. The finger-touch method and visual appearance are unreliable indicators that often result in overcooked or undercooked burgers.
How do I prevent flare-ups while grilling burgers?
Flare-ups typically result from grease dripping onto hot burners. Minimize flare-ups by ensuring your grill’s drip pan is clean and positioned correctly, trimming excess fat from patties before cooking, and avoiding the placement of overly fatty burgers directly over burners. If flare-ups occur, move burgers to the cooler zone temporarily until flames subside.
Can I prepare burger patties in advance?
Yes, you can form patties up to 24 hours ahead of grilling. Store formed patties on a parchment-lined plate in the refrigerator, covered with plastic wrap. Remove from refrigeration 15-20 minutes before grilling to allow them to reach optimal cooking temperature. Avoid freezing formed patties unless you plan to grill them within 3 months, as freezing can affect texture and moisture retention.
Is it necessary to let burgers rest after cooking?
While resting whole steaks is crucial for juice retention, burgers benefit minimally from extended resting periods due to their smaller size. However, allowing burgers to rest for 1-2 minutes before serving permits residual heat distribution and slight juice reabsorption. Serve immediately after this brief rest for optimal temperature and texture.


