Build a Deck? Carpenter’s Best Practices for a Professional-Quality Result
Building a deck is one of the most rewarding DIY projects a homeowner can undertake, transforming outdoor spaces into functional entertainment areas. However, the difference between a deck that lasts decades and one that fails prematurely comes down to understanding and applying carpenter’s best practices. Whether you’re a seasoned builder or tackling your first major project, mastering structural integrity, material selection, and installation techniques is essential for safety and longevity.
A properly constructed deck requires attention to local building codes and standards, appropriate fastening methods, and strategic planning. This comprehensive guide walks you through the professional approaches that experienced carpenters use to ensure decks meet safety requirements while delivering the aesthetic and functional results homeowners expect.
Understanding Local Building Codes and Permits
Before driving a single nail, successful deck builders understand that building permits and code compliance aren’t optional obstacles—they’re foundational requirements. Every jurisdiction has specific regulations governing deck construction, including setback requirements, height restrictions, railing specifications, and snow load calculations. Obtaining proper permits protects you legally, ensures your property insurance covers the structure, and guarantees that your deck meets safety standards.
The International Building Code (IBC) provides the foundation for most regional codes, though local amendments often apply. Contact your local building department before beginning to understand specific requirements for your area. Professional carpenters always verify frost line depths, which determine how deep post footings must be—typically 36-48 inches in cold climates but varying significantly by region.
Permit applications require detailed plans showing dimensions, materials, and structural calculations. While this seems bureaucratic, it forces you to think through your design comprehensively and ensures you’re building something that will safely support the intended load. Many jurisdictions now require engineered plans from certified professionals for decks over 200 square feet or elevated more than 30 inches.
Site Preparation and Foundation Planning
The foundation determines whether your deck remains level and stable for years or gradually settles unevenly. Proper site preparation begins months before construction with careful assessment of drainage, soil conditions, and existing utilities. Carpenters inspect for underground gas lines, electrical conduits, and water pipes before excavating post holes.
Deck posts must rest on solid ground below the frost line, which varies dramatically by climate. In northern regions where ground freezes, frost heave can lift posts upward during winter, causing structural damage. The solution is either digging holes deep enough to reach undisturbed soil below the frost line or using adjustable post bases that accommodate seasonal movement. Many builders use concrete footings with gravel bases that provide drainage while supporting substantial weight.
Slope assessment is equally critical. The deck should slope slightly away from the house—typically 1/8 inch per foot—to prevent water pooling. Carpenters use laser levels to verify this slope before securing the ledger board and installing joists. Poor drainage is the leading cause of rot in deck structures, so this seemingly minor detail has enormous consequences for longevity.
Before excavation, call your local utility locating service (811 in the United States) to mark underground utilities. This prevents dangerous and expensive accidents while ensuring your deck placement won’t interfere with essential infrastructure.
Selecting Quality Materials for Durability
Material choice dramatically impacts deck lifespan and maintenance requirements. Pressure-treated lumber, composite decking, tropical hardwoods, and engineered materials each have distinct advantages and limitations that carpenters carefully weigh against project goals and budgets.
Pressure-treated lumber remains the most economical choice for structural framing. Modern pressure-treated wood uses copper-based preservatives rather than older arsenic formulations, making it safer for residential use. However, quality varies significantly between suppliers. Carpenters specify lumber graded for ground contact (UC4A rating) for posts and other components touching soil, while UC3B or UC3A suffices for elevated framing.
For decking surfaces, composite materials offer exceptional durability with minimal maintenance. These engineered products combine wood fibers and plastic polymers, resisting rot, insects, and weathering that plague traditional wood. While significantly more expensive than lumber, composites require no staining or sealing, eliminating years of maintenance labor. Many builders use composite decking over pressure-treated framing, balancing initial cost against long-term value.
Tropical hardwoods like cumaru, ipe, and Brazilian walnut provide natural durability rivaling composites while maintaining authentic wood appearance. These dense woods resist rot and insects without chemical treatment, though their hardness makes fastening challenging and their cost substantial. Carpenters must pre-drill all fastening holes to prevent splitting.
Fasteners deserve equal attention to lumber selection. Stainless steel, hot-dipped galvanized, or specialty coated fasteners prevent rust staining and corrosion that weakens connections. Carpenters never use standard steel fasteners in treated lumber, as chemical reactions cause accelerated corrosion and structural failure.
Structural Design and Load Calculations
Professional deck design considers both live loads (people and furniture) and dead loads (the deck’s own weight), plus environmental factors like snow accumulation and wind exposure. Building codes typically specify that residential decks must support 40 pounds per square foot of live load, though snow-prone regions require substantially higher capacity.
The ledger board connection to the house is the most critical structural element, as it bears half the deck’s total load. Carpenters install ledger boards directly to the house’s rim joist using flashing and bolts spaced 16 inches apart. This connection must be absolutely secure—ledger board failures cause catastrophic collapses that result in serious injuries. The American Wood Council’s Ledger Board Connection Guide provides definitive specifications that professionals follow religiously.
Joist sizing depends on span length and spacing. A 2×8 joist might span 12 feet when spaced 16 inches apart, but only 10 feet when spaced 24 inches apart. Carpenters use span tables from the American Wood Council or hire engineers to calculate appropriate dimensions for specific conditions. Undersizing joists creates excessive deflection (sagging) and eventual failure, while oversizing wastes money and materials.
Post spacing and sizing similarly depend on load calculations. Posts typically support 4×4 posts spaced 6-8 feet apart for residential decks, though larger decks or heavy snow loads may require 6×6 posts with closer spacing. Carpenters never guess these dimensions—they calculate them based on actual loads and local codes.
Proper Framing Techniques and Joist Installation
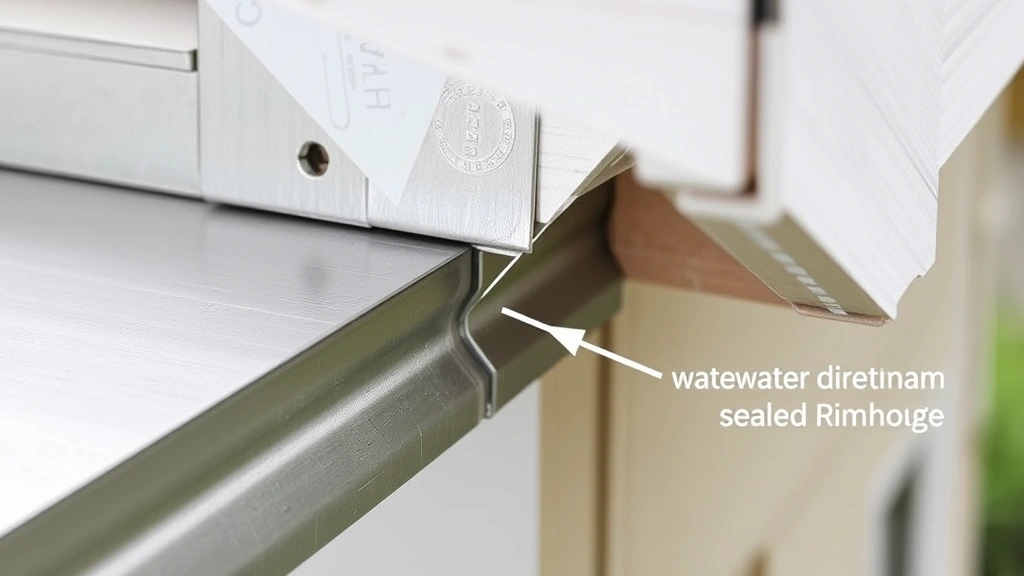
With foundation and design complete, framing becomes the critical next phase. Carpenters begin by installing the ledger board, ensuring proper flashing prevents water intrusion behind the house rim joist. Metal flashing should extend up behind house siding and down over the deck framing, directing water away rather than allowing it to accumulate and cause rot.
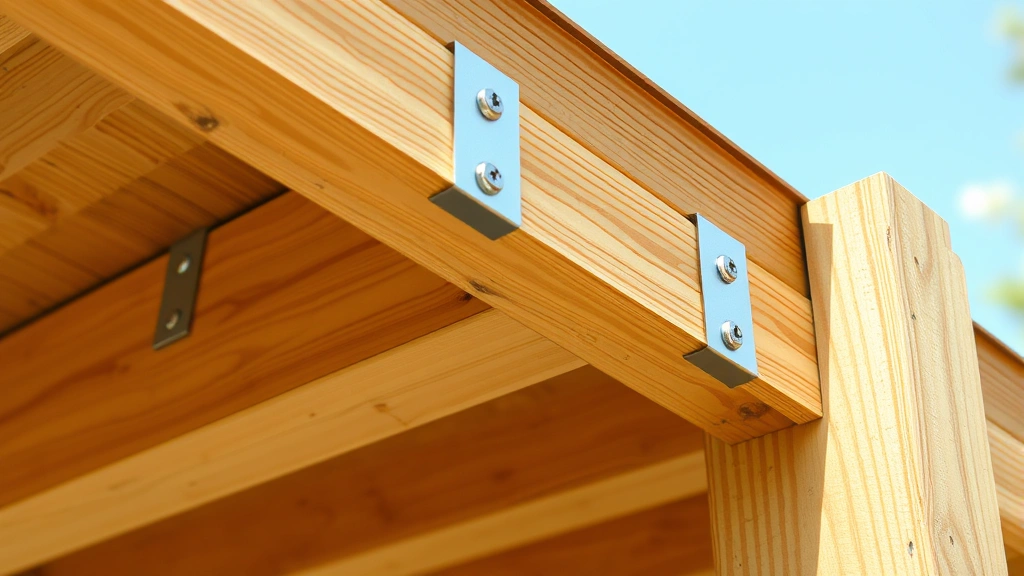
The rim joist (or band joist) connects the ledger board to the outer edge of the deck framing, creating a continuous structural frame. Carpenters use bolts or structural screws to connect these elements, never relying on nails alone. All connections must resist both vertical loads and lateral forces from wind or people leaning against railings.
Joist installation requires precise spacing and secure fastening. Joists typically space 16 inches on-center, meaning the distance from one joist’s center to the next is 16 inches. Carpenters mark these positions on rim joists and ledger boards using tape measures and marking tools, then install joists using either joist hangers or traditional toe-nailing methods. Joist hangers (metal brackets that support joists from below) provide superior strength and are preferred by most professional builders.
Blocking and bridging between joists prevent deflection and lateral movement. Carpenters install solid blocking at mid-span for joists exceeding 12 feet, or cross-bridging (X-shaped bracing between joists) at 8-foot intervals. This seemingly minor detail significantly improves deck stability and prevents the bouncy feeling associated with poorly constructed decks.
Decking Surface Installation Best Practices
Once framing is complete and inspected, decking installation can begin. The choice between traditional wood and composite materials influences installation methods, but fundamental principles remain constant: proper fastening, appropriate spacing, and attention to water drainage.
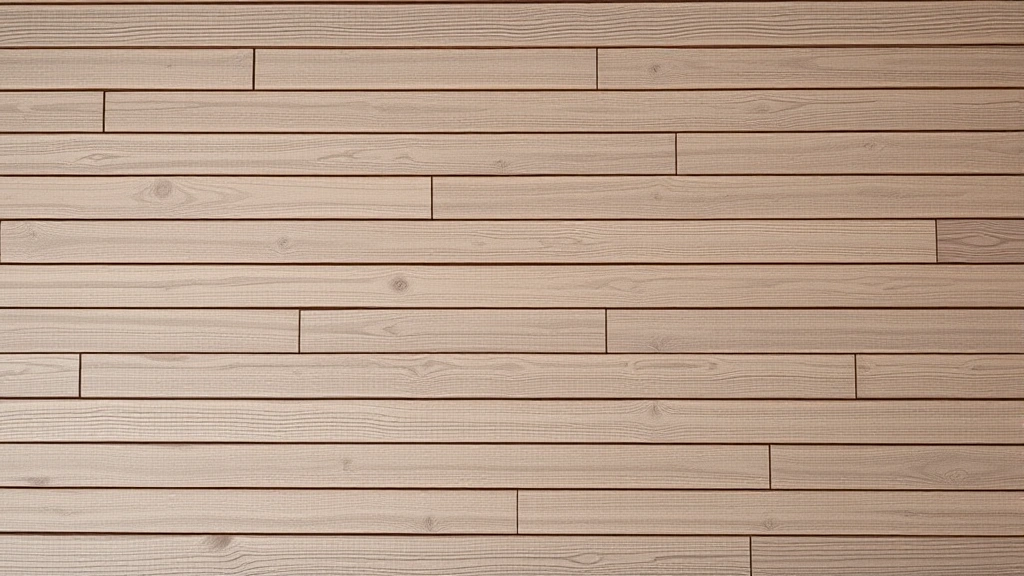
Boards should run perpendicular to joists, typically parallel to the house. Carpenters space boards approximately 1/8 inch apart to allow for seasonal expansion and contraction, and to facilitate water drainage and air circulation beneath the deck surface. Composite materials may require slightly different spacing—manufacturers provide specific guidelines that professionals follow precisely.
Fastening methods significantly impact durability and appearance. Hidden fastening systems (like clips that secure decking from underneath) eliminate visible screw heads and the staining that results from fastener corrosion. Traditional screw fastening uses two fasteners per joist, placed approximately 1.5 inches from board edges to prevent splitting. Carpenters pre-drill holes when fastening within 2 inches of board ends, a practice that prevents splitting and ensures tight connections.
Board selection requires attention to grain direction and moisture content. Carpenters prefer boards with growth rings oriented so the outer rings face up (called radial or quarter-sawn orientation), as these tend to cup less than flat-sawn boards. Allowing lumber to acclimate to local humidity for a few weeks before installation minimizes movement after fastening.
Railing Safety and Code Compliance
Railings aren’t merely aesthetic—they’re critical safety features that must meet specific code requirements. Residential decks elevated more than 30 inches typically require railings, and these railings must prevent falls while allowing visibility. Building codes specify that railings must be at least 36-42 inches high (measured from the deck surface to the top of the railing) and capable of withstanding 200 pounds of force applied horizontally without failing.
Balusters (the vertical members between railing posts) must be spaced so a 4-inch sphere cannot pass through—a requirement that prevents children from becoming trapped or falling through gaps. Carpenters space balusters accordingly and test spacing by attempting to pass a 4-inch ball through the gaps. This seemingly simple requirement eliminates many aesthetic railing designs that don’t meet safety standards.
Posts supporting railings must be securely fastened to the deck structure, typically with bolts driven through the rim joist or into the deck framing. These posts experience significant lateral forces when someone leans on the railing, and they must be sized and fastened accordingly. Many railing failures occur because posts are undersized or fastened with inadequate hardware.
Weather Protection and Maintenance Strategies
Even the best-built deck requires ongoing maintenance to resist weathering and extend its lifespan. Water management is the single most important factor determining deck longevity. Water that penetrates wood fibers causes rot, while water that pools on deck surfaces creates safety hazards and accelerates deterioration.
Carpenters design decks with multiple water-shedding features: proper slope away from houses, adequate spacing between boards for drainage, and ledger board flashing that directs water away from house structures. Some builders apply water-resistant sealers to wood decking annually, though composite materials typically require no such maintenance.
Ventilation beneath the deck prevents moisture accumulation that promotes rot and insect activity. Decks should have at least 18 inches of clearance between the deck surface and ground (or less with proper vapor barriers and ventilation). This airspace allows moisture to evaporate and prevents conditions that support decay.
For decks that will be like a finished basement space in terms of use intensity, professional-grade materials and construction become even more critical. Similarly, if you’re considering home security features for your outdoor space, deck construction should account for lighting and access considerations.
Annual inspections catch problems early before they become expensive repairs. Carpenters recommend checking fasteners for corrosion, inspecting for soft wood indicating rot, verifying that railings remain secure, and ensuring drainage systems function properly. Regular cleaning removes debris that traps moisture and promotes decay.
FAQ
What’s the most common mistake homeowners make when building decks?
Failing to obtain building permits and skipping proper ledger board flashing are the two most frequent errors. Permit skipping leads to liability issues and insurance problems, while improper flashing causes water damage to the house structure—often resulting in expensive remediation.
How deep should deck post footings be?
Post footings must extend below your local frost line, which varies by climate. Northern regions require 36-48 inches deep, while southern areas might need only 12-18 inches. Contact your local building department to determine the requirement for your specific location.
Can I use pressure-treated lumber for all deck components?
Pressure-treated lumber is appropriate for structural framing and posts, but many builders prefer composite or hardwood decking surfaces for aesthetic reasons and minimal maintenance. Ground-contact rated pressure-treated lumber (UC4A) is essential for posts and components touching soil.
How often should I seal or stain my deck?
Traditional wood decks benefit from sealing every 2-3 years, though this depends on climate and product quality. Composite decks typically require no sealing, and tropical hardwoods may need sealing only every 3-5 years. Always follow manufacturer recommendations for your specific material.
What’s the difference between joist hangers and toe-nailing?
Joist hangers (metal brackets) provide superior strength and consistent connection quality, making them preferred by professionals. Toe-nailing (driving nails at angles through joists into rim joists) is traditional but requires more skill and provides less consistent strength. Modern building codes increasingly require hangers for structural reliability.
Do I need an engineer to design my deck?
Small decks (under 200 square feet, under 30 inches elevated) in most areas don’t require engineered plans. However, larger decks, unusual designs, or areas with heavy snow loads typically require professional engineering. Check your local building department requirements before beginning design work.


