Building a shed is one of the most rewarding DIY projects a homeowner can undertake. Whether you need extra storage, a workshop, or a garden retreat, a well-constructed shed adds both functionality and value to your property. This carpenter-approved guide walks you through every step of the process, from initial planning and site selection to finishing touches and weatherproofing.
A shed project requires careful planning, proper materials, and attention to building codes and safety standards. Even if you’ve never built anything before, this comprehensive guide provides the knowledge and confidence you need to succeed. We’ll cover everything from foundation preparation to roof installation, with practical tips from experienced builders who’ve completed hundreds of sheds.
Planning Your Shed Project
Before you purchase a single board, invest time in thorough planning. The planning phase determines whether your shed will be functional, affordable, and built correctly. Start by defining your shed’s primary purpose. Will it store garden tools, serve as a workshop, house recreational equipment, or provide a combination of functions? Your answer influences size, ventilation requirements, insulation needs, and interior layout decisions.
Consider your local climate and weather patterns. Sheds in humid regions need different ventilation strategies than those in arid climates. Similarly, areas prone to heavy snow require different roof pitches and structural reinforcement. Research average rainfall, wind speeds, and temperature extremes for your location to inform material and design choices.
Create detailed sketches or use design software to visualize your shed. Include measurements for length, width, and height. Most building codes allow sheds under 100-120 square feet without a permit, but confirm this with your local authority. Document your design thoroughly—this becomes your roadmap during construction. Many experienced builders recommend creating a bill of materials during this phase, which helps with budgeting and ensures you have everything needed before starting.
Understanding Building Codes and Permits
Building codes exist to protect your safety and property value. Consult your local International Code Council (ICC) building codes and municipal regulations before construction begins. Different jurisdictions have varying requirements regarding shed setbacks from property lines, maximum size without permits, foundation depth, and roof load capacity.
Setback requirements typically mandate that structures be positioned a certain distance from property lines—commonly 5-10 feet depending on your area. Violating setback rules can result in fines, forced removal, or legal disputes with neighbors. Contact your local building department or planning office to obtain specific requirements for your property.
Many jurisdictions require permits for sheds exceeding certain dimensions or those with electrical service. The permit process involves submitting plans, paying fees, and scheduling inspections at various construction stages. While permits seem burdensome, they protect your investment and ensure the structure meets safety standards. When you sell your home, disclosed permits demonstrate proper construction to potential buyers.
Foundation requirements vary significantly by region. Cold climates require foundations below the frost line—typically 36-48 inches deep—to prevent heaving from freeze-thaw cycles. Warm climates may allow simpler foundations. Your local building department specifies frost line depth for your area, which is crucial information for foundation design.
Choosing the Right Location and Site Preparation
Location selection impacts your shed’s longevity, accessibility, and functionality. Choose a site with good drainage to prevent water accumulation around the structure. Avoid low spots where water pools during heavy rain. If your yard slopes, position the shed on higher ground or grade the site to direct water away from the foundation.
Consider sun exposure and prevailing winds. A shed receiving afternoon shade stays cooler in summer. Positioning the shed to block winter winds reduces heating needs if you plan to insulate it. Proximity to utilities matters too—know where underground electrical, gas, and water lines are located before digging. Call your local utility locating service (usually free) to mark underground utilities.
Accessibility is often overlooked but crucial for functionality. Ensure adequate clearance for doors to open fully and for maneuvering equipment in and out. If you’ll store a lawnmower or wheelbarrow, plan for easy access. Consider proximity to your home—a shed tucked too far away becomes inconvenient to use regularly.
Prepare the site by removing vegetation, rocks, and debris. Level the area as much as practical—minor slopes are acceptable, but significant unevenness causes foundation problems. Remove the top 2-3 inches of soil and organic matter, exposing bare earth. This prevents settling issues from decomposing vegetation beneath your foundation. If the soil is very poor quality, replace it with compacted gravel or fill.
Foundation Options Explained
Your shed’s foundation is perhaps the most critical structural element. A poor foundation leads to rot, settling, and structural failure years down the road. The best foundation option depends on your climate, soil conditions, and local building codes.
Concrete Slab Foundations: Concrete slabs offer excellent durability and create a clean floor surface. This option works best in stable soil and areas without significant frost concerns. Excavate the site to the required depth (typically 4-6 inches below frost line), add a gravel base, install edge forms, and pour concrete. Reinforce with rebar or wire mesh. Concrete slabs provide the most level surface and excellent moisture protection.
Concrete Frost Footings with Posts: In cold climates, dig holes below the frost line and set concrete piers or posts. This approach allows frost to move without affecting the structure. Posts sit on concrete footings, elevating the shed floor above ground. This method provides excellent drainage and works well in challenging soil conditions. Space footings according to your shed’s size and local building codes—typically 4-8 feet apart.
Gravel Pad Foundation: For smaller, non-permanent sheds in favorable climates, a compacted gravel pad with concrete blocks works. This budget-friendly option suits temporary structures but offers less longevity than concrete. Excavate 4-6 inches, add landscape fabric, and layer compacted gravel. Set concrete blocks on the gravel to support posts. This method allows excellent drainage but requires periodic maintenance.
Skid Foundation: Pressure-treated wooden skids or railway ties create a simple foundation for small sheds. This approach is quick but less durable than concrete. Skids work best for sheds you might eventually relocate. Ensure skids rest on level ground with good drainage underneath.
Regardless of foundation type, ensure proper drainage around your shed. Grade soil away from the structure so water flows outward, not toward the foundation. Consider installing a French drain or swale if water naturally collects in your yard. Poor drainage is the primary cause of shed deterioration over time.
Framing Your Shed Structure
Framing creates your shed’s skeleton and determines structural integrity. Most shed designs use conventional stick framing with wooden studs, though some builders prefer post-and-beam construction for larger sheds.
Floor Framing: Start by building the floor frame, which sits on your foundation. Use pressure-treated lumber for all wood contacting the foundation—this prevents rot from moisture. Pressure-treated wood contains preservatives that resist decay and insect damage. Standard floor framing uses 2×8 or 2×10 joists spaced 16 inches on center, depending on span and load requirements. Connect floor joists to the foundation securely using bolts, concrete anchors, or lag screws, depending on your foundation type.
Wall Framing: Build walls as individual frames on the floor, then tilt them into place. Standard stud spacing is 16 inches on center, though 24-inch spacing works for smaller sheds. Use 2×4 studs for most sheds, or 2×6 for insulated designs. Build your wall frames with sole plates (bottom), top plates (top), and studs connecting them. Include headers above door and window openings—these distribute weight around openings and prevent sagging.
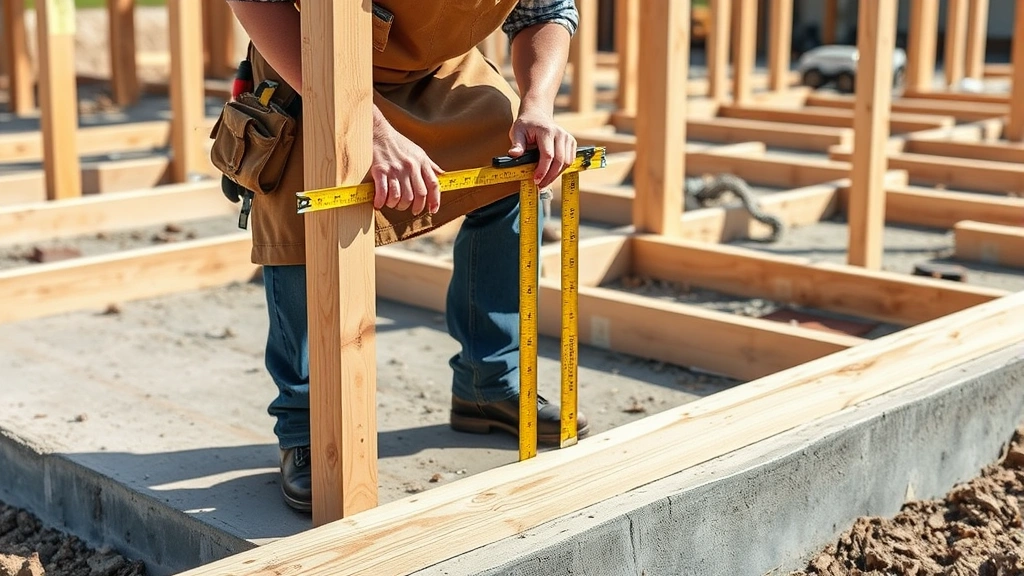
When raising walls, ensure perfect plumb using a level. Brace walls temporarily with diagonal bracing or ropes until roof trusses secure them permanently. Crooked walls lead to fitting problems for doors, windows, and siding. Take time during this phase to verify square measurements—measure diagonals and adjust until they’re equal.
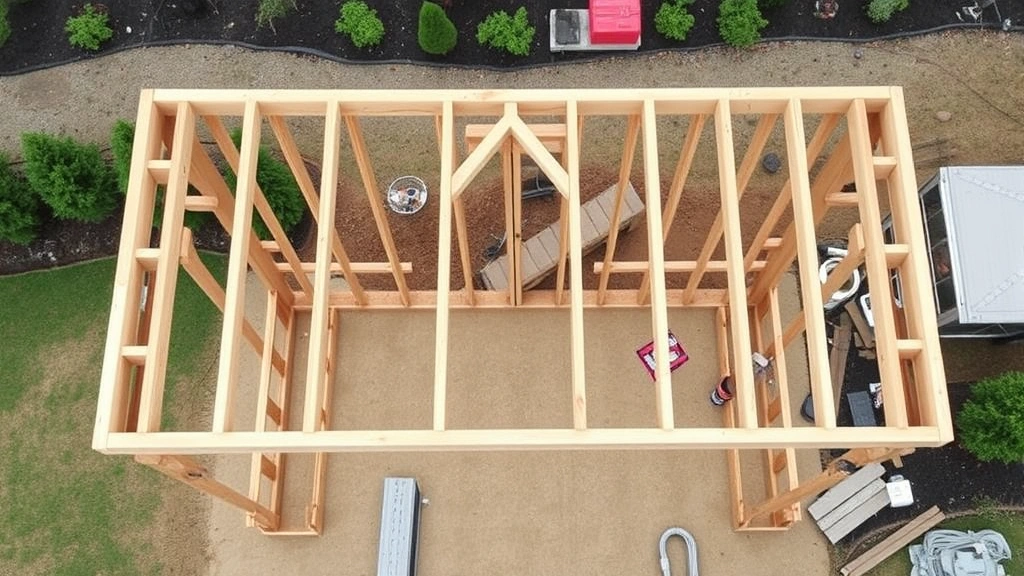
Roof Framing: Roof trusses or rafters transfer roof weight down through walls to the foundation. Pre-fabricated trusses save time and ensure proper engineering. For DIY woodworking projects, trusses eliminate complex calculations. Alternatively, build rafters on-site using rafter tables or software to determine angles and lengths. Roof pitch (slope) affects water drainage and structural strength. Steeper pitches shed water faster and support snow loads better, but require more material. A 4:12 pitch (4 inches of rise per 12 inches of horizontal run) balances functionality with material efficiency.
Space roof trusses or rafters 24 inches on center for most shed designs. Secure them firmly to top wall plates using hurricane ties or rafter ties—these metal connectors resist wind uplift. In high-wind areas, these connections are critical for structural safety.
Installing Walls and Doors
Once your frame is complete and properly braced, install exterior sheathing. Plywood or oriented strand board (OSB) provides structural bracing and a base for siding. Install sheathing with staggered seams—never align seams vertically, as this weakens the wall. Use 8-penny nails or screws spaced every 8 inches around edges and every 12 inches on intermediate framing.
Before installing siding, consider adding house wrap or felt paper. These breathable membranes allow moisture vapor to escape while blocking liquid water. This is especially important if you plan exterior painting or finishing. Proper moisture management prevents rot and extends your shed’s lifespan dramatically.
Select siding that suits your climate and maintenance preferences. Common options include:
- Wood siding: Attractive but requires regular painting or staining. Use cedar or pressure-treated lumber for durability.
- Metal siding: Low-maintenance and durable, though can dent and show dirt easily.
- Vinyl siding: Affordable and maintenance-free, though less durable than wood or metal in extreme climates.
- Board-and-batten: Charming rustic appearance, uses vertical boards with narrow battens covering seams.
Door Installation: Install a quality exterior door designed for sheds or outbuildings. Standard prehung exterior doors simplify installation. Frame the door opening during wall construction with a properly sized header. Position doors for convenient access to frequently needed items. Consider door swing direction—ensure doors don’t swing into paths or block adjacent windows.
Install door frames securely using shims to ensure plumb installation. Check that doors open and close smoothly without sticking. For security, install a quality lock and consider adding a deadbolt if storing valuable equipment. Many builders recommend installing two doors on opposite sides for emergencies and improved ventilation options.
Windows improve aesthetics and provide natural light, reducing the need for electrical lighting. Position windows on walls receiving natural light. Install windows before siding for easier flashing installation. Proper window flashing prevents water infiltration around the window frame—this is crucial for longevity.
Roofing Your Shed
Roofing is critical for protecting your shed’s interior from weather. The roof system includes decking, underlayment, and the finished roofing material.
Roof Decking: Install plywood or OSB over roof trusses, creating a solid surface for roofing materials. Use 1/2-inch plywood for standard 24-inch truss spacing. Stagger seams and leave 1/8-inch gaps between sheets to allow for expansion. Secure decking with 8-penny nails or screws every 6 inches around edges and every 12 inches on intermediate framing.
Underlayment and Flashing: Install roofing underlayment (felt or synthetic) over decking before installing shingles. This secondary weather barrier prevents water from reaching wood if shingles fail. Pay special attention to flashing around roof penetrations like vents or chimneys. Flashing directs water away from vulnerable areas and prevents leaks. This is where many DIY builders cut corners, leading to expensive water damage later.
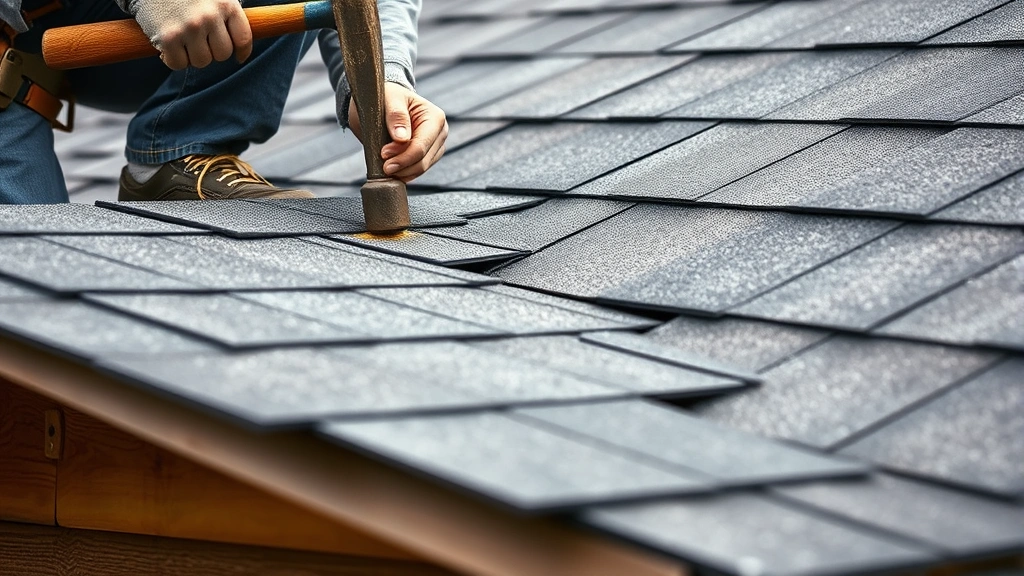
Shingles and Roofing Materials: Asphalt shingles are the most common and affordable option for sheds. They’re durable, relatively easy to install, and available in many colors. Architectural shingles offer enhanced appearance and durability compared to basic three-tab shingles. Metal roofing is extremely durable and low-maintenance but more expensive initially. Standing seam metal roofing looks professional and lasts 40+ years with minimal maintenance.
When installing shingles, follow manufacturer guidelines regarding nailing patterns and spacing. Improper installation voids warranties and reduces shingle lifespan. Nail shingles with roofing nails at the proper depth—nails should penetrate decking but not protrude through. Use the correct number of nails per shingle, typically 4-6 depending on manufacturer specifications.
Install ridge vents or cap shingles at the roof peak to allow moisture vapor to escape. This ventilation is critical in humid climates and prevents mold and rot inside the shed. Consider installing soffit vents at the eaves to create continuous ventilation airflow from eaves to ridge.
Gutters and downspouts manage water runoff, directing it away from your foundation. Install gutters along roof edges, sloping them slightly toward downspouts (typically 1/16 inch per foot). Extend downspouts at least 4-6 feet away from the shed to prevent water from pooling near the foundation.
Finishing and Weatherproofing
After the structural shell is complete, finishing work protects your investment and improves functionality and appearance.
Interior Finishing: For basic storage sheds, interior finishing is minimal. Ensure proper ventilation to prevent moisture buildup and mold. Install vents on opposite walls near the roof to allow air circulation. If you’ll use the shed as a workshop, consider finishing techniques similar to basement spaces, including insulation and drywall. Insulation is worthwhile if you’ll work in the shed during winter or store temperature-sensitive items.
Install shelving and organization systems to maximize storage efficiency. Wall-mounted shelves, pegboards, and storage cabinets keep tools and equipment organized and accessible. Proper organization makes your shed more functional and easier to maintain.
Electrical Considerations: If you need electrical service in your shed, hire a licensed electrician. Electrical work must comply with National Electrical Code (NEC) standards. Run conduit (not individual wires) from your home’s electrical panel through underground burial or along the exterior. Install a subpanel in the shed with proper grounding. Never attempt electrical work beyond your expertise—improper installation creates fire and shock hazards. For security and convenience, consider adding motion-sensor lighting outside the shed.
Painting and Staining: Exterior paint or stain protects wood from UV damage and moisture infiltration. Choose high-quality exterior paint formulated for wood. Proper surface preparation is critical—clean, sand, and prime surfaces before painting. Apply at least two coats of quality paint. Stain offers a more natural appearance than paint but typically requires reapplication every 2-3 years. Paint lasts longer, typically 5-7 years before repainting is needed.
Weatherproofing Details: Install weatherstripping around doors to prevent drafts and water infiltration. Caulk gaps around window frames, door frames, and where siding meets trim. Use exterior-grade caulk rated for the movement and weather exposure your shed experiences. Poor caulking allows water to infiltrate, causing rot and interior damage.
Install flashing where the roof meets walls and around any roof penetrations. Flashing is thin metal (usually aluminum) bent to direct water away from vulnerable areas. This is especially important at roof-to-wall transitions where water naturally collects.
For improved longevity, consider installing a drip edge along roof edges. This metal trim guides water into gutters rather than allowing it to run behind gutters and soak fascia boards. Drip edge is inexpensive insurance against expensive water damage.
Maintain your shed proactively. Inspect annually for signs of damage, rot, or pest intrusion. Caulk gaps that develop, repaint worn areas, and clear gutters regularly. A well-maintained shed lasts decades; neglected sheds deteriorate rapidly.
FAQ
Do I need a permit to build a shed?
Requirements vary by jurisdiction. Many areas allow sheds under 100-120 square feet without permits, but some require permits for all structures. Check your local building department’s regulations. Obtaining proper permits protects your investment and avoids legal issues when selling your home.
What’s the best foundation for a shed?
The best foundation depends on your climate and soil conditions. Concrete slabs work well in stable soil and warm climates. In cold climates, frost footings prevent heaving damage. Consult your local building department for frost line depth and specific requirements for your area.
How long does it take to build a shed?
A typical 10×12 shed takes 40-80 hours for an experienced builder, or 100-200+ hours for a first-time DIYer. This timeline includes planning, site preparation, foundation work, framing, roofing, siding, and finishing. Breaking the project into phases allows spreading work over several weekends.
Can I build a shed on my property line?
No, building codes require setbacks from property lines. Typical requirements are 5-10 feet, though this varies by jurisdiction. Violating setback rules results in fines or forced removal. Always verify setback requirements before choosing your site.
Should I insulate my shed?
Insulation is beneficial if you’ll work in the shed during winter or store temperature-sensitive items. For basic storage, insulation may be unnecessary but is relatively inexpensive to add during construction. Proper ventilation is more important than insulation for most storage sheds.
What’s the best roofing material for a shed?
Asphalt shingles are affordable and durable for most applications. Metal roofing lasts longer and requires less maintenance but costs more initially. Consider your climate, maintenance preferences, and budget when choosing roofing material.
How do I prevent water damage in my shed?
Proper grading, foundation drainage, roof flashing, gutters, and regular maintenance prevent water damage. Ensure water slopes away from the shed, install gutters and downspouts, maintain roof integrity, and caulk gaps regularly. These preventive measures save thousands in repairs.


