Build a DIY Shed? Expert Tips Inside
Building your own shed is one of the most rewarding DIY projects you can tackle. Whether you need extra storage for garden tools, a workspace for hobbies, or a retreat space, a well-constructed shed adds both functionality and value to your property. This comprehensive guide walks you through every step of the process, from initial planning and material selection to final finishing touches, ensuring your shed stands strong for decades.
A DIY shed project requires careful planning, proper materials, and attention to building codes and safety standards. Unlike casual home improvement tasks, shed construction involves structural integrity, weather protection, and foundation work that directly impacts the longevity of your investment. By following expert techniques and local regulations, you’ll create a professional-quality structure that enhances your property while developing valuable construction skills.
Planning Your Shed Project
Before breaking ground, invest time in detailed planning. Start by determining your shed’s purpose—this decision influences size, layout, and special features. A storage shed requires different design elements than a workshop or hobby space. Consider how you’ll use the structure throughout the year and what activities will occur inside.
Create detailed sketches or use free online design tools to visualize your shed. Most residential sheds range from 8×10 feet to 12×16 feet, though local zoning laws may restrict maximum dimensions. Check your International Building Code (ICC) requirements and contact your local building department to understand permit requirements, setback distances from property lines, and height restrictions. Many jurisdictions require permits for structures over 100-120 square feet, and some mandate professional inspections.
Budget planning is crucial. Material costs typically range from $1,500 to $5,000 for a basic 10×12 shed, depending on quality and finishes. If you’re just starting out, consider exploring DIY beginner woodworking projects to build confidence before tackling a full shed. Create a detailed materials list including lumber, fasteners, roofing materials, and hardware. Purchase quality materials—cheap wood warps and fails prematurely, costing more in repairs.
Selecting the Right Location
Location determines your shed’s longevity and usability. Choose a spot with good drainage to prevent water accumulation around the foundation. Avoid low-lying areas where water pools after rain, as this leads to rot, mold, and structural deterioration. Slightly sloped terrain is ideal—water naturally flows away from the structure.
Sunlight exposure matters significantly. South-facing locations experience more temperature fluctuations and UV exposure, accelerating material degradation. If possible, position your shed where morning sun dries morning moisture but afternoon shade provides relief. Consider prevailing winds in your region—position the shed to minimize wind exposure on vulnerable sides.
Check for underground utilities before digging. Call your local utility locating service (typically “Call Before You Dig”) at least three days before excavation. Hitting electrical lines, gas pipes, or water mains creates dangerous and expensive problems. Verify property lines precisely—disputes with neighbors about shed placement cause legal headaches. Consider sightlines from your home and neighbors’ properties; aesthetics matter for property values and relationships.
Access is critical. Ensure your shed location allows equipment and materials to reach the building site. A narrow gate or dense landscaping may force you to carry materials by hand, significantly increasing labor time and difficulty. Plan pathways that allow wheelbarrows and hand trucks to move freely.
Foundation and Framing Basics
A solid foundation prevents settling, shifting, and water damage. Three common options exist: concrete pads, gravel base with treated skids, and concrete slab. For most residential sheds, a concrete pad or skid foundation works excellently. Concrete pads involve digging below the frost line (typically 12-48 inches depending on climate) and pouring concrete footings at corners and midpoints. This prevents frost heave—winter ground expansion that shifts structures upward, cracking walls and misaligning doors.
Treated lumber skids offer a simpler alternative for smaller sheds. Using pressure-treated 4×6 or 4×8 timbers as a base distributes weight across a gravel bed, allowing drainage underneath. Ensure the skid sits level and is supported at multiple points. Never build directly on bare soil—rot and pest infestation occur rapidly without proper foundation.
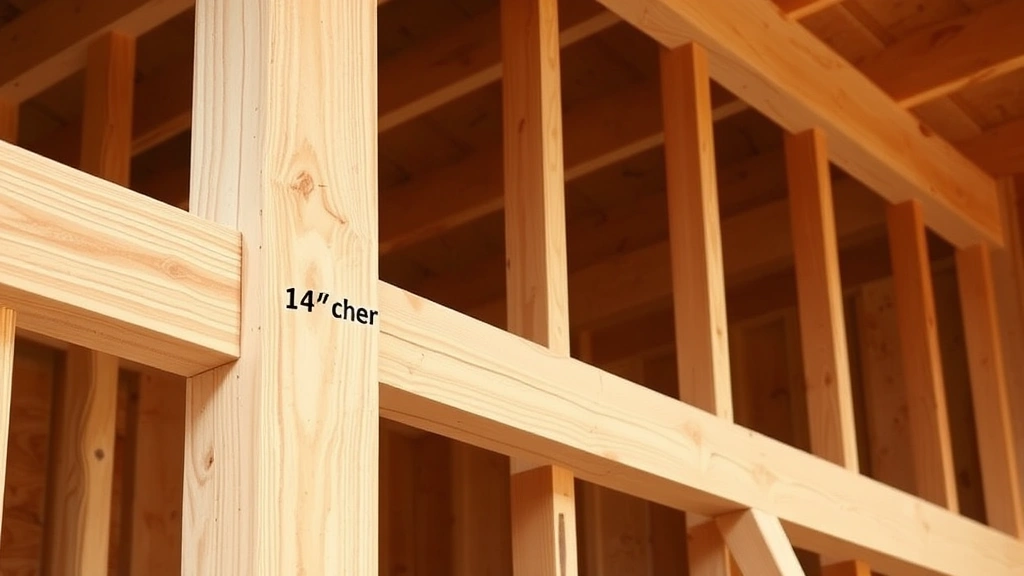
Framing begins after the foundation cures completely (minimum 28 days for concrete). Standard stud spacing is 16 inches on center, meaning studs are positioned 16 inches apart from centerline to centerline. This spacing provides structural strength while maximizing material efficiency. Use pressure-treated lumber for bottom plates (the base of walls) that contact concrete, as regular lumber rots when wet.
Wall height typically ranges from 7 to 9 feet, with 8 feet being standard for most sheds. Taller walls increase interior space and headroom but require more materials and create higher wind resistance. Frame walls on the ground, then tilt them into place—much easier than building walls in position. Use 2×4 studs with 2×6 headers over door and window openings. Headers must be sized correctly based on span; American Wood Council specifications provide sizing charts based on load and span.
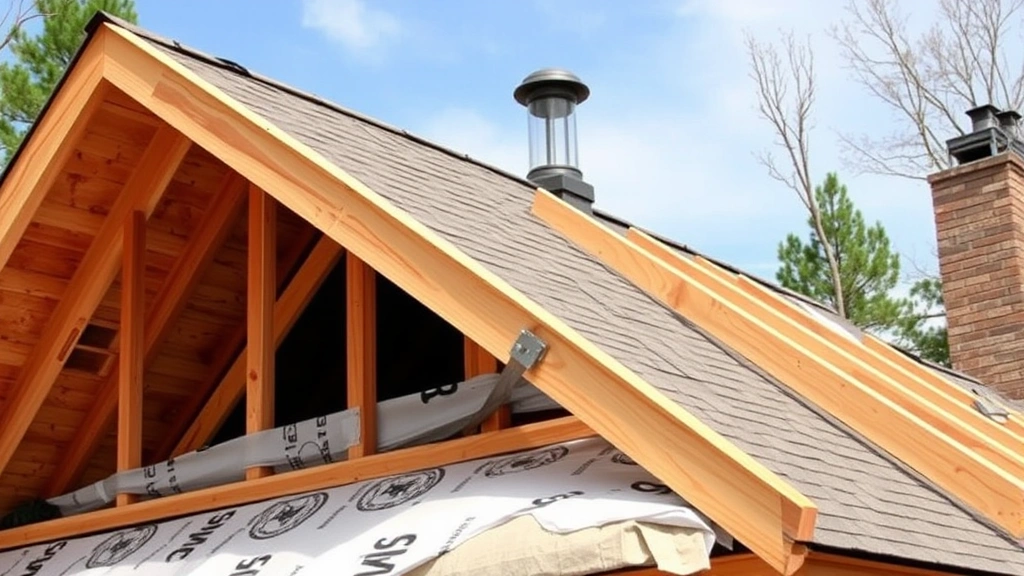
Roof framing is where many DIY builders struggle. A simple gable roof (peaked roof) is most common and easiest to build. Roof pitch (slope) typically ranges from 4:12 to 8:12 (meaning 4 to 8 inches of rise per 12 inches of horizontal run). Steeper pitches shed water better but require more materials. Calculate rafter size and spacing based on your local snow load and wind speed—consult NFPA guidelines or your building department for requirements.
Roofing and Weather Protection
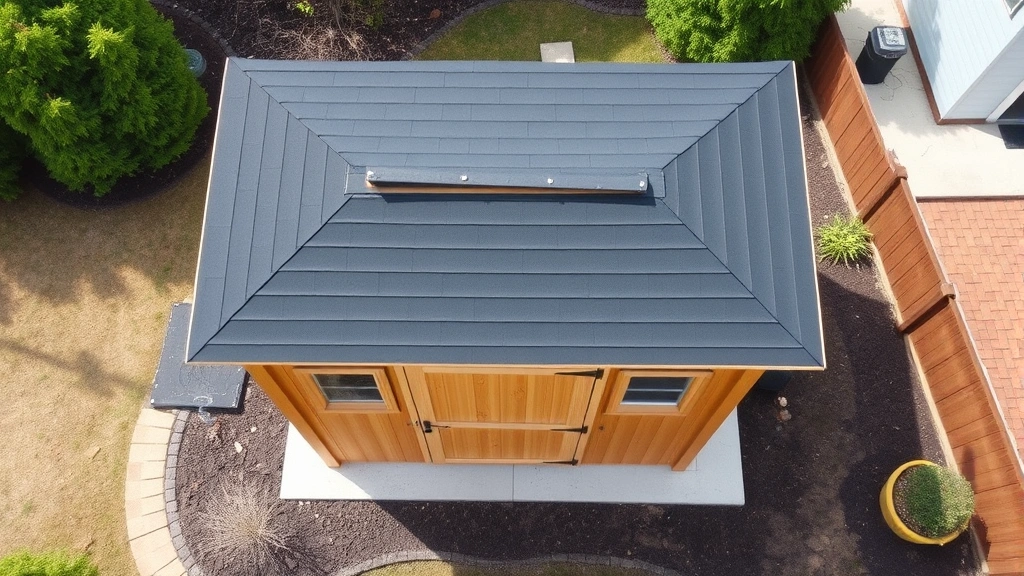
Roofing protects everything inside from rain, snow, and UV damage. Asphalt shingles are the most affordable option, lasting 15-25 years with proper installation. Metal roofing costs more initially but lasts 40-70 years and handles heavy snow loads excellently. Metal also sheds snow quickly, preventing dangerous roof loads in snowy climates.
Before installing shingles, install roofing underlayment—a water-resistant barrier that provides secondary protection if shingles fail. Felt or synthetic underlayment prevents water from reaching the wood structure. Install it horizontally, overlapping each course by 4-6 inches, working from bottom to top so water flows downward over each layer.
Proper ventilation prevents moisture accumulation in the attic space. Install soffit vents at the eaves (bottom of roof overhang) and ridge vents at the peak. This creates airflow that removes heat and moisture, preventing mold growth and extending roof life. Without ventilation, moisture condenses on the underside of the roof deck, promoting rot and structural decay.
Flashing—metal trim that directs water away from vulnerable areas—is essential at roof penetrations like vents and chimneys, and at wall-to-roof transitions. Improper flashing is the leading cause of roof leaks. Use corrosion-resistant flashing materials rated for your climate, and overlap pieces so water flows downward.
Gutters and downspouts manage water runoff. Even small sheds benefit from gutters that direct water away from the foundation and walls. Water running down the sides of an unprotected shed can saturate the foundation and cause rot at the base. Position downspout extensions at least 4-6 feet from the structure, or route water to a rain barrel or dry well.
Doors, Windows, and Finishing
Doors are both functional and structural elements. Most garden sheds use a single 3-foot wide door, though larger sheds benefit from double doors for moving equipment. Frame the door opening 1-2 inches wider and taller than the actual door to allow for adjustment during installation. A pre-hung exterior door simplifies installation—the door, frame, and hinges come assembled.
Windows provide light and ventilation, improving usability and reducing the need for electrical lighting during daytime. However, windows reduce wall strength and create potential leak points, so don’t overdo them. Two small windows positioned high on the walls provide adequate light without compromising structural integrity. Use tempered or polycarbonate panels in sheds where breakage risk is high.
Siding protects the structural frame from weather. Plywood sheathing covered with exterior siding is traditional and reliable. Horizontal lap siding (clapboard), vertical board-and-batten, or metal panels all work well. Ensure the sheathing is covered with house wrap—a breathable water-resistant barrier that allows interior moisture to escape while blocking external water infiltration. Improper house wrap installation traps moisture and causes rot.
Interior finishing depends on your shed’s purpose. A basic storage shed might only need rough lumber and basic insulation. A workshop requires proper flooring—concrete is durable but cold; plywood subflooring over joists is more comfortable. If you’re considering more complex building projects, review our guide on DIY basement finishing for advanced finishing techniques applicable to shed interiors.
Insulation and vapor barriers matter if you’ll work in the shed during winter or store temperature-sensitive items. Fiberglass batts between studs provide basic insulation. Add a vapor barrier (plastic sheeting) on the warm side of the insulation to prevent moisture problems. For climate control, consider a small electric heater or air conditioning unit, though this requires electrical work best handled by licensed electricians.
Tools and Safety Equipment
Building a shed requires both hand and power tools. Essential hand tools include a framing hammer, circular saw, drill-driver, level, tape measure, and square. A power miter saw dramatically speeds up crosscutting lumber. A reciprocating saw handles demolition and cutouts. Rent expensive tools like scaffolding rather than buying them.
Safety equipment is non-negotiable. Wear safety glasses whenever using power tools—a wood chip traveling at high speed causes permanent eye damage. Use hearing protection around loud equipment; permanent hearing loss is irreversible. Work gloves protect hands from splinters and cuts. A dust mask prevents inhalation of sawdust, which irritates lungs over time.
Fall protection becomes critical when working on roofs. Use a safety harness and rope if you’re working at heights, or use proper scaffolding and guardrails. Many DIY injuries occur on roofs when people slip—this is preventable with proper equipment and caution.
Electrical safety matters when using corded power tools. Use ground fault circuit interrupter (GFCI) protected outlets, especially outdoors. Never use power tools in wet conditions. Keep cords away from sharp objects and moving equipment.
FAQ
Do I need a building permit for a DIY shed?
Most jurisdictions require permits for structures over 100-120 square feet. Permits ensure your shed meets local codes for safety, setback requirements, and height limits. Unpermitted structures can create legal problems when selling your home and may not be covered by homeowner’s insurance. Contact your local building department to determine requirements for your specific location and shed size.
What’s the best foundation for a shed?
Concrete pads with footings below the frost line provide the most durable foundation, preventing frost heave and settling. Pressure-treated skids on gravel work well for smaller sheds and are simpler to install. Never build directly on soil—rot and pest problems occur rapidly. The best choice depends on your climate, shed size, and budget.
How long does a DIY shed typically last?
With proper construction and maintenance, a shed lasts 20-40 years or longer. Material quality, climate, and maintenance significantly affect lifespan. Treated lumber, quality roofing, proper drainage, and regular maintenance (repainting, roof repairs, gutter cleaning) extend the shed’s life considerably. Neglected sheds deteriorate rapidly.
Can I build a shed on my property line?
Most zoning codes require setbacks from property lines—typically 5-10 feet depending on your jurisdiction. Building on a property line creates legal disputes and may violate local codes. Always verify exact setback requirements with your building department before choosing a location.
What roofing material lasts longest?
Metal roofing lasts 40-70 years, significantly longer than asphalt shingles (15-25 years). Metal costs more initially but offers superior longevity, better snow shedding, and lower maintenance. For a long-term investment, metal roofing provides better value despite higher upfront costs.
Should I hire an electrician for shed wiring?
Yes, hire a licensed electrician for any electrical work beyond basic lighting. Improper wiring creates fire and shock hazards. Electrical codes are strict for safety reasons—violations can cause electrocution or fires. The cost of professional work is minimal compared to the safety benefits and code compliance.
Building a DIY shed is an achievable project that develops valuable construction skills while creating a functional structure. Start with solid planning, follow local building codes, invest in quality materials, and prioritize safety throughout the process. Whether you’re creating storage space or a hobby workshop, the satisfaction of building something with your own hands makes every hour worthwhile. For related projects and additional DIY expertise, explore our DIY Nest Hub Blog for comprehensive guides on home improvement projects. If your shed will include security features, check out our DIY home security guide for protecting your valuable tools and equipment.


