Build a Shed Foundation? Expert Tips Inside
A solid foundation is the backbone of any successful shed construction project. Whether you’re planning a small storage structure or a larger workshop, understanding how to properly build a shed foundation will save you thousands in repairs and headaches down the road. A poorly constructed foundation can lead to structural failure, water damage, pest infiltration, and costly repairs that could have been prevented with proper planning and execution.
This comprehensive guide walks you through every step of building a shed foundation, from site selection and material choices to drainage considerations and long-term maintenance. We’ll cover the most popular foundation types used by both professional builders and DIY enthusiasts, ensuring your shed remains level, stable, and protected from the elements for decades to come.
Understanding Shed Foundation Types
Choosing the right foundation type depends on several factors including your local climate, soil conditions, shed size, budget, and intended use. The four primary foundation options are concrete slabs, pier and post systems, gravel beds, and concrete skids. Each has distinct advantages and limitations that affect both installation difficulty and long-term performance.
Concrete slab foundations offer the most permanent solution and are ideal for larger sheds or structures that will house heavy equipment. They provide excellent moisture protection and create a level, finished surface suitable for vehicles or machinery. However, concrete slabs require significant upfront investment and professional-grade tools.
Pier and post foundations elevate the shed structure above ground, allowing air circulation underneath that naturally prevents moisture accumulation and rot. This system works particularly well in areas with high water tables or frequent flooding. The modular nature of pier systems also makes them easier to adjust for uneven terrain.
Gravel foundations represent the most budget-friendly option and work adequately for small, temporary structures in areas with good drainage. They’re simple to install but require annual maintenance and eventual replacement of settled gravel material.
Concrete skids combine affordability with reasonable durability, making them popular among homeowners seeking a middle ground. These pre-cast or site-built concrete runners distribute the shed’s weight while allowing some drainage underneath.
Site Selection and Preparation
The location you choose for your shed foundation dramatically impacts its lifespan and performance. Before breaking ground, invest time in thorough site evaluation. Look for areas with natural slope to encourage water runoff away from the structure. Avoid low spots where water naturally collects or where your neighbors’ downspouts direct drainage.
Check for underground utilities by calling your local utility locating service before digging. Many areas offer free marking of electrical lines, gas lines, and water mains—a critical safety step that prevents dangerous accidents and expensive damage. Mark these locations clearly with spray paint or flags.
Assess your soil composition by digging a test hole 12-18 inches deep. Good foundation soil should be firm, well-draining, and free from organic material like roots or grass. Clay-heavy soils retain moisture and can cause settling; sandy soils may shift too easily. If your soil is problematic, consider adding a gravel base layer or consulting a professional mason for soil recommendations.
Clear the site completely of vegetation, removing grass, weeds, and any roots that could decompose and create voids under your foundation. Use a level to check the existing grade and determine how much grading work you’ll need to do. Most shed foundations require a relatively level surface with minimal slope for drainage—ideally 1-2% grade (about 1 inch drop per 8 feet of length).
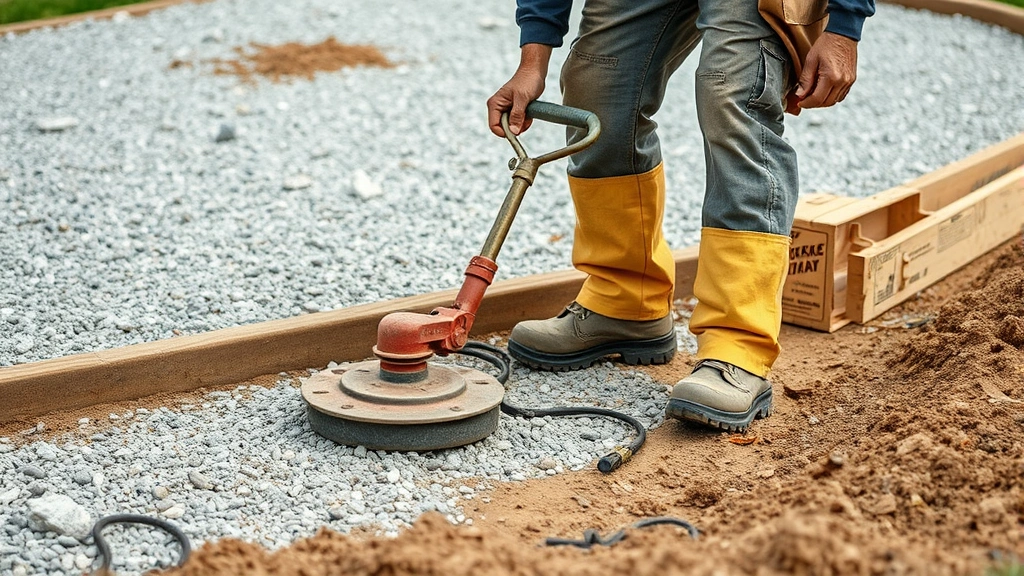
Compact the soil thoroughly using a hand tamper or mechanical compactor. Proper compaction prevents settling and ensures your foundation sits on stable ground. This step is often overlooked but makes an enormous difference in long-term performance.
Concrete Slab Foundations
Concrete slab foundations provide the most durable and weather-resistant base for shed structures. A properly constructed slab will remain level and stable for 30+ years with minimal maintenance. The basic process involves creating a gravel base, building forms, mixing and pouring concrete, and finishing the surface.
Preparation and Forms
Begin by establishing your shed’s footprint using string lines and corner stakes. Mark out the area slightly larger than your actual shed dimensions to ensure the concrete extends fully under the structure. Excavate 4-6 inches of soil within this marked area, removing any remaining vegetation and roots.
Spread 4 inches of gravel or crushed stone as a base layer and compact it thoroughly. This base layer improves drainage and prevents frost heave in cold climates. In areas with poor drainage, consider adding a perforated drainage pipe around the perimeter that channels water away from the foundation.
Build your forms using 2×8 lumber, staking them securely every 3-4 feet. Ensure forms are level using a 4-foot level and a straightedge. Proper form construction directly affects your finished concrete surface, so take time to get this right. Coat wooden forms with oil or form release agent to prevent concrete from sticking.
Concrete Mixing and Pouring
For small sheds, you can mix concrete by hand using bags of pre-mixed concrete, though a concrete mixer significantly reduces labor. For larger slabs, renting a ready-mix truck is more economical and ensures consistent quality. Most shed slabs require a 4-inch thickness with concrete strength rated at 3,000-4,000 PSI.
Pour concrete into your forms and spread it evenly using a shovel and rake. Work the concrete to eliminate air pockets and ensure it fills all corners and edges. Use a vibrating screed board or 2×4 straightedge to level the concrete surface flush with your forms.
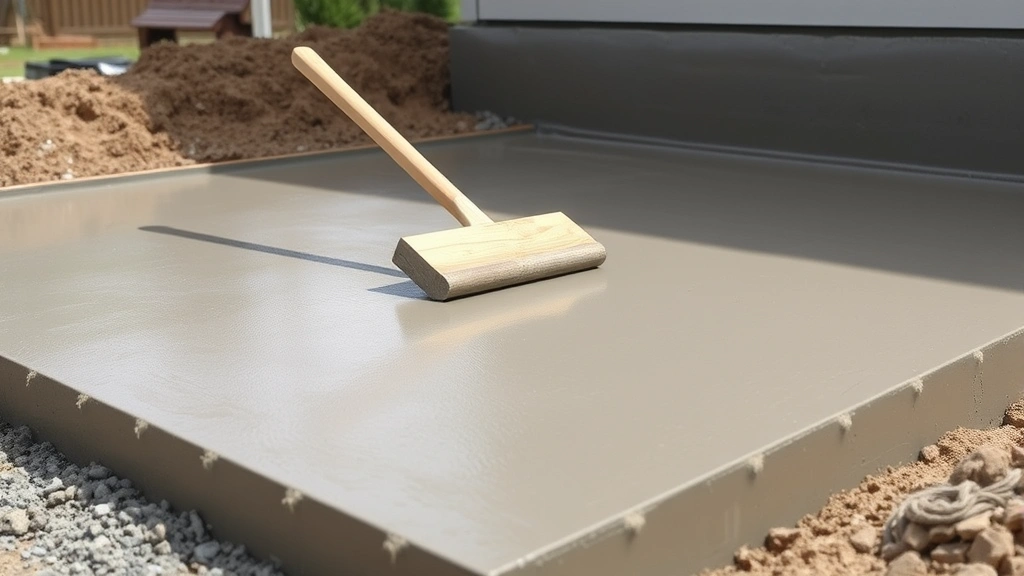
Finishing the Surface
After screeding, smooth the surface using a wooden float, working in overlapping circular motions. This step closes surface pores and creates a more durable finish. For better traction, you can broom-finish the surface by dragging a stiff-bristled broom across the slightly-hardened concrete.
Allow concrete to cure for at least 7 days before placing your shed structure on the slab. During this curing period, keep the concrete moist by misting with water and covering with plastic sheeting. Proper curing ensures maximum strength development and prevents cracking.
For additional protection, consider sealing the concrete surface after curing. Quality concrete sealers repel water, prevent staining, and extend slab lifespan by reducing freeze-thaw damage in cold climates.
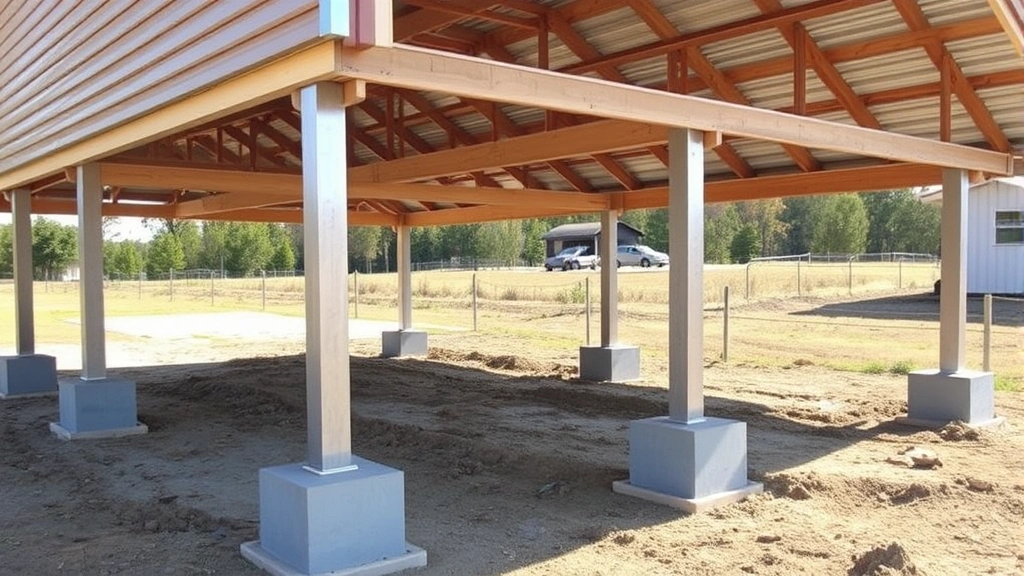
Pier and Post Foundations
Pier and post foundations elevate your shed structure above grade, creating a ventilated space underneath that naturally resists moisture problems. This foundation type works exceptionally well in areas prone to flooding, high water tables, or significant freeze-thaw cycles. The system distributes the shed’s weight through vertical posts anchored to below-grade piers.
Determining Pier Depth and Spacing
Check your local building code for frost line depth in your area—typically 12-48 inches depending on climate. Piers must extend below the frost line to prevent heaving during freeze-thaw cycles. Spacing between piers typically ranges from 4-8 feet depending on shed size and load capacity.
Calculate the number of piers needed by dividing your shed’s perimeter by the maximum spacing allowed. For an 8×12 shed in a 36-inch frost line area, you’d need piers at each corner plus additional piers along each side.
Installing Concrete Piers
Dig holes at each pier location extending 6-12 inches below your frost line. Add 4-6 inches of gravel at the bottom of each hole for drainage and bearing surface. For permanent installations, use concrete footings: either pre-cast concrete piers or holes filled with concrete that accepts galvanized post bases.
If pouring concrete footings, use cardboard sonotubes to form above-grade portions that extend 6-12 inches above finished grade. This height keeps the wooden posts away from direct soil contact, reducing rot risk. Pour concrete into the sonotube and set a post base or anchor bolt while concrete is still wet.
Installing Posts and Beams
Once pier concrete cures, install galvanized or pressure-treated 4×4 posts in each pier location. Use shims to level posts precisely before securing with bolts. Posts should be perfectly vertical—check with a level in two directions.
Connect posts using pressure-treated 2×8 or 2×10 beams, creating a rectangular frame that will support your shed floor system. Ensure all connections are bolted securely, as these joints transfer all the shed’s weight to the foundation piers.
This elevated system allows water to flow freely underneath, and air circulation naturally dries any moisture that accumulates. For additional pest protection, install hardware cloth or metal screening around the perimeter below the shed.
Gravel and Skid Foundations
For temporary structures or budget-conscious projects, gravel and skid foundations offer practical alternatives. These systems are quick to install and require minimal equipment, making them popular for small sheds and storage structures.
Gravel Foundation Construction
Gravel foundations work best for smaller sheds (under 100 square feet) in areas with good natural drainage. Mark your shed’s footprint and remove vegetation from the area. Add 4-6 inches of compacted gravel, creating a level base. The gravel allows water to drain while providing a reasonably stable bearing surface.
The main limitation of gravel foundations is settling and migration over time. Gravel shifts with freeze-thaw cycles and heavy equipment movement, requiring annual releveling and periodic replacement. Additionally, gravel offers minimal rodent protection, as burrowing animals easily tunnel through the material.
For improved performance, consider installing landscape fabric under the gravel to stabilize the base and prevent weeds from growing through. Some builders add a treated wood skid frame on top of the gravel for additional stability.
Concrete Skid Foundations
Concrete skids combine the simplicity of gravel foundations with better durability. These are essentially concrete beams or runners positioned under the shed’s perimeter, distributing weight over a larger area. Skids can be pre-cast concrete piers laid on compacted gravel, or site-built using concrete.
For site-built skids, create forms using 2×8 lumber, fill with concrete, and allow to cure fully before moving your shed structure onto them. Concrete skids resist settling better than gravel while remaining more affordable than full slab foundations.
Position skids parallel to your shed’s length, typically spaced 4-6 feet apart depending on shed size. Ensure skids are level relative to each other, as any significant height difference will stress your shed’s frame and potentially cause structural damage.
Drainage and Moisture Control
Proper drainage is critical to protecting your shed foundation from water damage, rot, and structural failure. Water is the enemy of any foundation system, so implementing comprehensive drainage measures is essential.
Grade Sloping and Perimeter Drainage
Establish proper slope around your shed, directing water away from the foundation. Maintain at least 1-2% slope (1 inch drop per 8 feet) for the first 10 feet around the structure. This simple step prevents water from pooling against your foundation.
For areas with poor drainage or high water tables, install perforated drainage pipe around the foundation perimeter. Lay 4-inch perforated PVC pipe in a gravel-filled trench sloped to daylight or a drainage area away from the shed. This system actively removes subsurface water before it can reach your foundation.
Surface Water Management
Install gutters and downspouts on your shed roof to direct rainwater away from the foundation. Extend downspouts at least 4-6 feet from the shed, or better yet, connect them to underground drainage systems that carry water further away.
Grade the soil around your shed to create a shallow swale or low point 3-4 feet away from the structure. This swale captures and channels surface runoff away from the foundation area. In heavy rain areas, consider installing a French drain—a shallow trench filled with gravel and perforated pipe that collects and moves water away from the shed.
Foundation Moisture Barriers
For concrete slab foundations, apply a quality concrete sealer after curing to repel water and prevent moisture from wicking up into your shed structure. Reapply sealant every 2-3 years to maintain protection.
For raised foundations, ensure proper ventilation underneath the shed by leaving gaps or installing vents in any perimeter screening. This ventilation prevents moisture accumulation and reduces rot risk in floor systems.
Consider installing a moisture barrier under wooden floors built on gravel or skid foundations. Heavy plastic sheeting under floor joists reduces moisture absorption by the wood, extending floor lifespan significantly.
Building Code Compliance
Before starting any shed foundation work, research your local building codes and regulations. While small sheds sometimes fall under permitting thresholds, many jurisdictions require permits for structures exceeding certain square footage or value limits.
Permit Requirements
Contact your local building department to determine permit requirements for your specific project. Some areas require permits for any permanent structure, while others exempt sheds under 200 square feet. Obtaining permits ensures your foundation meets local requirements and protects your property value and insurance coverage.
Frost Line Requirements
Your local building standards specify minimum frost line depths for your area. This varies dramatically by region—from 0 inches in frost-free areas to 48+ inches in northern climates. Any structure with a foundation must extend below this line to prevent heaving during freeze-thaw cycles.
Setback and Easement Requirements
Check local zoning regulations for setback requirements—minimum distances your shed must maintain from property lines, utilities, and other structures. Many jurisdictions require 5-10 feet from property lines and 10+ feet from wells or septic systems.
Verify that your shed location doesn’t conflict with utility easements. Even if you have permission from your utility company today, easements allow them to access and repair infrastructure, potentially affecting your shed in the future.
Accessibility and Drainage Standards
Some building codes specify drainage requirements around structures, including minimum distances for surface water to flow away from foundations. Codes may also regulate how water can be directed onto neighboring properties.
For larger or commercial sheds, accessibility requirements may apply. While small residential sheds typically have minimal ADA requirements, it’s worth confirming with your building department.
Common Mistakes to Avoid
Learning from others’ mistakes can save you significant time, money, and frustration. Here are the most common shed foundation errors and how to prevent them.
Inadequate Site Preparation
Rushing site preparation is perhaps the most common mistake. Failing to properly clear vegetation, compact soil, or establish correct grade leads to settling, cracking, and water problems years later. Invest adequate time in thorough site preparation—it’s the foundation of everything that follows.
Ignoring Drainage Concerns
Many DIYers underestimate the importance of drainage, assuming their site naturally sheds water. Water that looks dry during construction can become problematic after heavy rains or seasonal changes. Implement comprehensive drainage measures even if they seem unnecessary—the investment pays dividends.
Skipping the Frost Line
Building shallow foundations in freeze-thaw climates virtually guarantees problems. Frost heave forces foundations upward during winter, cracking concrete and stressing structures. Always extend footings below your local frost line—there are no exceptions to this requirement.
Using Untreated Wood
Pressure-treated lumber is essential for any wood-ground contact. Untreated wood rots quickly when exposed to moisture, compromising your foundation’s integrity. Always use pressure-treated or naturally rot-resistant wood for posts, beams, and any other foundation components.
Improper Concrete Curing
Rushing to build on fresh concrete before it fully cures creates weak foundations prone to cracking and settling. Allow minimum 7 days curing time, and keep concrete moist during this period. Cold weather extends curing time—allow 14+ days in temperatures below 50°F.
Inadequate Ventilation Under Raised Structures
Enclosed spaces under raised sheds trap moisture, promoting rot in floor systems. Ensure adequate ventilation by leaving gaps in perimeter screening or installing foundation vents spaced every 8-10 feet.
Neglecting Maintenance
Even excellent foundations require ongoing maintenance. Inspect your foundation annually, regrade if settling occurs, reapply sealant as needed, and maintain gutters and drainage systems. Regular maintenance prevents minor issues from becoming major problems.
FAQ
How deep should a shed foundation be?
Foundation depth depends on your local frost line, which varies from 0 inches in frost-free areas to 48+ inches in northern climates. Any footings must extend below the frost line to prevent heaving. Check your local building code or contact your building department for the specific requirement in your area.
Can I build a shed foundation on clay soil?
Clay soil can work for shed foundations but requires special attention. Clay retains moisture and shifts during wet/dry cycles, potentially causing settling and cracking. Improve clay soil by adding a compacted gravel base layer, ensuring proper drainage around the foundation, and considering a pier system that allows air circulation beneath the structure.
How much does a shed foundation cost?
Foundation costs vary dramatically by type and size. Gravel foundations cost $100-300 for a small shed. Concrete skids run $300-800. Concrete slabs cost $500-2,000+ depending on size and complexity. Pier and post systems typically fall in the $400-1,500 range. Labor costs can double or triple these figures if hiring professionals.
Do I need a permit for a shed foundation?
Permit requirements vary by jurisdiction. Many areas exempt sheds under 100-200 square feet, while others require permits for any permanent structure. Contact your local building department before starting work. Obtaining permits ensures code compliance and protects your property investment and insurance coverage.
How long does concrete take to cure before building on it?
Concrete reaches 70% strength in 7 days and 100% strength in 28 days. For shed foundations, wait minimum 7 days before placing structures on fresh concrete. In cold weather below 50°F, extend curing time to 14+ days. Keep concrete moist during curing by misting and covering with plastic sheeting.
What’s the best foundation for a wet area?
Pier and post foundations work best in wet areas or locations with high water tables. These systems elevate structures above ground, allowing water to flow underneath naturally. Ensure adequate ventilation under the shed and consider installing perimeter drainage to direct subsurface water away from foundation piers.
Can I move a shed after it’s built?
Sheds on gravel or skid foundations can be relocated relatively easily with proper equipment. Concrete slab foundations are essentially permanent, as removing concrete is expensive and time-consuming. If you anticipate moving a shed, consider building on skids or gravel rather than a permanent slab foundation.


