Build a Deck? Expert Tips for Beginners
Building your own deck is one of the most rewarding DIY projects you can undertake. Whether you’re looking to expand your outdoor living space, create an entertainment area, or simply add value to your home, a well-constructed deck serves as the perfect foundation for summer gatherings and relaxation. This comprehensive guide will walk you through everything you need to know to successfully build a deck from start to finish, even if you’ve never picked up a hammer before.
A deck project requires careful planning, proper materials, and attention to safety details. The difference between a deck that lasts decades and one that deteriorates within years often comes down to understanding fundamental construction principles and following local building codes. By following the expert tips in this guide, you’ll gain the confidence and knowledge needed to create a beautiful, safe, and long-lasting outdoor structure that your family will enjoy for years to come.
Understanding Local Building Codes and Permits
Before you drive a single nail into the ground, you must understand and comply with your local building codes and permit requirements. This isn’t just bureaucratic red tape—these regulations exist to ensure your deck is safe, structurally sound, and properly constructed. Building codes vary significantly by location, so what’s acceptable in one municipality may not be in another.
Contact your local building department or visit their website to obtain the specific requirements for deck construction in your area. Most jurisdictions require permits for decks over a certain size (typically 200 square feet) or those elevated more than 30 inches above ground level. The permit process usually involves submitting detailed plans, paying fees, and scheduling inspections at various stages of construction. While this might seem like an extra hassle, inspections actually protect your investment and ensure your deck meets safety standards.
Key code requirements typically include post spacing, joist sizing, railing specifications, and fastener requirements. The International Building Code (IBC) provides the framework that most municipalities adopt and adapt. Understanding snow load requirements, wind resistance, and ground frost depth in your area is essential for proper post installation. Many builders make the mistake of skipping this step, only to face costly corrections or removal orders later.
Planning Your Deck Design and Layout
Successful deck construction begins with thoughtful planning and accurate design. Start by determining the purpose of your deck—will it primarily host large gatherings, provide a quiet retreat, or serve as a dining extension of your home? Your intended use will influence size, layout, and features. A entertaining deck might benefit from multiple levels, while a meditation space requires less square footage but more privacy considerations.
Sketch your deck design on paper, noting dimensions, proximity to your home, and any existing landscape features like trees or slopes. Consider how the deck will integrate with your home’s architecture and existing outdoor spaces. Many homeowners find it helpful to mark out the deck area with string or chalk to visualize the footprint before committing to construction. This allows you to assess sun exposure, sightlines, and traffic flow through your yard.
Size matters both functionally and financially. A 12×16-foot deck provides approximately 192 square feet—enough for a table and chairs with room to move around. However, if you’re planning to host frequent gatherings, consider going larger. Remember that larger decks require more materials and more structural support, which increases costs. Additionally, when planning home renovation projects, consider how your deck integrates with other outdoor improvements you might be planning.
Elevation is another critical planning consideration. Ground-level decks (less than 24 inches high) are simpler and require fewer railings, but they may not provide adequate drainage or prevent moisture accumulation. Elevated decks offer better ventilation and water drainage but require more robust structural support. Check your local frost line depth—this determines how deep your posts must be buried to prevent frost heave during winter months, which can shift your deck and compromise its structural integrity.
Gathering Tools and Materials
Assembling the right tools and materials before you begin is essential for efficient, safe construction. Quality tools not only make the job easier but also produce better results. You’ll need basic hand tools including a hammer, circular saw, drill-driver, level, tape measure, and carpenter’s square. A power miter saw makes angled cuts precise and quick, while a reciprocating saw handles demolition and rough cuts efficiently.
Safety equipment is non-negotiable. Invest in safety glasses, work gloves, a dust mask, and hearing protection. When working at heights, proper fall protection becomes essential. A tool belt keeps frequently-used items within reach, reducing fatigue and improving productivity. Consider renting specialized equipment like a power auger for digging post holes—this saves tremendous time and effort compared to manual digging.
Material selection dramatically impacts your deck’s longevity and maintenance requirements. Pressure-treated lumber remains the most affordable option, with modern treatments making it safer than older arsenic-based formulations. Composite materials like Trex or TimberTech offer superior durability and minimal maintenance but cost significantly more upfront. Tropical hardwoods like Ipe provide exceptional longevity and natural beauty but require specialized tools and expertise to work with. Cedar and redwood offer aesthetic appeal and natural resistance to decay, though they require regular maintenance.
For a typical 12×16-foot deck, you’ll need pressure-treated posts (6×6 or 4×4 depending on spacing), rim joists (typically 2×10 or 2×12), floor joists (2×8 or 2×10), decking boards (2×6 or 2×4), and galvanized or stainless steel fasteners. The National Association of Home Builders provides detailed material lists based on deck dimensions and local requirements. Don’t skimp on fasteners—using corrosion-resistant screws or galvanized nails prevents rust staining and structural failure.
Preparing the Foundation and Posts
A solid foundation is the bedrock of any successful deck. Proper post installation prevents settling, shifting, and structural failure over time. Begin by locating all posts according to your design plan, typically spaced 6 to 8 feet apart depending on joist size and snow load requirements. Mark post locations with spray paint or chalk.
Dig post holes to the depth required by your local frost line—this typically ranges from 2 to 4 feet depending on your geographic location. Use a power auger for efficiency, or rent a hand auger if working with just a few holes. The hole diameter should be approximately 10 inches. Once dug, place a 4-6 inch gravel base in each hole for drainage.
Posts should be set on concrete footings that extend above ground level. This prevents wood-to-soil contact, which accelerates decay. Use concrete tubes (Sonotubes) to create clean, cylindrical footings, or simply pour concrete directly into the hole. For elevated decks, many builders prefer adjustable post bases that allow for height correction after concrete sets. Ensure posts are perfectly plumb (vertical) using a level—even slight angles compound over the deck’s length and compromise structural integrity.
Allow concrete to cure fully (typically 48-72 hours) before proceeding. This patience investment prevents post shifting during frame construction. Consider this similar to the foundation work required when adding major home additions, where proper foundation work prevents costly problems later.
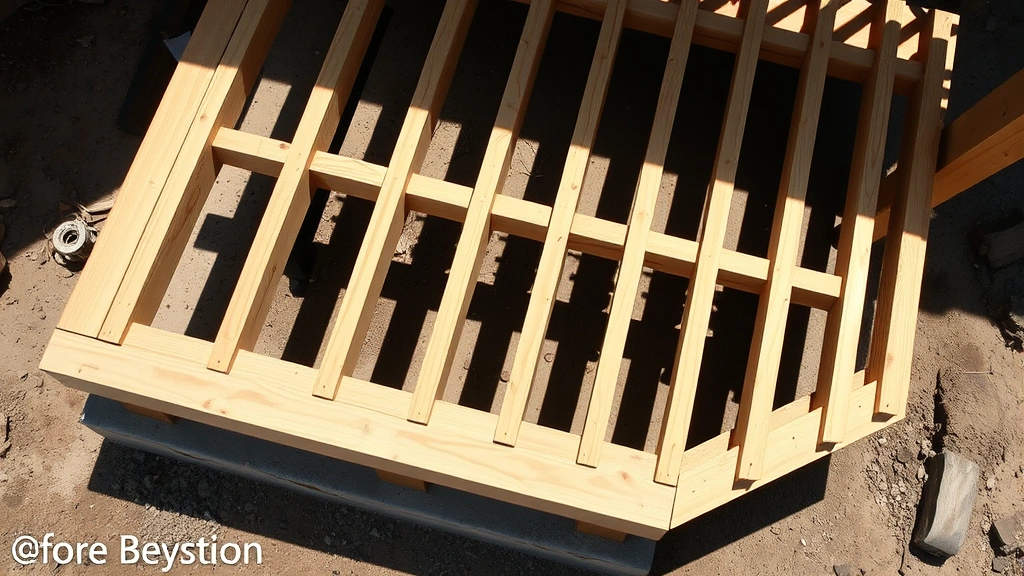
Constructing the Frame and Joists
Once posts are set, you’re ready to build the frame. Install the rim joists (the outer frame members) first, securing them to the posts with galvanized bolts or structural screws. The rim joists must be level and square—take time to verify measurements diagonally across corners. If diagonal measurements are equal, your frame is square.
Install the ledger board (the connection to your house) with special care. This member carries half your deck’s weight, so it must be securely fastened to your home’s rim joist or band board—never to siding. Remove siding where the ledger attaches, and use flashing to prevent water intrusion between the ledger and house. Improper ledger installation is responsible for numerous deck collapses; many jurisdictions now require structural engineers to inspect ledger connections.
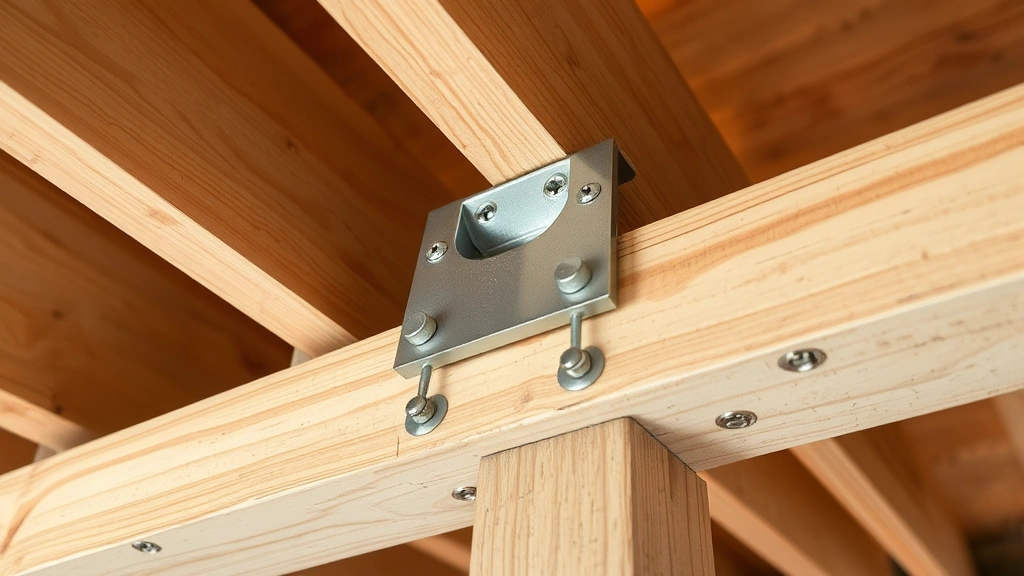
Space floor joists (perpendicular members that support decking boards) typically 16 inches on center for 2×8 joists, or 12 inches on center for 2×6 joists. Check your local building code for specific spacing requirements based on joist size and snow load. Use galvanized joist hangers to secure joists to rim joists and ledger board—these metal brackets distribute loads and prevent wood crushing. Toe-nailing (driving nails at angles) is outdated and significantly weaker than joist hangers.
Install blocking (short pieces between joists) at mid-span for joists over 12 feet long. This prevents joists from twisting and improves overall deck rigidity. Many beginners skip this step, but it’s essential for long-term structural performance. Check that all joists are level before proceeding to decking installation.
Installing Decking and Railings
Decking installation is where your deck truly takes shape. Begin at the house or ledger board and work outward, maintaining consistent spacing between boards (typically 1/8 inch for pressure-treated lumber, which allows for seasonal expansion and contraction). Use a spacer block to maintain uniform gaps—this looks professional and prevents water pooling.
Secure each decking board with two fasteners per joist, using corrosion-resistant screws or hot-dipped galvanized nails. Screws hold better long-term and allow for easier board replacement if needed. Pre-drill screw holes in hardwood to prevent splitting. Stagger board joints across joists to distribute loads and improve appearance. Never align joints in a straight line, as this creates weak points and looks amateurish.
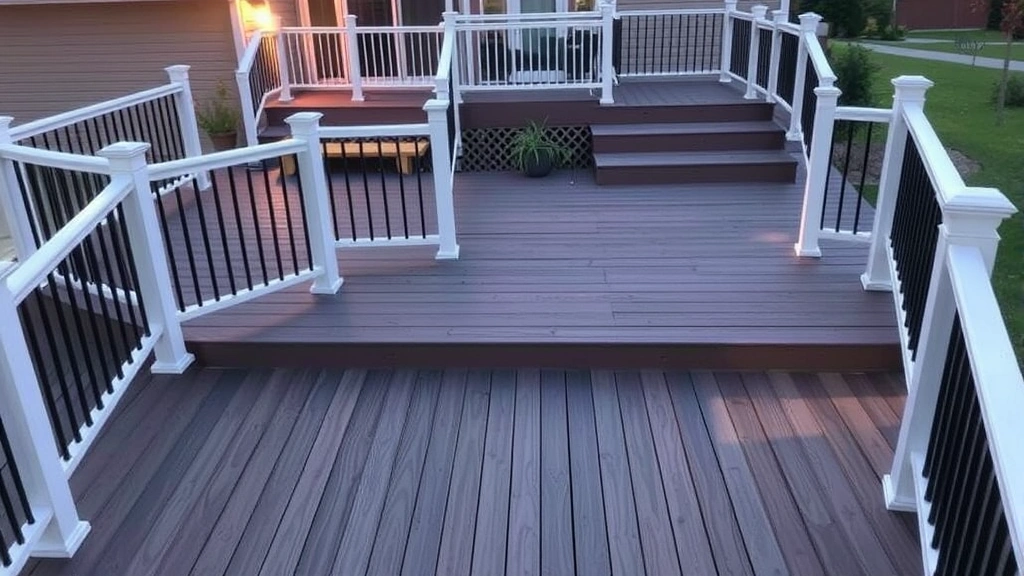
Railings aren’t just aesthetic—they’re essential safety features required by code for decks over 30 inches high. Railings must be at least 36-42 inches tall (check your local code) and withstand 200 pounds of horizontal force without failing. Vertical balusters (spindles) must be spaced no more than 4 inches apart to prevent children from becoming trapped. This spacing requirement is strictly enforced because of serious safety concerns.
Install railings securely to deck framing with bolts or lag screws, never just screws. The connection points carry tremendous stress during use. Many beautiful railing designs are available—from traditional wood balusters to modern cable railings. Whatever style you choose, ensure it meets code requirements and is properly installed. Poor railing installation is a leading cause of deck injuries and liability issues.
Finishing Touches and Maintenance
Once your deck structure is complete, finishing touches enhance both appearance and longevity. Seal or stain your deck to protect wood from UV damage and moisture penetration. This is particularly important for pressure-treated lumber, which benefits greatly from protective finishes. Apply sealer every 2-3 years to maintain protection. Composite decking requires less maintenance but still benefits from occasional cleaning.
Install stairs if your deck is elevated, ensuring they meet code requirements for tread depth, rise height, and railing specifications. Stairs are surprisingly complex—improper rise and run ratios create tripping hazards. Many deck injuries occur on poorly designed stairs, so don’t shortcut this component.
Add finishing details like trim boards, fascia, and skirting to improve appearance and protect the underside from weather and pests. These elements also hide the deck’s infrastructure from view. Consider adding under-deck lighting for ambiance and safety, or a ceiling fan to improve comfort during hot weather. Many homeowners also explore outdoor security features to protect their deck investment.
Regular maintenance extends your deck’s lifespan significantly. Sweep debris regularly, inspect fasteners annually, and address any wood damage promptly. Replace damaged boards before they compromise structural integrity. Check for rot, particularly in areas prone to moisture accumulation. Early detection and repair prevent small problems from becoming major expenses.
Consider how your deck relates to other home improvement projects. Many homeowners find that after completing a deck, they’re motivated to tackle other projects like basement finishing or other outdoor improvements. The skills and confidence you gain building a deck translate well to other construction projects.
FAQ
How much does it cost to build a basic deck?
A basic 12×16-foot pressure-treated deck typically costs $3,000-$5,000 in materials. Labor costs vary significantly by region but generally run $50-$100 per hour. Composite decking increases costs to $8,000-$12,000 for the same size. Always get multiple estimates and verify contractors’ licensing and insurance.
Can I build a deck without a permit?
Building without a permit is never advisable. Unpermitted decks create liability issues, complicate insurance claims, and can result in costly removal orders. Permits exist to protect you and future property owners. The permit cost is minimal compared to potential problems.
How long does a deck typically last?
Pressure-treated decks last 15-20 years with proper maintenance. Composite decks often last 25-30 years. Proper construction, protective finishes, and regular maintenance significantly extend longevity. Cedar or redwood decks require more frequent maintenance but can last 20+ years if well-cared-for.
What’s the best time of year to build a deck?
Spring and early summer offer ideal conditions—warm weather, longer days, and dry conditions facilitate construction. Avoid winter in cold climates where frost can disrupt concrete curing. Late fall is acceptable if you complete work before freezing temperatures arrive.
Do I need a professional engineer for my deck?
Many jurisdictions now require engineer-stamped plans for decks with complex designs or larger sizes. Even if not required, consulting an engineer for elevated decks or unusual configurations provides peace of mind. The cost ($300-$800) is minimal compared to structural failure risks.
What’s the best decking material for my climate?
In wet climates, composite or tropical hardwood resists moisture better than pressure-treated lumber. In dry climates, pressure-treated lumber performs well and costs less. Cedar and redwood work in any climate but require more maintenance. Consider your climate’s specific challenges—heavy snow, extreme heat, or high humidity—when selecting materials.
How do I prevent deck rot and pest damage?
Keep decks dry by ensuring proper drainage, maintaining gutters, and repairing leaks promptly. Use pressure-treated lumber resistant to rot and termites. Seal wood annually with protective finishes. Inspect regularly for damage signs, and address problems immediately. Avoid ground-to-wood contact by elevating the deck structure.
Can I attach a deck to my house myself?
Yes, but the ledger connection requires careful attention. Remove siding, install flashing, and bolt the ledger securely to your house’s rim joist. This is arguably the most critical connection on your deck—improper installation has caused numerous deck collapses. Many jurisdictions require inspections of ledger connections specifically.
For additional information on outdoor construction projects, explore our guide on DIY home improvements, or learn about other construction skills like masonry techniques. The expertise you gain building a deck opens doors to many other rewarding DIY projects.


