
How to Clean Tape Residue: Expert Tips for Every Surface
Tape residue is one of the most frustrating byproducts of construction, renovation, and general household projects. Whether you’re dealing with painter’s tape, masking tape, duct tape, or packaging tape, that sticky, gummy residue left behind can mar surfaces and create an unprofessional appearance. The challenge intensifies when the residue hardens on delicate materials like wood, glass, or painted surfaces where aggressive scrubbing risks causing damage.
Understanding the science behind adhesive residue and learning proven removal techniques will save you time, money, and the headache of ruined surfaces. This comprehensive guide covers every method you need to tackle tape residue effectively, from gentle approaches for sensitive materials to heavy-duty solutions for stubborn buildup. We’ll explore both commercial products and household alternatives that deliver results without requiring specialized equipment.
Why Tape Leaves Residue Behind
Adhesive residue occurs because most tape uses pressure-sensitive adhesives designed to stick permanently until removed. These adhesives contain polymers and tackifying resins that bond to surfaces through molecular attraction. When you peel tape away, the adhesive layer often remains because it adheres more strongly to the surface than to the tape backing itself.
The longer tape sits, the more the adhesive cures and hardens, making removal exponentially more difficult. Heat, sunlight, and humidity accelerate this process. Understanding this chemistry helps you choose appropriate removal methods—you’re essentially trying to break the molecular bonds between the adhesive and the surface beneath, or softening the adhesive enough to roll it away cleanly.
Different tape types present different challenges. Painter’s tape, designed for temporary masking, typically leaves less residue than duct tape or industrial-strength adhesives. However, even quality painter’s tape can leave stubborn marks if left on surfaces for extended periods or exposed to heat and UV rays.
Best Methods for Different Surfaces
Glass and Windows
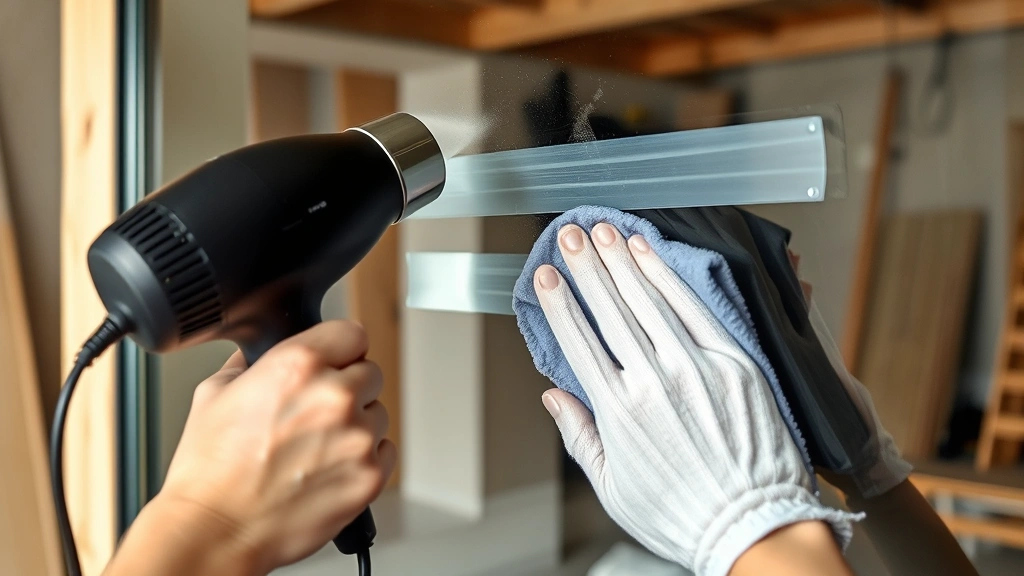
Glass surfaces are forgiving because they’re non-porous and resistant to damage from most cleaning methods. Start with a plastic scraper or old credit card held at a 45-degree angle to gently lift residue. For stubborn buildup, apply rubbing alcohol or isopropyl alcohol solutions directly to the residue and let sit for 30 seconds before scraping. A heat gun set to low temperature can soften adhesive without damaging glass. Follow with glass cleaner and a microfiber cloth for streak-free results.
Painted Surfaces and Drywall
Painted walls and ceilings require the gentlest approach since aggressive scraping removes paint along with residue. Always test removal methods in inconspicuous areas first. Apply heat from a hair dryer on low setting for 20-30 seconds to warm the adhesive, then gently roll the residue away with your fingertip using a slow, steady motion. If this fails, try home improvement projects that involve proper surface preparation by applying a small amount of cooking oil, baby oil, or adhesive remover to a cloth and rubbing gently. Never use solvents like acetone on latex paint.
Wood and Finished Surfaces
Wood finishes demand careful handling to prevent damage to stain or varnish. Start with the gentlest method: warm water and a soft cloth. For hardened residue, apply a small amount of mineral oil or linseed oil to break down the adhesive without affecting the wood’s finish. Let it sit for 2-3 minutes, then gently rub with a soft cloth in the direction of the grain. Avoid plastic scrapers that might gouge the surface; instead, use a rubber eraser or your fingernail. For stubborn cases on unfinished wood, proper cleaning techniques adapted to wood include rubbing alcohol applied sparingly with a cloth.
Fabric and Upholstery
Tape residue on fabric requires prevention-focused strategies since removal risks damaging fibers. If residue occurs, gently roll it away with your fingers first—friction often removes dried adhesive without chemicals. For remaining residue, apply a tiny amount of rubbing alcohol to a white cloth and dab (never rub) the affected area. Always test on hidden fabric sections first. Avoid heat guns on delicate fabrics as synthetic materials may melt.
Plastic and Vinyl
Plastic and vinyl surfaces are durable but can become cloudy or damaged by harsh solvents. Warm water and gentle rubbing removes fresh residue effectively. For aged buildup, apply a small amount of WD-40, silicone spray, or even peanut butter (seriously—the oils break down adhesive) to the residue, let sit briefly, then wipe clean. Test any solvent on an inconspicuous area first, as some plastics react poorly to certain chemicals.
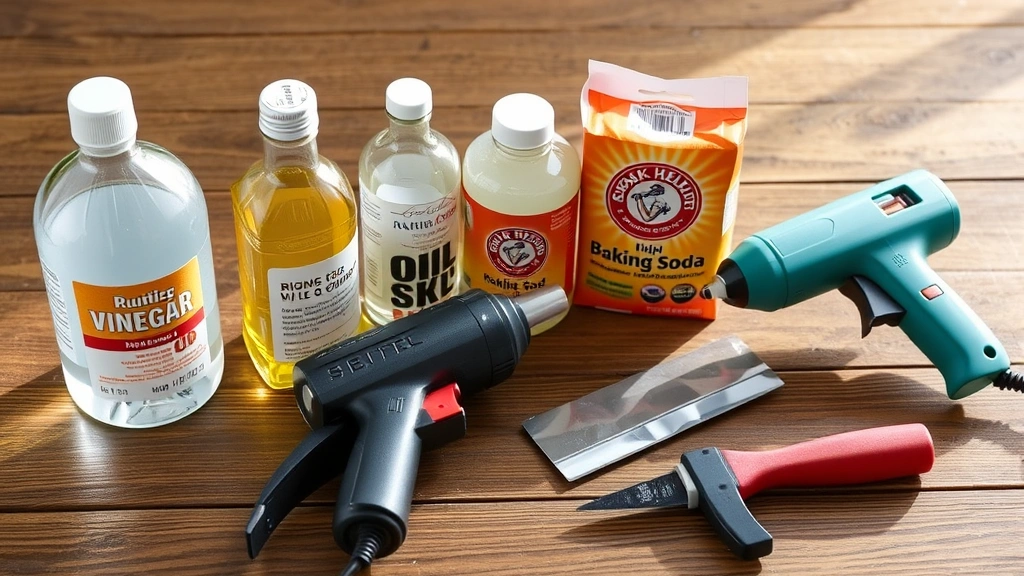
Household Solutions That Work
You likely have effective tape residue removers in your home already. These budget-friendly options work surprisingly well and eliminate concerns about chemical safety around children and pets.
Heat Application
Heat remains one of the most effective and accessible methods. A standard hair dryer on low or medium heat softens pressure-sensitive adhesives without damaging most surfaces. Hold it 4-6 inches away for 20-30 seconds, then gently roll or rub the residue away. A heat gun works faster but risks surface damage if overheated—keep it moving and maintain distance. This method works best on glass, plastic, and vinyl but requires caution on painted surfaces.
Oil-Based Products
Cooking oils, baby oil, mineral oil, and even peanut butter contain compounds that break down adhesive bonds. Apply sparingly to residue, wait 2-3 minutes for penetration, then rub gently with a soft cloth. The oily residue remaining requires additional cleaning with dish soap and warm water, but this two-step process removes even stubborn buildup safely. This approach suits delicate surfaces like wood and leather because it won’t strip finishes.
Alcohol Solutions
Rubbing alcohol (isopropyl alcohol) dissolves many adhesive compounds effectively. Apply it to a cloth rather than directly to the surface to control saturation, then rub gently. Let it sit for 30-60 seconds on stubborn residue before rubbing. This method works excellently on glass, hard plastics, and finished wood, though it may damage some paint types. Always test first.
Vinegar and Baking Soda
White vinegar’s acidity helps break down adhesive bonds. Dampen a cloth with vinegar, apply to residue, and let sit for 5-10 minutes before rubbing. For extra power, make a paste with baking soda and vinegar, apply to residue, and let dry slightly before rubbing away. This combination is safe for virtually all household surfaces and leaves no toxic residue.
Citrus-Based Cleaners
D-limonene, extracted from citrus peels, is a natural solvent that effectively dissolves adhesives. Commercial citrus cleaners (like Goo Gone) leverage this compound, but you can also use fresh lemon juice or orange peel rubbed directly on residue. The natural oils penetrate adhesive bonds, making removal easier. This method smells pleasant and works safely on most surfaces.
Commercial Products Worth Trying
When household methods fall short, commercial adhesive removers offer concentrated solutions designed specifically for this challenge. Understanding product types helps you choose appropriately for your situation.
Solvent-Based Removers
Goo Gone and similar products use citrus solvents and petroleum distillates to dissolve adhesives quickly. These work exceptionally well on tough residue but require good ventilation and careful surface testing. They’re ideal for glass, hard plastics, and metal surfaces. Follow product instructions carefully, as leaving these products on delicate surfaces too long can cause damage.
Adhesive Remover Sprays
Purpose-built adhesive removers like 3M Adhesive Remover spray deliver concentrated solvents in convenient packaging. These products typically work within minutes and require minimal effort. They suit commercial applications and heavy-duty residue but cost more than household alternatives. Use in well-ventilated areas and follow safety precautions on the label.
Rubbing Compound
Automotive rubbing compound, designed to remove oxidation and light scratches from car paint, also effectively removes tape residue from painted surfaces. Apply with a soft cloth, rubbing in circular motions, then buff away. This method works particularly well because it gently polishes the surface while removing adhesive. Test on inconspicuous areas first.
Specialized Fabric Removers
Products formulated specifically for fabric and upholstery minimize fiber damage while dissolving adhesive. These typically contain gentler solvents and are designed for delicate materials. Apply sparingly, let sit briefly, and dab rather than rub.
Prevention Strategies
The best tape residue removal is preventing it in the first place. These strategies minimize cleanup requirements during your next cleaning project or renovation.
Choose the Right Tape
Quality painter’s tape (blue or green tape specifically labeled for delicate surfaces) leaves minimal residue. Brands like 3M ScotchBlue and FrogTape are formulated to release cleanly. For temporary masking, these products cost slightly more but save hours of cleanup. Avoid cheap masking tape that hardens quickly and bonds permanently.
Remove Tape Promptly
Don’t leave tape on surfaces longer than necessary. Remove painter’s tape while paint is still wet or immediately after it dries—once it cures fully, the adhesive hardens and removal becomes difficult. Many painters remove tape within 24 hours of painting to prevent this issue.
Temperature Control
Heat accelerates adhesive curing. If possible, keep taped surfaces cool and out of direct sunlight. This is particularly important for outdoor projects where UV exposure hardens adhesive rapidly. In extreme heat, check tape daily and remove if residue begins forming.
Surface Preparation
Clean surfaces before applying tape. Dust and dirt particles prevent proper adhesive contact, sometimes causing residue as the tape releases from the surface rather than the adhesive bonding. A quick wipe with a damp cloth ensures better tape adhesion and cleaner removal.
Safety Considerations
Tape residue removal involves chemical and physical hazards worthy of attention. Understanding safety prevents injury and damage.
Ventilation Requirements
Solvent-based removers release fumes that can cause dizziness, headaches, and respiratory irritation. Always work in well-ventilated areas, open windows, and run exhaust fans. Wear a respirator mask if working indoors with strong solvents for extended periods. Never use these products in closed spaces.
Skin and Eye Protection
Chemical adhesive removers can irritate skin and eyes. Wear nitrile gloves when handling solvents and avoid touching your face. If product contacts eyes, flush immediately with water for 15 minutes and seek medical attention. Some people develop contact dermatitis from prolonged solvent exposure, so wash hands thoroughly after use.
Material Compatibility
Always test removal methods on inconspicuous areas before treating visible surfaces. Some solvents dissolve paint, damage plastic finishes, or bleach fabric colors. What works on glass might damage painted trim. Taking five minutes to test prevents costly mistakes.
Tool Safety
When using scrapers or heat guns, maintain awareness of your surroundings. Heat guns can ignite flammable materials—keep them away from curtains, paper, and insulation. Plastic scrapers are safer than metal ones for most surfaces, but even plastic can gouge soft materials if you’re not careful. Work methodically rather than forcefully.
Ladder and Height Safety
If removing tape residue from ceilings or high walls, use proper ladder safety. Never overreach; reposition your ladder frequently. Have someone spot you if possible. Falling from height causes far more damage than tape residue ever will.
FAQ
Will vinegar remove old, hardened tape residue?
Vinegar’s mild acidity helps break down some adhesives, particularly on non-porous surfaces like glass. For hardened residue, combine vinegar with heat (apply vinegar-dampened cloth, then use a heat gun) for better results. Patience matters—let vinegar soak for 10+ minutes on stubborn residue before rubbing.
Can I use a pressure washer for outdoor tape residue?
Pressure washers work on hard outdoor surfaces like concrete and metal but risk damaging painted surfaces, wood, and vinyl. Start with low pressure (under 1500 PSI) and maintain distance. For delicate outdoor surfaces, stick with gentler chemical methods.
Is Goo Gone safe for all surfaces?
Goo Gone works on most hard surfaces but can damage some plastics, rubber, and painted finishes. Always test on hidden areas first. Never use on leather or delicate fabrics. The product requires good ventilation and should not contact skin for extended periods.
How do I remove tape residue from car paint?
Car paint requires gentle treatment. Apply rubbing alcohol or automotive clay bar to residue, then rub gently with a soft cloth. For stubborn buildup, use a heat gun on low setting. Avoid harsh solvents that strip clear coat. If uncertain, consult a professional detailer.
What’s the fastest method for removing lots of tape residue?
Heat combined with a solvent works fastest for large areas. Use a heat gun to soften adhesive, apply citrus-based remover or rubbing alcohol, then roll away residue. For commercial projects with extensive residue, professional-grade adhesive removers applied systematically save the most time.
Can I use WD-40 on all surfaces?
WD-40 effectively removes tape residue from plastic, metal, and glass but can stain porous materials like fabric and wood. Test first. The product leaves an oily residue requiring follow-up cleaning with dish soap and water.
Why does some tape residue return after cleaning?
Incomplete adhesive removal leaves microscopic residue that can re-adhere to dust particles or become sticky again with heat. For stubborn cases, repeat the removal process or use stronger solvents. Sometimes multiple light applications work better than one aggressive attempt.
Is rubbing alcohol safe for all paint types?
Rubbing alcohol is generally safe for oil-based and acrylic paints but can damage some latex formulations. Test on an inconspicuous area first. Use sparingly and don’t let it pool on the surface. Diluting alcohol with equal parts water reduces risk on sensitive finishes.
How can I remove tape residue from antique or valuable surfaces?
For valuable items, consult a professional conservator before attempting removal. If proceeding yourself, use only the gentlest methods: warm water, mild soap, or mineral oil applied with extreme caution. Avoid all solvents and heat until confirming they won’t damage finishes or materials.
What should I do if removal methods damage the surface?
Stop immediately and assess the damage. For minor paint scuffs, touch-up paint may restore appearance. For deeper damage, professional refinishing might be necessary. Document what removal method caused damage to guide decisions on other affected areas. Some damage is better left untouched than made worse by continued removal attempts.


