Table of Contents
Introduction
Picture this: you’re out on the water, casting a line with a fishing rod you built with your own hands. Every component chosen by you, every detail crafted to match your style. There’s honestly nothing quite like it. The satisfaction runs deeper than just catching fish—it’s about the pride of using something you created from scratch, piece by piece.
Building your own fishing rod isn’t just a money-saving hack (though that’s a nice bonus). It’s about really understanding your gear and putting your personal stamp on every element. You get to pick the perfect materials, master some pretty cool assembly techniques, and watch a simple rod blank transform into something uniquely yours. If you’ve ever tackled projects like DIY woodworking plans or DIY flooring installation, you know that sweet spot where patience meets creativity—and that’s exactly what rod building is all about.
Now, let’s talk materials. Rod blanks, reel seats, guiding rings—it might sound overwhelming at first, but here’s the thing: quality materials make all the difference. Just like when you’re building a tiny house or installing kitchen cabinets, understanding what you’re working with and knowing your tools inside and out separates amateur work from professional results. Plus, there’s something deeply satisfying about working with your hands and creating something that’ll last.
Here’s what I love about rod building—it fits perfectly into that whole DIY lifestyle. You know how some people get hooked on DIY car repairs or spend hours perfecting DIY paper crafts? Rod building scratches that same itch. And the aesthetic choices? They’re endless. Cork or EVA foam for the handle, decorative wrap patterns that catch the light just right—it’s like personalizing a DIY body scrub or choosing that perfect color for house painting. Every choice reflects who you are.
What You’ll Learn in This Guide
We’re going to walk through everything together—from your first material selection to that final cast with your completed rod. Whether you’re completely new to this or looking to step up your technique, I’ve got you covered.
- Choosing the Right Materials: We’ll explore everything you need—rod blanks, reels, guides, handles, the works. You’ll learn what makes quality components worth the investment and which tools will make your life easier.
- Types of DIY Fishing Rods: Different fishing styles need different rods. We’ll break down spinning rods, fly fishing setups, baitcasting options, and help you figure out which direction matches your fishing dreams.
- Step-by-Step Assembly: This is where the magic happens. From prepping your rod blank to wrapping thread like a pro, applying that glass-smooth epoxy finish, and mounting everything securely—we’ll take it one step at a time.
- Customization and Maintenance: Want to make your rod truly one-of-a-kind? We’ll cover creative ways to add your personal touch, plus the maintenance tricks that’ll keep your rod performing beautifully for years to come.
The sections ahead will give you everything you need to make this project both enjoyable and successful. Just like mastering DIY RV renovations or tackling DIY tiny house projects, building a fishing rod takes some patience and a willingness to learn as you go. But here’s what you get in return: practical skills that’ll serve you well, and a deeper connection to every fishing trip you take.
I’ll walk you through each technique with clear instructions and real-world tips that actually work. Whether you’re tired of settling for store-bought rods or you’re just itching for a hands-on creative challenge, rod crafting delivers that perfect blend of function and artistry. You’ll end up with something that’s not just useful—it’s uniquely yours.
Ready to start building? Your custom fishing rod adventure starts right here. Let’s create something that’ll make every cast feel special and turn heads at the dock. Time to get our hands dirty!
Want to build your own fishing rod? You’re in for a treat. There’s something special about crafting a rod with your own hands—every cast feels more personal, every catch more meaningful. You get to pick exactly what materials go into it, how it feels in your grip, and how it performs on the water. We’re going to walk through everything you need to know, from choosing the right materials to putting it all together. Whether you’ve never built a rod before or you’re looking to create something truly custom, let’s dive into what makes a great DIY fishing rod.
Essential Materials and Tools for Crafting a Durable Fishing Rod
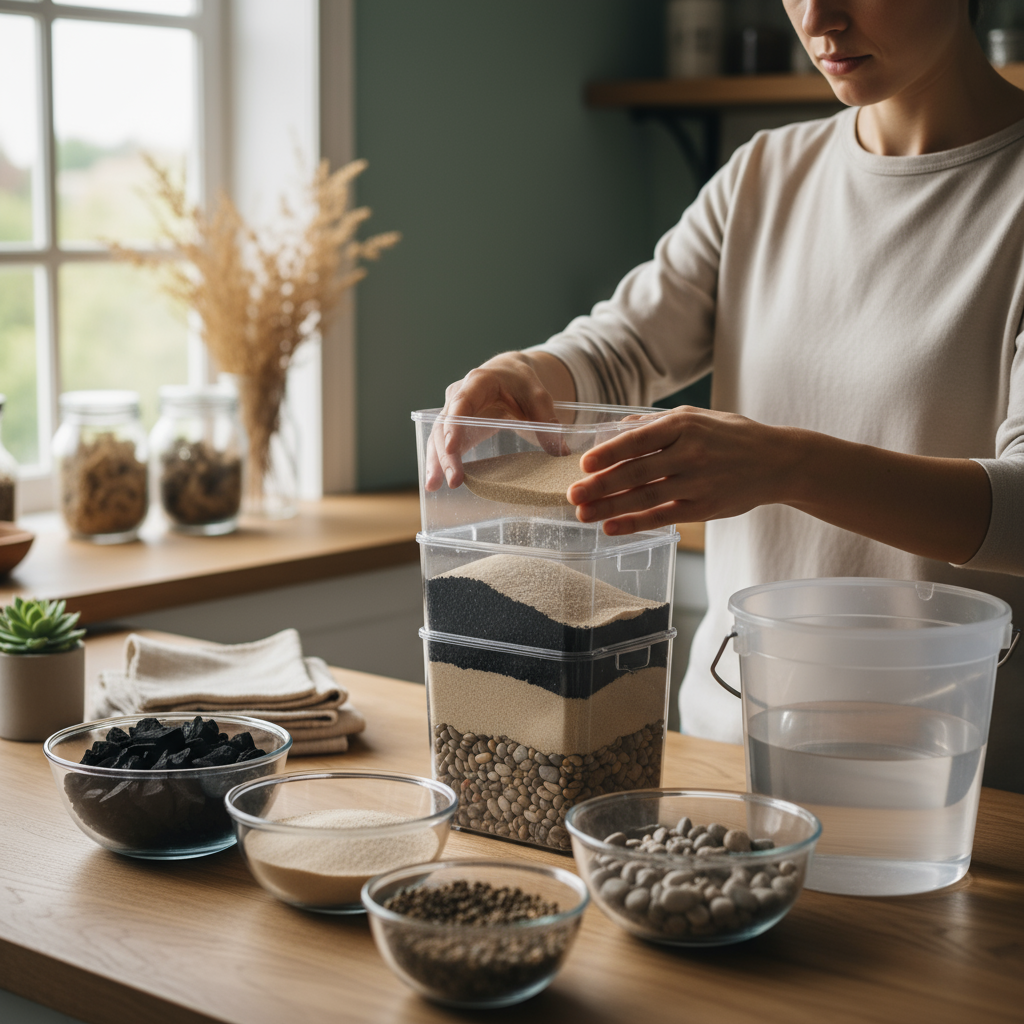
Here’s the thing about building fishing rods—your materials make or break the final product. Literally. Start with your rod blank because this is your foundation. Think of it as the skeleton of your rod. Blanks come in different materials and flex patterns, so you’ll want to match yours to how you fish. Going after bass in heavy cover? You’ll need something different than if you’re casting for trout in a mountain stream.
Your reel seat needs to hold your reel rock-solid while keeping everything balanced in your hands. Then there are guides and tips—these might seem like small parts, but they’re doing all the work of managing your line. Go cheap here, and you’ll regret it when they start corroding or your line starts fraying. Quality thread and epoxy are what actually hold everything together and give your rod that professional finish. And don’t overlook your handle material. Cork feels natural and classic, while EVA foam can take a beating and still look good. For some creative ideas on working with different materials and techniques, check out DIY woodworking plans—there are some clever approaches that might spark ideas for your rod building.
Now, about tools. You could try to wing it, but having the right equipment makes this whole process so much smoother. A rod wrapper keeps your thread even and tight—trust me, trying to do this by hand is an exercise in frustration. Epoxy application is almost an art form, and having the right supplies means the difference between a smooth, glass-like finish and something that looks like it was done in a hurry. Different grits of sandpaper help you prep surfaces properly and smooth out any rough spots. Don’t forget safety gear—epoxy fumes aren’t something you want to mess around with. Precision matters too, so good measuring tools and sharp cutters will save you headaches later. If you want to get better at handling detailed work like this, exploring DIY car repairs can actually teach you a lot about patience and precision that applies perfectly to rod building.
Key Components of Quality Materials and Tools
These are the building blocks that’ll determine whether your rod feels like a custom masterpiece or a wobbly disappointment.
- Rod Blanks: Available in graphite, fiberglass, or composites, blanks determine flexibility, strength, and sensitivity. Selecting the right blank based on fishing style is crucial for effective casting and fish fighting.
- Reels and Reel Seats: Reel seats secure the reel to the rod, providing balance and control. Materials vary from aluminum to graphite composites, affecting weight and durability.
- Guides and Tips: These components guide the fishing line and reduce friction, with inserts made from ceramic or other wear-resistant materials to ensure long-lasting smooth line movement.
- Thread and Epoxy: High-quality thread provides the binding strength to hold guides in place, while epoxy seals and protects wraps from moisture and abrasion, ensuring a sleek, polished finish.
- Handle Materials: Cork offers a lightweight, natural grip with good insulation, whereas EVA foam is durable, resistant to UV and moisture, and preferred for heavy-duty use.
Getting familiar with these components helps you mix and match to create something that’s truly yours. Once you’ve got your materials sorted out, the real fun begins—actually putting it all together.
Ready to get your hands dirty? The assembly process is where all your planning pays off, and where you’ll really see your vision come to life.
Step-by-Step Guide: Assembling Your Custom DIY Fishing Rod
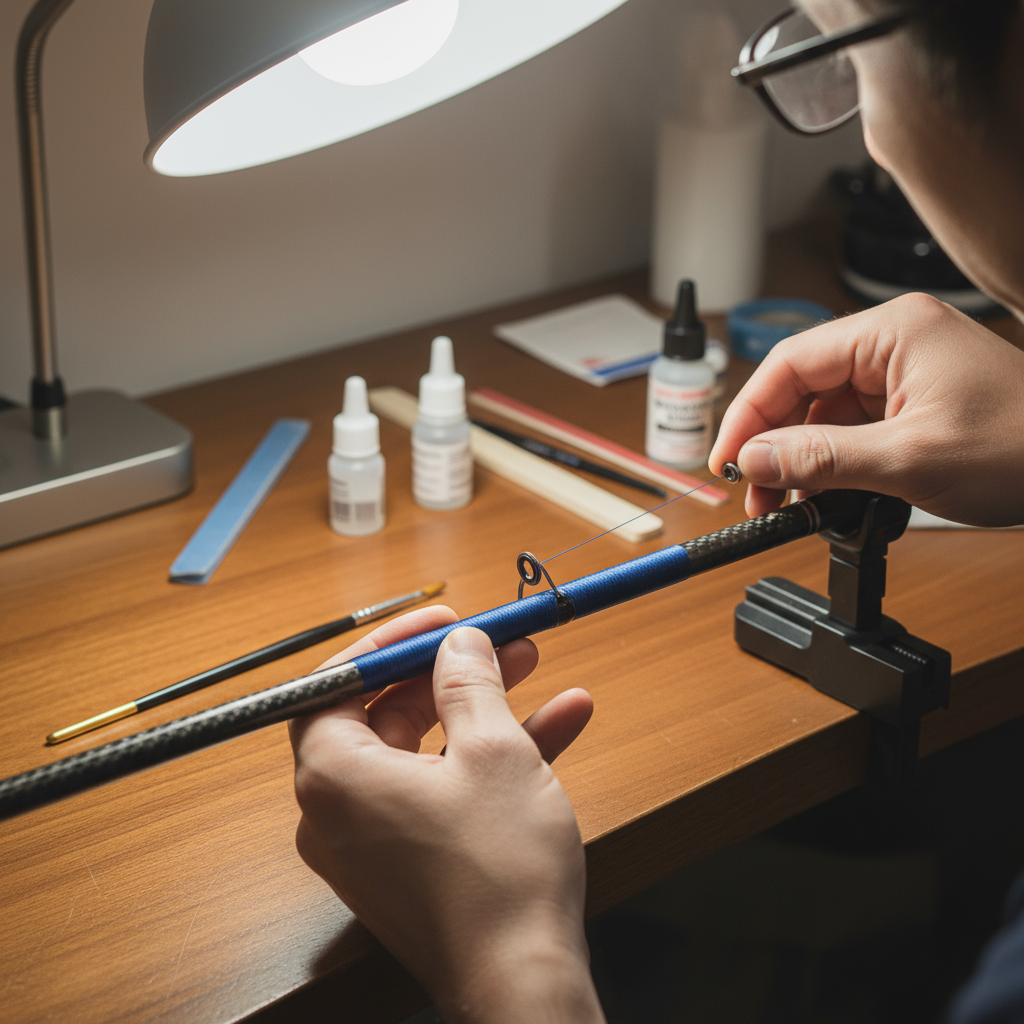
Building your rod is like following a recipe—skip steps or rush through them, and you’ll taste the difference. We start with prepping that rod blank, which means getting the measurements right, sanding it smooth, and sealing it properly. No shortcuts here. Next comes guide installation, and this is where many first-time builders either nail it or end up frustrated. Mark your positions carefully, wrap those guides with steady hands, and double-check your alignment as you go.
The epoxy stage? This is make-or-break time. Too little and your wraps won’t be protected. Too much and you’ll have drips and uneven spots that’ll bug you every time you use the rod. Take your time, follow the curing instructions, and resist the urge to handle it before it’s fully set. Finally, mounting your handle and reel seat brings everything together. This is when it starts feeling like an actual fishing rod instead of a collection of parts. Want to see how other detailed assembly projects work? The principles in DIY blinds installation actually translate well—same attention to detail, same patience required.
Here’s what separates good rod builders from frustrated ones: taking your time and getting each step right before moving on. Measure twice, cut once applies big time here. When you’re sanding, think smooth and even—any rough spots will show up later. Guide placement needs to be spot-on because there’s no easy way to fix it if you mess up. Your thread wrapping technique will improve as you go, but start with consistent tension and work from there. And when it comes to epoxy, cleanliness and timing are everything. If you’re into DIY projects that require this kind of step-by-step precision, you might enjoy reading about DIY RV renovations—similar methodical approach, similar satisfaction when you get it right.
Essential Construction Steps to a Successful Rod Build
Nail these steps, and you’ll have a rod that performs as well as anything you could buy—maybe better.
- Preparing the Rod Blank: Select the blank suited to your fishing technique, measure to desired length accurately, sand surface to remove imperfections, and apply sealant to protect against moisture and damage.
- Installing the Guides: Mark guide locations according to rod specifications, wrap each guide carefully with thread ensuring tight, even coils, and check alignment frequently for consistent line flow.
- Applying Epoxy and Assembly: Coat thread wraps with epoxy resin carefully to seal and strengthen, using proper mixing and curing methods. Mount the handle and reel seat securely with adhesive or screws, verifying balance and comfort.
- Final Inspection and Testing: After curing, inspect the rod for uniform finish, guide security, and smoothness. Test flexibility and balance with gentle flexing to ensure readiness for fishing use.
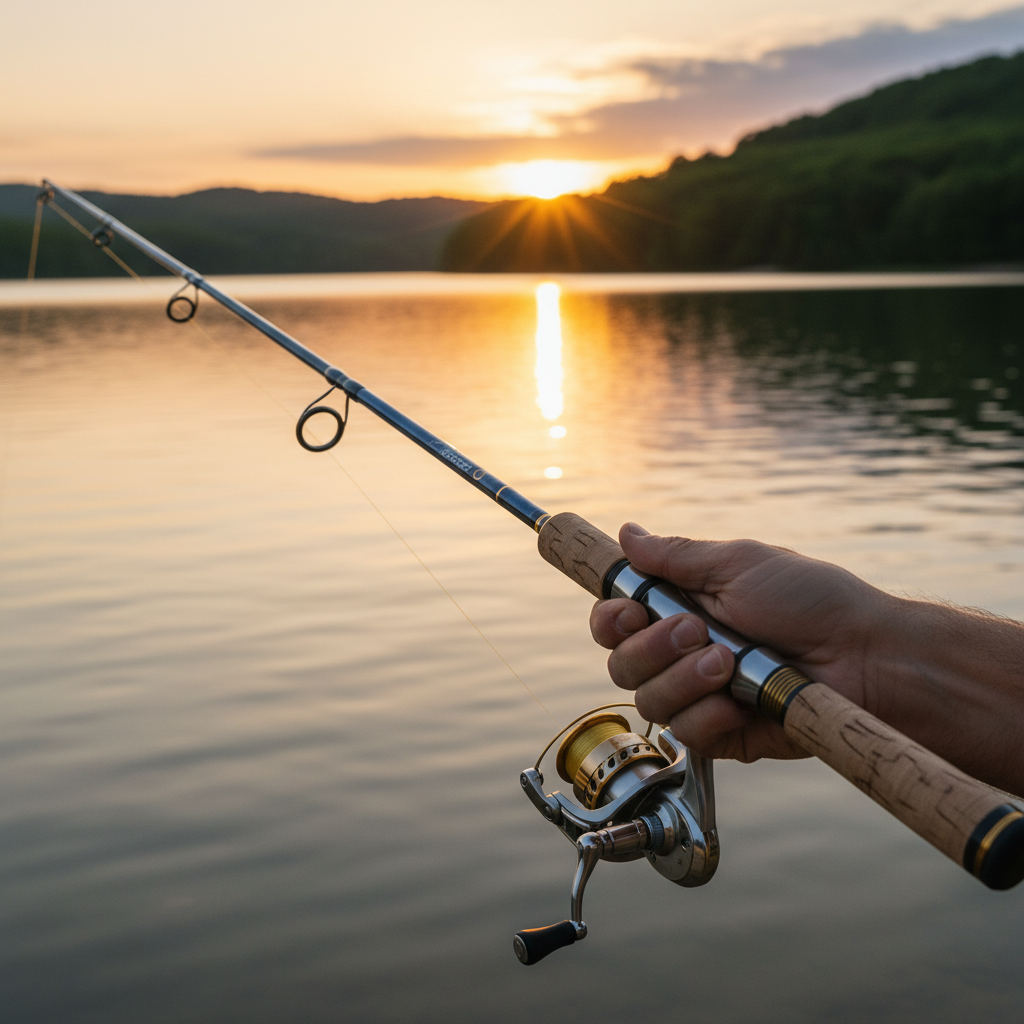
So here we are—you’ve just learned how to build your own fishing rod from scratch. Pretty cool, right? This isn’t just another weekend project. It’s about creating something that’s uniquely yours, perfectly matched to how you fish. From picking that first rod blank to watching the epoxy cure on your final wrap, every step builds toward something special.
What I love most about this whole process? The customization possibilities are endless. Want a rod that’s perfect for those early morning bass trips? You can build that. Need something light for creek fishing? You’ve got the skills now. And when you’re out on the water using something you crafted with your own hands—well, that’s a feeling you can’t buy.
Here’s the thing about maintaining your rod: treat it right, and it’ll serve you for years. Clean it after each trip, store it properly, and don’t be afraid to make small repairs when needed. You built it, so you understand it better than anyone. That knowledge makes you the best person to keep it in top shape.
Ready to take your DIY skills even further? Your rod-building experience has given you some solid foundation skills that translate beautifully to other projects. If you enjoyed working with your hands and being precise with materials, you might love diving into DIY woodworking plans—the attention to detail you’ve developed will serve you well there. Or maybe you’re ready for something that requires the same methodical, step-by-step approach you just mastered? Check out our DIY flooring installation guide. And for those who caught the DIY bug and want to tackle mechanical projects, our DIY car repairs guide is perfect for beginners looking to expand their skills.
You’ve got the knowledge, you’ve got the confidence, and most importantly, you’ve got that DIY spirit that makes all the difference. Your first rod won’t be your last—trust me on that. Each one you build will be better than the previous one. So get out there, test that rod, and start planning your next build. The water’s calling!
Frequently Asked Questions
-
What is the easiest type of fishing rod to build?
- Spinning rods are generally the easiest for beginners to build due to their simple design.
-
How long does it take to build a DIY fishing rod?
- The building process typically takes a few hours to a couple of days, depending on complexity and curing times.
-
Can I customize the rod’s length and power?
- Yes, choosing the right rod blank allows you to tailor length and power to your fishing needs.
-
Where can I purchase materials for making fishing rods?
- Specialty fishing tackle shops and online stores offer rod blanks, guides, and accessories.
-
What maintenance does a DIY fishing rod require?
- Regular cleaning, drying, and proper storage will ensure longevity and performance.