Build a Shed: Expert Tips for Speedy Success
Building a shed is one of the most rewarding DIY projects you can undertake, combining practical construction skills with the satisfaction of creating permanent outdoor storage. Whether you’re storing garden tools, seasonal equipment, or creating a workshop space, a well-built shed adds both functionality and value to your property. The timeline for completing a shed project varies significantly based on size, complexity, design, and your experience level, but with proper planning and expert guidance, most homeowners can complete a modest 8×10 shed in 2-4 weeks of active work.
The key to speedy success lies in thorough preparation, understanding local building codes, gathering quality materials before you start, and following a logical construction sequence. This comprehensive guide walks you through every stage of the shed-building process, from site selection and foundation work through framing, roofing, and finishing touches. We’ll share insider tips from experienced builders, explain how to avoid common delays, and provide realistic timelines for each phase so you can plan your project effectively.
Planning and Permits: Foundation for Success
Before breaking ground, invest time in comprehensive planning to prevent costly mistakes and delays. Start by checking your local building codes and zoning regulations, which typically specify setback requirements, height restrictions, and whether your shed needs a permit. Many jurisdictions require permits for structures over 100-120 square feet or those located within certain distances from property lines.
Contact your local building department to understand permit requirements specific to your area. Processing times typically range from 1-3 weeks, so submit applications early. You’ll need detailed plans showing dimensions, materials, foundation type, and roof pitch. Use professional design resources or quality shed plan software to create accurate drawings. When designing your DIY project, consider whether you want a simple gable roof or more complex designs, as complexity directly impacts construction time.
Create a detailed material list organized by phase: foundation, framing lumber, roofing materials, siding, and hardware. Pre-ordering materials ensures availability and prevents project delays waiting for deliveries. Calculate exact quantities using your plans to avoid multiple trips to the supplier. Budget 10-15% extra for waste and mistakes—this cushion saves both time and money.
Site Preparation and Foundation Work
Proper site preparation determines your shed’s longevity and construction ease. Choose a level location with good drainage and adequate space for materials staging. Clear the area of vegetation, rocks, and debris. Mark the perimeter using stakes and string lines, ensuring square corners by measuring diagonals—they should be equal if your rectangle is true.
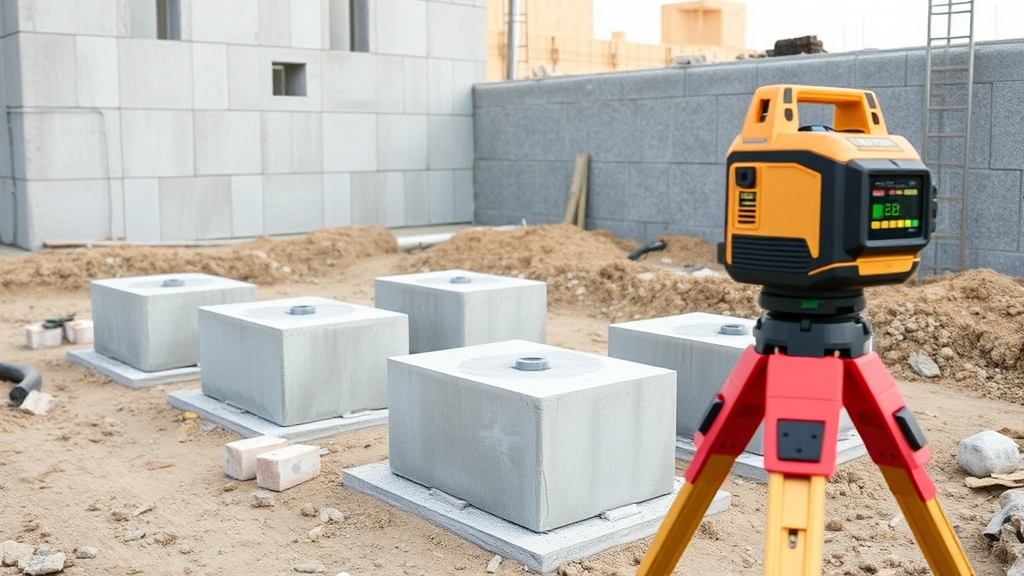
Foundation type significantly affects timeline. Concrete pads (4-6 concrete piers) are fastest, taking 1-3 days for preparation and pouring, then 3-7 days curing before framing begins. Gravel or crushed stone foundations work for smaller sheds but require more maintenance. A full concrete slab takes longer but provides excellent protection and a clean floor surface.
For concrete pier foundations, dig holes 2-3 feet deep below frost line (varies by region—check local requirements), set concrete pier blocks, and verify they’re level using a 4-foot level. This method typically takes 2-3 days total. Allow concrete to cure fully before proceeding; rushing this step compromises structural integrity. While the foundation cures, organize your framing materials and assemble any pre-fabricated components.
Pro tip: Rent a transit level or laser level for foundation work—it saves hours compared to manual leveling methods and ensures accuracy that prevents frame complications later.
Framing the Shed Structure
Framing typically represents 30-40% of total construction time but is critical for structural integrity. Begin by building the base frame from pressure-treated lumber, securing it to foundation piers with galvanized bolts. The base frame must be perfectly level and square—take extra time here as mistakes compound through every subsequent step.
Wall framing follows standard construction methods: build walls flat on the ground, then raise and brace them. This approach is faster than building walls in place. Use 2×4 lumber for standard sheds, spacing studs 16 inches on center. For an 8×10 shed, you’ll have four wall sections that typically take 1-2 days to frame completely.
Install headers above door and window openings, ensuring they’re properly sized per wood construction standards. Temporary diagonal bracing during wall raising prevents collapse and injury—never skip this safety step. Once all walls are up and plumb, install the top plates and begin roof framing.
Roof framing complexity varies by design. Simple gable roofs with standard 4:12 pitch take 1-2 days for an 8×10 shed. More complex roof designs, dormers, or steep pitches require additional time. Pre-calculate rafter cuts or purchase pre-cut trusses to accelerate this phase. Pre-cut trusses are slightly more expensive but save substantial time—often 1-2 days per shed.
Sheathing the roof with plywood typically takes 1 day for a small shed. Use exterior-grade plywood and secure with galvanized nails or screws spaced per code (typically 6-8 inches on edges, 12 inches in field). Proper sheathing is essential for weather resistance and structural rigidity.
Roofing Installation and Weather Protection
Once sheathing is complete, install roof underlayment immediately to protect against weather. Synthetic underlayment is faster than felt and more durable. Overlap courses properly and secure according to manufacturer specifications and local wind codes.
Asphalt shingle installation typically takes 1-2 days for a small shed. Start at the eaves, working toward the ridge, maintaining proper overlap and nail placement. Use roofing nails rated for your climate zone—incorrect fastening causes premature failure. Metal roofing installs faster (often 1 day for small sheds) but requires different techniques and special fasteners.
Install flashing around any roof penetrations, at valleys, and where the roof meets walls. Proper flashing prevents water intrusion that can damage framing and interior contents. This critical step shouldn’t be rushed—take time to ensure all seams are sealed and properly overlapped.
Consider your local climate when selecting roofing materials. National Roofing Contractors Association guidelines help you choose materials appropriate for your region’s weather patterns, ensuring your shed remains weather-tight for decades.

Siding, Doors, and Exterior Finishing
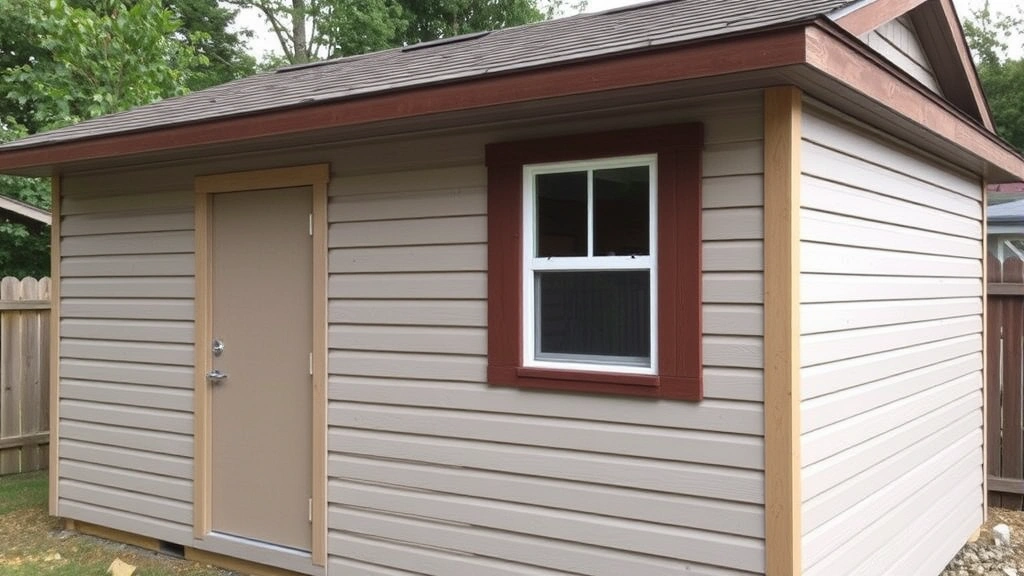
With the roof weather-tight, exterior finishing can proceed. Wall sheathing (plywood or OSB) should already be installed during framing. Now apply weather-resistant barrier (house wrap) before siding installation. This vapor-permeable membrane allows moisture escape while preventing water infiltration.
Siding options include horizontal lap siding, vertical board-and-batten, plywood panels, or metal. Horizontal lap siding takes longest (2-3 days for small shed) as each piece must be cut, fitted, and fastened individually. Plywood siding is faster (1-2 days), requiring fewer pieces and fasteners. Consider pre-primed or pre-finished options to reduce painting time later.
Door and window installation happens before final siding. Use pre-hung exterior doors and windows designed for shed applications. Install them in rough openings created during framing, ensuring they’re level, plumb, and square. Flash around all openings to prevent water infiltration. This typically takes 1-2 hours per opening.
Trim work includes fascia, soffit, and corner boards. Quality trim installation protects the structure and improves appearance. Paint or stain all exterior wood before final assembly if possible—this accelerates the finishing phase and ensures complete coverage. Consider painting techniques that allow faster application, such as roller methods for large flat surfaces.
Interior Setup and Final Details
Interior finishing depends on your shed’s intended use. For basic storage, flooring might be gravel or simple wood pallets. Workshop sheds benefit from finished flooring—plywood subfloor with paint or rubber coating takes 1-2 days and provides durable, cleanable surface.
Install shelving, workbenches, or storage systems appropriate for your needs. Wall-mounted options are fastest and maximize space. Heavy-duty shelving rated for your stored items ensures safety and functionality. Electrical installation requires licensed electrician in most jurisdictions—budget 1-2 days if needed.
Interior wall finishing is optional. Uninsulated walls work fine for storage; if you want climate control or insulation, add foam board or fiberglass batts between studs before interior sheathing. This adds 2-3 days but significantly improves functionality for sensitive items or workshop use.
Final details include caulking gaps, installing gutter systems, and site cleanup. Gutters prevent water damage to foundation and siding, making them worthwhile additions. Paint or stain interior walls if desired. These finishing touches typically take 2-3 days total.
Timeline Breakdown by Project Size
8×10 Shed (Standard Small Shed): Planning and permits (2-3 weeks), site prep and foundation (3-5 days), framing (4-5 days), roofing (2-3 days), siding and doors (3-4 days), interior and finishing (2-3 days). Total active construction: 14-20 days, plus 3+ weeks for permits and foundation curing.
10×12 Shed (Medium Storage): Add approximately 3-4 days to small shed timeline. Total active construction: 18-25 days. Permits remain 2-3 weeks if required.
12×16 Shed (Large Workshop): Significantly more complex; expect 25-35 days active construction. More wall sections, larger roof, and additional interior systems increase timeline. Permits may take longer for this size.
These timelines assume favorable weather, no major errors, and continuous work. Weather delays, material shortages, or learning curve adjustments can extend projects by 1-3 weeks. Working with a helper or team accelerates progress significantly—most tasks are 30-50% faster with two people versus working alone.
Realistic planning accounts for 1-2 unexpected delays and weather interruptions. Build 1-2 weeks buffer into your schedule, especially if building during unpredictable seasons. Starting earlier than your deadline prevents stress and rushed work that compromises quality.


