How to Build a Deck: Pro Tips Inside
Building a deck transforms your outdoor space into a functional entertainment area while adding significant value to your home. Whether you’re a seasoned DIY enthusiast or tackling your first major project, understanding the fundamentals of deck construction ensures a safe, durable structure that will withstand years of use. This comprehensive guide walks you through every phase of deck building, from initial planning and material selection through final finishing touches.
A well-constructed deck requires careful attention to local building codes, proper foundation techniques, and quality craftsmanship. The timeline for completing a deck typically ranges from two to four weeks for a standard 12×16-foot structure, depending on your experience level, weather conditions, and crew size. Understanding these variables helps you set realistic expectations and maintain momentum throughout the project.
Planning Your Deck Project
Before purchasing a single board, invest time in thorough planning. Start by checking local building codes and permits with your municipality. Most jurisdictions require deck permits for structures over 30 inches high or larger than 200 square feet. These regulations exist to ensure structural integrity and safety compliance.
Create a detailed sketch or use deck design software to visualize your final structure. Consider the deck’s purpose—will it serve as an entertainment space, dining area, or quiet retreat? Measure your outdoor space carefully, accounting for existing trees, drainage patterns, and sun exposure. A south-facing deck receives intense afternoon heat, while north-facing decks remain cooler but shadier.
Determine your deck’s height based on your home’s floor elevation and desired functionality. Ground-level decks (under 30 inches) require minimal railing regulations, while elevated decks demand sturdy railings and potentially more complex construction. Sketch the layout including stairs, built-in seating, and any special features you envision.
Budget considerations should include materials, tools you may need to purchase or rent, and permits. Quality pressure-treated lumber, composite materials, or tropical hardwoods each offer different cost-to-durability ratios. If you’re interested in complementary building skills, explore our beginner woodworking projects guide for foundational techniques.
Materials and Tools Selection
Selecting appropriate materials directly impacts your deck’s longevity and maintenance requirements. Pressure-treated lumber remains the most economical choice, featuring chemical treatment that resists rot and insect damage. Modern treatments are environmentally safer than older formulations. Cedar and redwood offer natural decay resistance and attractive appearance but require more frequent maintenance.
Composite decking combines wood fibers with plastic polymers, offering low-maintenance durability without staining or sealing. While more expensive upfront, composites eliminate ongoing maintenance costs. Tropical hardwoods like Ipe and Cumaru provide exceptional durability and natural beauty, though they’re premium-priced and require specialized cutting tools.
Essential tools include a circular saw, drill-driver, level, tape measure, square, and safety equipment. Specialized tools like a post hole digger, power miter saw, and impact driver streamline the process. Consider renting expensive equipment rather than purchasing if it’s your first project. Invest in quality safety gear: work gloves, safety glasses, dust masks, and hearing protection are non-negotiable.
Fastening materials matter significantly. Use galvanized, stainless steel, or composite-specific fasteners to prevent rust staining and structural failure. Never use standard nails; deck screws provide superior holding power. A typical 12×16-foot deck requires approximately 5 pounds of fasteners—plan accordingly.
Foundation and Posts
A solid foundation determines your deck’s structural integrity and longevity. Posts must rest on footings that extend below the frost line—typically 36-48 inches deep in colder climates. Frost heave causes posts to shift when ground freezes and thaws, compromising structural integrity. Check your local building code requirements for frost depth specifications in your region.
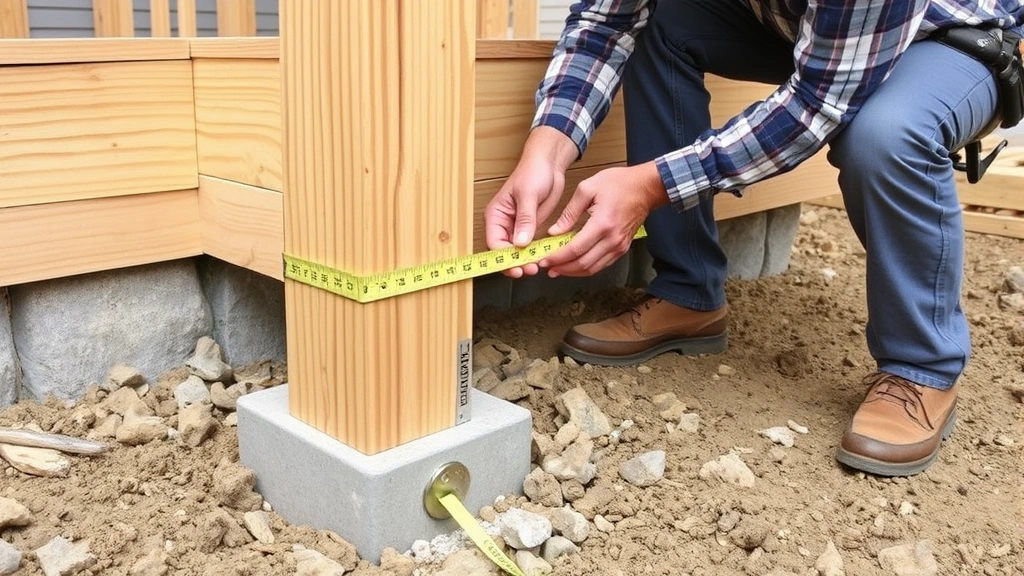
Dig postholes at marked locations, ensuring holes reach the proper depth. Use concrete footings rather than simply burying posts in soil; concrete prevents rot and provides stable support. Pour concrete into footings, then set posts into concrete while it’s still wet. Allow concrete to cure fully—typically 48 hours—before proceeding with construction.
Space posts no more than 8 feet apart along the beam. Posts should be 4×4 lumber for most residential decks, cut to length so the top aligns with your planned beam height. Use a level to verify posts are perfectly vertical before concrete sets completely. Adjust as needed by bracing temporarily with scrap lumber.
Apply post caps or flashing at the top of each post to redirect water away from the wood grain. This simple step dramatically extends post life by preventing water absorption at the vulnerable end grain. Some builders prefer metal post bases that sit on concrete pads above ground, further protecting posts from moisture.
Framing the Deck
Once posts are set, install the ledger board where your deck connects to the house. This beam transfers half your deck’s weight to the house structure, so installation must be absolutely secure. Remove siding, sheathing, or flashing to expose the house rim joist. Install the ledger board with flashing underneath to prevent water intrusion behind your home’s siding.
Attach the ledger board using galvanized bolts spaced 16 inches apart. Bolts provide superior holding power compared to nails or screws. The ledger is your deck’s most critical connection—improper installation causes catastrophic failure. Consult professional deck construction guidelines for detailed ledger specifications.
Install the outer beam connecting the posts opposite your house. This rim beam should match the ledger board’s height precisely. Use galvanized bolts or lag screws to attach the beam to posts. The beam carries your entire deck’s weight, so verify all connections are secure and properly fastened.
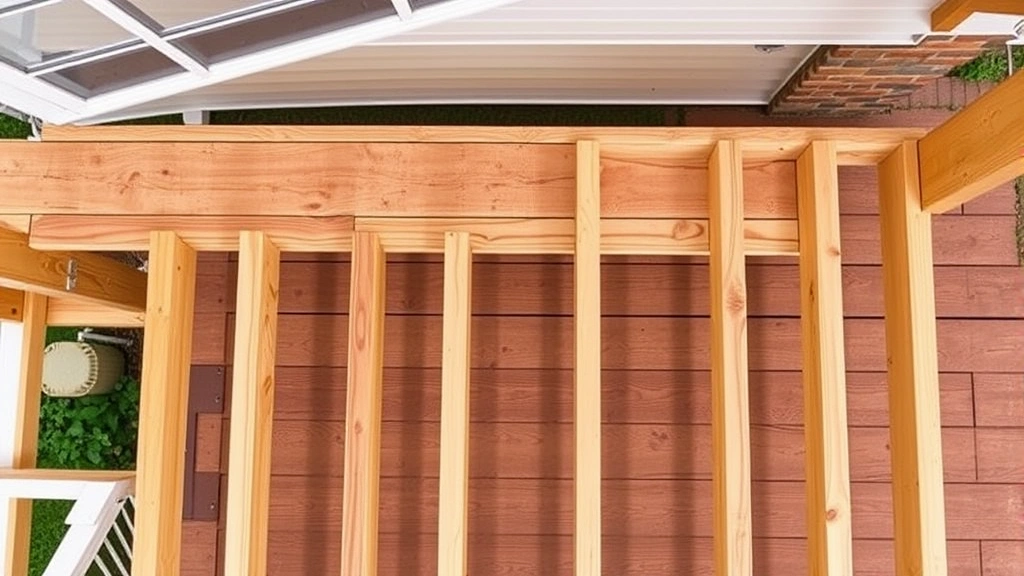
Install interior beams between posts using joist hangers, which provide superior support compared to toe-nailing. Space joists 16 inches on center—this spacing supports standard decking board widths. Joists typically use 2×8 or 2×10 lumber, depending on the span and load requirements. Longer spans require larger lumber to prevent sagging.
Crown your joists by installing them with the crown (slight curve) facing up. This natural curve helps the joist straighten under load. A crowned joist properly installed resists sagging better than an inverted one. Check joists with a level as you install them, maintaining consistent height across the entire frame.
Installing Decking Boards
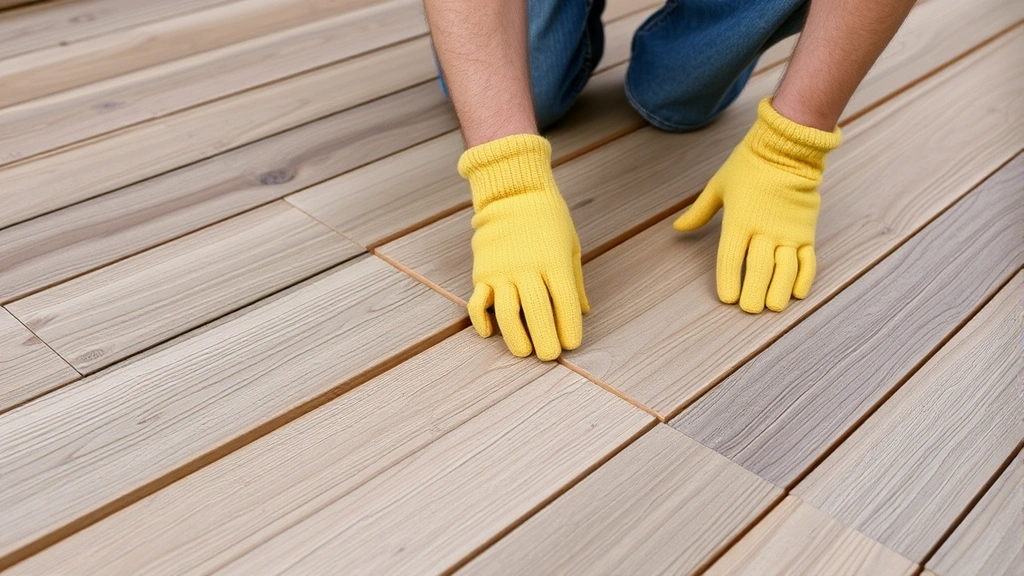
Decking board installation requires attention to spacing, fastening, and layout. Most wood expands and contracts seasonally; leave 1/8-inch gaps between boards to accommodate this movement. Composite decking typically requires slightly larger gaps—check manufacturer specifications for your specific product.
Plan your decking layout to minimize waste and achieve visually balanced edges. Snap chalk lines to maintain straight rows, especially critical for large decks. Install the first board parallel to the house, maintaining consistent spacing from the ledger. Fasten each board with two fasteners per joist to prevent cupping and twisting.
Use a spacer block to maintain consistent gaps between boards. Commercial spacers or even a finish nail work effectively. Drive fasteners at slight angles to pull boards tight against the spacer before removing it. This technique ensures uniform spacing throughout the deck.
For longer decks, stagger board end joints across multiple joists. Never allow butt joints to align directly above single joists—this creates weak points. Staggered joints distribute load more effectively and appear more professional. Cut boards to length using a miter saw for clean, safe cuts.
Work methodically from one side to the other, maintaining consistent fastening pressure. Over-driven fasteners damage boards; under-driven fasteners fail under load. Use a fastener depth gauge to achieve proper penetration—fastener heads should sit flush with the board surface.
Railings and Safety Features
Decks elevated more than 30 inches above grade require railings—this isn’t optional. Railings prevent falls and are legally mandated in virtually all jurisdictions. Railings must withstand 200 pounds of horizontal force without failing, so structural integrity is paramount.
Railing posts should be 4×4 lumber, installed no more than 6 feet apart. Attach posts securely to the deck frame with galvanized bolts or lag screws. The railing itself—balusters, pickets, or panels—must prevent a 4-inch sphere from passing through any opening. This prevents child entrapment. Horizontal balusters are particularly risky for climbing; vertical spacing is generally safer.
Railing height must be at least 36 inches measured from the deck surface. Some jurisdictions require 42 inches for commercial applications. Check your local codes for specific requirements. Install railings before allowing anyone on the deck to prevent accidents during construction.
Stairs require special attention to safety and code compliance. Stair treads should be 10-11 inches deep with 7-8 inch risers. Handrails are mandatory for stairs with four or more risers. Handrails must be 34-38 inches high, measured from the stair nosing, and capable of supporting 200 pounds of force without deflecting more than 1/4 inch.
Install stair nosing—a rounded or angled edge that prevents tripping. Treads must be slip-resistant, especially important in wet climates. Consider our home security guide for additional outdoor safety considerations beyond deck construction.
Finishing and Maintenance
Finishing protects your deck from UV damage and moisture intrusion while enhancing appearance. For pressure-treated lumber, wait 3-6 months before staining to allow the wood to weather slightly and moisture content to stabilize. Stain penetrates dried wood more effectively than freshly milled lumber.
Clean your deck thoroughly before finishing. Pressure wash to remove dirt, mold, and mildew, then allow complete drying. Apply a quality deck stain rated for exterior use. Stains come in transparent, semi-transparent, and solid formulations. Transparent stains showcase wood grain but require more frequent reapplication. Solid stains provide better UV protection and hide imperfections.
Seal composite decking according to manufacturer recommendations. Some composites require no sealing; others benefit from periodic application. Read your material’s care instructions carefully—improper finishing can void warranties.
Establish a maintenance routine to extend your deck’s life. Sweep debris regularly to prevent moisture accumulation. Clean gutters above your deck to prevent water runoff damage. Inspect fasteners annually, tightening any that have loosened. Remove mold and mildew promptly using appropriate cleaners.
Refinish pressure-treated wood every 2-3 years depending on climate and exposure. Composite decking requires less frequent maintenance but still benefits from occasional cleaning. Address repairs immediately—a small problem now prevents major structural issues later.
For additional home improvement guidance, explore our basement finishing guide or our house painting guide for complementary projects that enhance your outdoor living space investment.
FAQ
How long does a deck take to build?
A standard 12×16-foot deck typically requires 2-4 weeks for experienced builders and 4-8 weeks for first-time DIYers. This timeline assumes proper permits, favorable weather, and straightforward designs. Complex decks with multiple levels, built-in features, or challenging terrain require additional time.
Do I need a building permit for my deck?
Most jurisdictions require permits for decks exceeding certain size thresholds (typically 200 square feet) or height requirements (usually 30 inches). Permit requirements vary by location, so check with your local building department. Permits ensure your deck meets safety codes and protect your property value.
What’s the best deck material?
The best material depends on your priorities. Pressure-treated lumber offers affordability but requires maintenance. Composite decking provides low-maintenance durability at higher cost. Tropical hardwoods offer premium appearance and longevity but premium pricing. Consider climate, maintenance tolerance, budget, and aesthetic preferences when choosing.
How deep should deck footings be?
Footings must extend below your local frost line—typically 36-48 inches in cold climates, though some areas require 12-24 inches. Frost heave causes posts to shift seasonally without proper footings. Contact your local building department or construction association for frost line specifications in your area.
Can I attach a deck to my house without a ledger board?
No. The ledger board is essential for supporting half your deck’s weight. Improperly installed ledgers cause catastrophic deck failure, potentially injuring people. Always install ledgers with proper flashing and secure bolting. This connection is non-negotiable for safety and code compliance.
What spacing is required between deck boards?
Leave 1/8-inch gaps between pressure-treated and composite boards to accommodate seasonal expansion and contraction. Some composite manufacturers specify different spacing—always check product specifications. Proper spacing prevents cupping, warping, and fastener failure.
How often should I stain or seal my deck?
Pressure-treated lumber typically requires restaining every 2-3 years, depending on climate and sun exposure. Composite decking varies by product; some need no sealing while others benefit from periodic treatment. Inspect your deck annually and refinish when water no longer beads on the surface—this indicates the finish is failing.


