DIY Shed Plans? Expert-Designed Strategies for Building Your Dream Storage Solution
Building a shed from scratch is one of the most rewarding DIY projects you can undertake. Whether you need extra storage space, a workshop, or a garden retreat, a well-planned shed provides functional space while adding value to your property. However, the difference between a shed that stands for decades and one that deteriorates quickly often comes down to the quality of your initial planning and design choices.
In this comprehensive guide, we’ll walk you through expert-designed strategies for creating a shed that’s not only structurally sound but also meets your specific needs. From foundation selection to roofing materials, we’ll cover every critical decision point that separates amateur projects from professional-quality results. Whether you’re building a small 8×10 storage shed or a larger 12×16 workshop space, these proven strategies will help you avoid costly mistakes and ensure your investment stands the test of time.

Understanding Local Building Codes and Permits
Before you drive a single nail, understanding your local building requirements is absolutely essential. Building codes exist to protect your safety and ensure structural compliance. Many homeowners skip this step, thinking it’s bureaucratic red tape, but building code violations can lead to denied insurance claims, failed property inspections, and even forced removal of the structure.
Check with your local International Code Council (ICC) resources to understand which building codes apply in your jurisdiction. Most areas require permits for sheds exceeding 100-200 square feet, though some municipalities have stricter requirements. The permit process typically involves submitting plans, paying fees, and scheduling inspections at key construction stages.
Additionally, verify setback requirements—the minimum distance your shed must be from property lines, utilities, and neighboring structures. Many areas require 5-10 foot setbacks, and violating these can force you to move or demolish your shed. Contact your local building department and request information about shed-specific regulations, electrical requirements if you plan to add power, and any homeowners association restrictions that might apply.

Selecting the Right Location and Site Preparation
Location determines not only convenience but also the longevity of your shed. The ideal location offers proper drainage, adequate sunlight for visibility and maintenance, and protection from prevailing winds. Avoid low-lying areas where water collects during heavy rain—poor drainage is one of the leading causes of shed deterioration and wood rot.
Examine your site carefully during and after rainfall to identify drainage patterns. If water naturally pools in your chosen location, either select a different spot or plan for drainage solutions like gravel beds or French drains. Consider proximity to utilities; you don’t want to accidentally strike a buried gas line or electrical cable during foundation work.
Before beginning site preparation, clear the area of vegetation, rocks, and debris. Mark out your shed footprint with string and stakes, ensuring corners are square using the 3-4-5 triangle method (measure 3 feet along one side, 4 feet along the adjacent side; the diagonal should measure exactly 5 feet if corners are square). Remove topsoil and vegetation from the marked area—typically 2-4 inches deep—to prevent settling and provide a clean base for your foundation.
When planning your layout on your property, consider sun exposure carefully. While some sun helps prevent moisture accumulation, excessive heat can warp wood and degrade roofing materials. A location with morning sun and afternoon shade often provides the best balance. Also think about security considerations and visibility from your home if you’re storing valuable tools or equipment.
Foundation Types: Choosing What Works Best
Your foundation choice profoundly impacts your shed’s lifespan and performance. There are four primary options, each with distinct advantages and considerations:
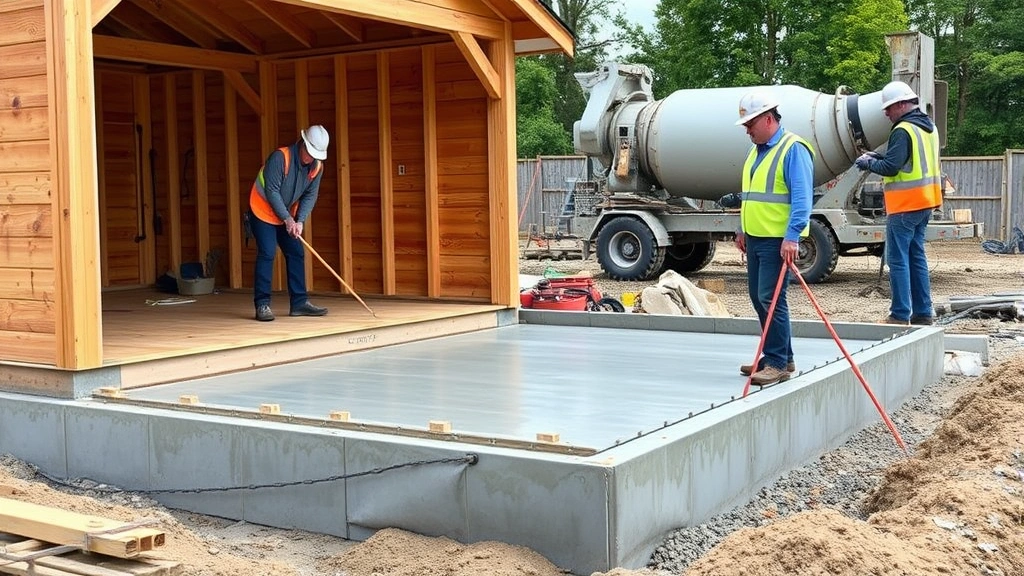
- Concrete Slab: Provides excellent stability and moisture protection. Requires excavation, gravel base, concrete mixing, and finishing work. Best for permanent installations and areas with significant freeze-thaw cycles. Cost ranges from $400-$1,200 depending on size.
- Gravel/Crushed Stone Base: Most affordable option at $100-$300. Provides adequate drainage but requires annual maintenance and eventual replacement. Works best for temporary or semi-permanent structures in well-draining areas. Compact gravel to 4-6 inches depth for stability.
- Pier and Beam: Concrete piers placed below frost line with wooden beams spanning between them. Excellent for areas with significant freeze-thaw cycles and allows air circulation underneath. Costs $300-$800 and provides good longevity. Requires precise frost line depth knowledge for your region.
- Concrete Blocks: Mid-range option combining affordability with decent durability. Stack concrete blocks on compacted gravel, leaving 2-3 inches above grade to prevent water splash. Cost approximately $200-$500. Simpler than pouring a full slab but requires careful leveling.
The frost line—the depth to which ground freezes in winter—is critical for northern climates. Foundations not extending below the frost line can heave and shift as soil freezes and thaws. Contact your local extension office or building department for your area’s frost line depth. In most northern regions, this ranges from 2-4 feet deep.
Framing Strategies for Structural Integrity
Proper framing is where amateur builders often cut corners, leading to sagging roofs and structural failure years later. Expert-designed sheds follow these critical framing principles:
Wall Framing: Use 2×4 lumber for walls with studs spaced 16 inches on center (standard practice). This spacing provides adequate support while remaining economical. For larger sheds or those in high-wind areas, consider 12-inch spacing or 2×6 lumber. Install a continuous bottom plate on your foundation and a double top plate to tie walls together. Use proper woodworking techniques and fastening methods to ensure joints are tight and square.
Brace wall corners with diagonal 2x4s or metal bracing to prevent racking (walls twisting out of square). This is especially important in areas prone to high winds or seismic activity. Building codes often specify bracing requirements, so verify local requirements before framing.
Roof Framing: The roof carries significant weight and must be properly engineered. For gable roofs (peaked), use collar ties—horizontal members connecting opposite roof rafters—to prevent spreading. Space collar ties no more than every 4 feet vertically from the peak. Rafter size depends on span, spacing, roof pitch, and snow load in your area. Most 8-12 foot wide sheds use 2×6 or 2×8 rafters.
Consult NFPA building standards and load tables to determine proper rafter sizing for your specific application. Undersized rafters can sag over time, causing roof leaks and potential collapse under heavy snow loads.
Ventilation Framing: Proper attic ventilation prevents moisture accumulation and extends roof life. Plan for soffit vents at the bottom of rafter bays and a ridge vent or gable vents at the top, allowing continuous air circulation. This requires specific framing details like installing lookouts for soffit support.
Roofing Systems and Weather Protection
Your roofing system is the primary defense against weather damage. Material selection affects both initial cost and long-term maintenance requirements:
Asphalt Shingles: Most common choice, offering good value at $100-$300 for materials on a typical 10×12 shed. Lifespan ranges from 15-25 years depending on climate and quality. Installation requires proper underlayment, drip edge, and fastening patterns. Ensure shingles are nailed according to manufacturer specifications—typically 4-6 nails per shingle—to prevent blow-off in high winds.
Metal Roofing: Premium option costing $400-$800 but lasting 40-70 years. Excellent for areas with heavy snow or rain. Requires specialized installation and proper flashing details to prevent leaks. Metal expands and contracts with temperature changes, so fastening systems must accommodate this movement.
Rubber/TPO Membrane: Commercial-style roofing increasingly popular for DIY projects. Costs $300-$600, lasts 20-30 years, and handles ponding water well. Seams must be properly sealed, and the material must be secured according to manufacturer specifications.
Regardless of material choice, proper underlayment is critical. Use synthetic underlayment (ice-and-water shield in vulnerable areas) under your roofing material to provide secondary moisture protection. Install drip edge along all roof edges to direct water away from fascia and walls. These details prevent water intrusion that leads to wood rot and structural failure.
Doors, Windows, and Ventilation
Doors and windows require careful planning and execution to prevent future problems. Door placement affects both functionality and structural integrity. Avoid placing doors on the side facing prevailing winds when possible, as this forces rain inside during storms.
Door Installation: Install a proper door frame with a sill pan or threshold that slopes away from the building to shed water. Use exterior-grade doors rated for your climate. Ensure door openings are properly framed with adequate support—never frame a door opening that compromises wall bracing. Hang doors with quality hinges and install a threshold to prevent water intrusion at ground level.
Windows: While not essential, windows improve functionality and help prevent moisture accumulation. Install windows high on walls to minimize weather exposure. Use tempered or polycarbonate panels in sheds where breakage could be problematic. Ensure windows have proper flashing and sills that direct water away from the building.
Ventilation Strategy: Even if you’re not installing a complex ventilation system, plan for passive air movement. Louvers or gable vents allow air circulation that prevents moisture buildup, wood rot, and mold growth. In humid climates or if storing moisture-sensitive items, consider adding a small moisture control system similar to basement finishing strategies, including vapor barriers and potentially a dehumidifier.
Interior Organization and Finishing Touches
The interior of your shed should be organized for both functionality and longevity. Proper organization prevents items from damaging the structure and makes your space more usable.
Wall Treatment: Consider interior wall sheathing or paneling to protect framing from dust and moisture. Plywood, oriented strand board (OSB), or tongue-and-groove boards all work well. Wall sheathing also provides a surface for mounting shelving and storage systems. Leave a small gap (1/4 inch) between panels to allow for wood movement with humidity changes.
Flooring: Bare concrete or gravel floors are acceptable for tool storage but create dust and make cleaning difficult. Plywood flooring adds comfort and organization, though it requires proper drainage beneath the shed to prevent rot. If adding flooring over a gravel base, consider a moisture barrier first. For concrete slabs, ensure proper slope for drainage and seal the surface to prevent dust and moisture issues.
Storage Systems: Install heavy-duty shelving securely attached to wall framing. Proper shelving keeps items organized, off the ground where moisture can damage them, and makes efficient use of vertical space. Consider finishing touches like interior painting or staining to improve aesthetics and protect wood surfaces. Use exterior-grade paint to ensure durability in the humid shed environment.
Utility Considerations: If adding electricity, hire a licensed electrician to ensure code-compliant installation. Improper electrical work creates fire hazards and insurance issues. If you need water access, plan for drainage and freezing concerns in cold climates. Outdoor kitchens or washing stations require proper grading and drainage to prevent water damage to the shed structure.
For those interested in comprehensive property projects, understanding water management systems for your entire property helps inform shed utility planning.
FAQ
Do I need a permit to build a shed?
Most jurisdictions require permits for sheds exceeding 100-200 square feet or those with electrical systems. Even smaller sheds may need permits depending on local regulations. Check with your building department before starting. Permits ensure your shed meets safety codes and won’t create insurance or resale issues.
What’s the best foundation for a shed?
The best foundation depends on your climate, soil conditions, and permanence plans. Concrete slabs offer maximum durability in freeze-thaw climates. Pier-and-beam systems work well for most areas and allow ventilation underneath. Gravel bases are budget-friendly for temporary structures. Consult your local building department about frost line requirements for your region.
How much does it cost to build a basic 10×12 shed?
Basic 10×12 shed construction typically costs $2,000-$5,000 in materials, depending on finishes and location. A gravel foundation with standard framing and asphalt shingles represents the lower end. Concrete foundations, metal roofing, or interior finishing push costs higher. This doesn’t include labor if hiring professionals.
What’s the most common mistake DIYers make with sheds?
Inadequate foundation preparation and poor drainage are the most common issues. Many builders underestimate the importance of proper site drainage, leading to water damage and wood rot within 5-10 years. Skipping the permit process and building code compliance also creates problems that surface during property sales or insurance claims.
Can I build a shed on my own?
Yes, but it requires careful planning and realistic assessment of your skills. Foundation work, framing, and roofing are feasible for experienced DIYers. Electrical work should be left to licensed professionals. Start with a smaller shed to build experience, and don’t hesitate to hire professionals for specialized tasks like concrete pouring or roofing.
How do I prevent wood rot in my shed?
Wood rot results from sustained moisture exposure. Prevent it by ensuring proper drainage around the shed, adequate ventilation to manage humidity, and maintaining gutters and downspouts. Use pressure-treated lumber for all ground-contact framing. Apply exterior sealant or paint to exposed wood surfaces. Inspect regularly for water intrusion and address leaks immediately.


