How to Remove Candle Wax: Professional Cleaning Methods and Tips
Candle wax spills and residue are among the most common household messes that homeowners face. Whether you’ve accidentally knocked over a burning candle on your hardwood floor, dripped wax onto your carpet, or discovered stubborn buildup on decorative surfaces, knowing how to effectively remove candle wax can save you time, money, and frustration. Professional cleaners have perfected numerous techniques over years of experience, and the good news is that most of these methods are simple enough for anyone to execute at home using basic supplies you likely already have in your kitchen and cleaning cabinet.
The key to successful wax removal lies in understanding how wax behaves at different temperatures and what solvents work best on various surfaces. Unlike some cleaning challenges that require expensive specialized equipment or harsh chemical treatments, candle wax removal is remarkably straightforward once you grasp the fundamentals. In this comprehensive guide, we’ll walk you through professional-approved strategies for removing wax from virtually any surface in your home, from delicate fabrics to tough stone and wood surfaces.
Why Candle Wax Removal Matters
Understanding the importance of prompt and proper wax removal goes beyond simple aesthetics. Candle wax, particularly paraffin wax commonly used in decorative and scented candles, can permanently stain surfaces if left to sit for extended periods. The wax bonds with certain materials, especially porous surfaces like natural stone, unfinished wood, and natural fiber textiles. When wax hardens, it becomes significantly more difficult to remove without potentially damaging the underlying surface. Professional cleaners emphasize that the first few hours after a spill represent your best opportunity for easy removal.
Different candle types present different challenges. Soy-based candles, which are increasingly popular due to their natural origins, actually behave quite differently from traditional paraffin candles. Gel candles, which contain mineral oil and resin compounds, require yet another approach. Understanding what type of candle caused your mess will help you select the most appropriate removal method. Additionally, if your candle was scented or colored, you may need to address potential staining or fragrance residue after removing the physical wax buildup.
The Freezing Method: Your First Line of Defense
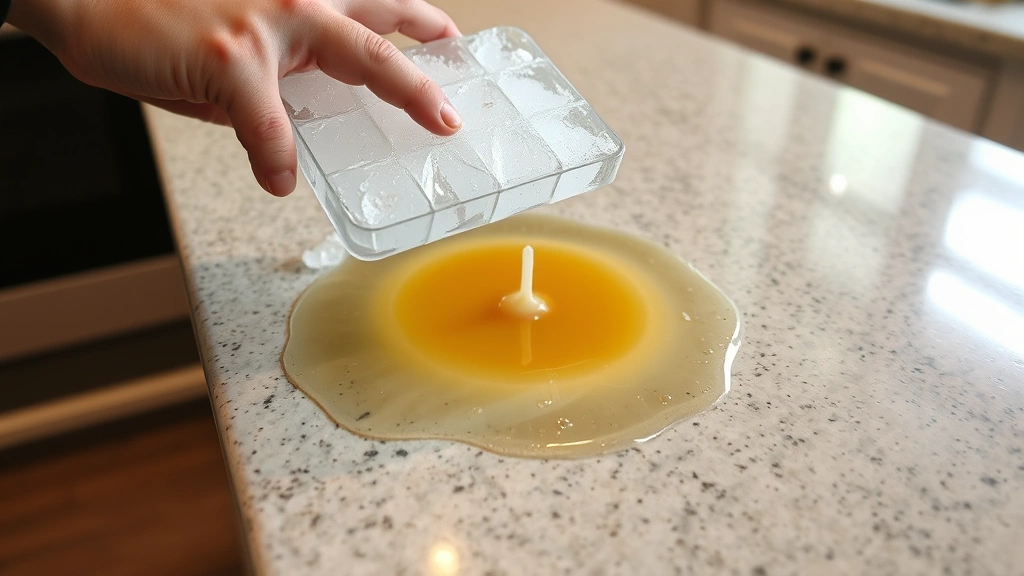
Professional cleaners consistently recommend the freezing method as the safest and most effective first approach for candle wax removal on most surfaces. This technique works because wax becomes brittle and separates from surfaces when frozen solid. The beauty of this method is that it requires no chemicals, heat sources, or specialized equipment—just ice and patience.
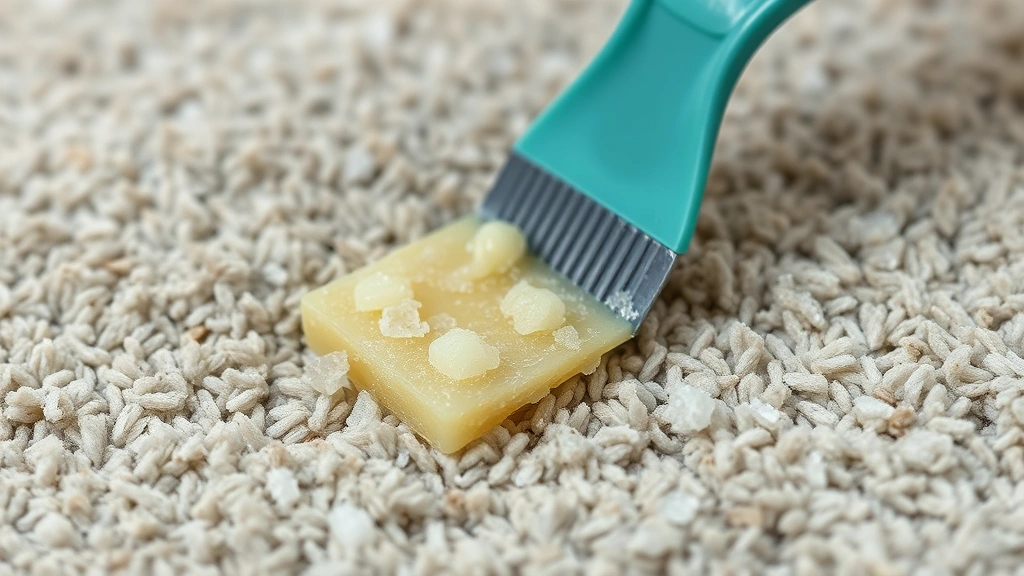
For carpet and upholstered surfaces: Place a plastic bag filled with ice directly onto the wax deposit and allow it to sit for fifteen to twenty minutes. The cold will cause the wax to contract and harden completely. Once frozen solid, gently scrape away the wax using a plastic scraper, old credit card, or butter knife. Work slowly and deliberately to avoid pulling fibers from the carpet or creating gouges in the surface. Many professional carpet cleaners prefer this method because it leaves no residue and doesn’t risk heat damage to synthetic fibers.
For hard surfaces: The same principle applies to wood floors, tile, stone countertops, and similar materials. Ice packs work particularly well on these surfaces because you can apply firm pressure while scraping without risk of damage. Once the wax is completely brittle, use a plastic or wooden scraper held at a low angle to lift the wax away from the surface. This method is especially valuable for natural stone like marble or granite, where heat can sometimes cause problems.
The freezing method does have limitations. It works best on fresh wax spills and may be less effective on thin, spread-out layers that have already begun to set. Additionally, if wax has been on a surface for weeks, it may have bonded too thoroughly for simple scraping to work. In these cases, you’ll need to progress to heat-based or solvent-based methods.
Heat-Based Removal Techniques
Heat is a professional cleaner’s secret weapon for candle wax removal, but it must be applied carefully to avoid damaging surfaces. The principle is simple: melting wax allows it to separate from surfaces and can be blotted or wiped away cleanly. However, the method of applying heat varies significantly depending on your surface type.
The iron method: This technique works exceptionally well on carpets, upholstery, and some fabrics. Place a thin cloth or paper towel directly over the wax, then hold a warm iron (set to low-medium heat) on top of the cloth for several seconds. The heat transfers through the cloth, melting the wax, which then absorbs into the cloth. Move to a clean section of the cloth and repeat until all visible wax transfers away. The key is using a barrier cloth to prevent wax from sticking to your iron. After this initial treatment, you may notice some residual staining—this is where our guide on DIY carpet cleaning becomes invaluable for addressing any remaining discoloration.
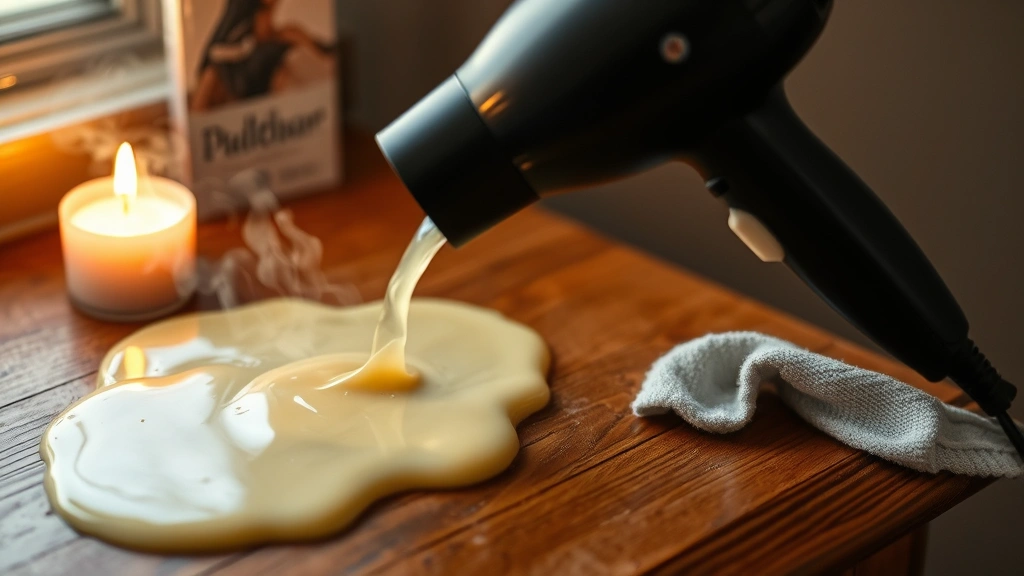
The hair dryer approach: For surfaces where an iron isn’t practical, a hair dryer set to medium heat can gently warm wax until it becomes pliable. Hold the dryer six to eight inches from the surface and move it constantly to avoid overheating any single area. Once the wax softens, use a cloth or plastic scraper to remove it. This method requires patience but works well on delicate surfaces and vertical applications.
Hot water immersion: For removable items like candlestick holders, figurines, or decorative objects, submerging them in hot (not boiling) water often works beautifully. The wax will float away as it melts, or you can easily wipe it off with a cloth once softened. This method is particularly effective for metal candleholders and similar items.
Removing Wax from Carpets and Fabrics
Carpets and upholstered furniture present unique challenges because the fibers can trap wax particles deep within their structure. Professional carpet cleaners approach this systematically, using the combination methods that maximize effectiveness while minimizing fiber damage.
Start with the freezing method to remove the bulk of the wax. Once you’ve removed what you can through scraping, apply the iron-and-cloth technique to address remaining residue. After the wax is gone, you’ll likely notice some discoloration or sticky residue remaining. At this point, many professionals recommend using a solvent-based cleaner specifically formulated for wax removal. Test any solvent on an inconspicuous area first to ensure it doesn’t affect your carpet’s color or texture.
For stubborn cases, professional-grade carpet cleaning solutions containing citrus-based solvents (which are safe and effective) can be applied directly to the affected area. Allow the solution to sit for five to ten minutes before blotting with clean cloths. You may need to repeat this process several times. If the wax has been present for a long time and has thoroughly bonded with the fibers, you might benefit from professional carpet cleaning services using commercial equipment.
The same principles apply to upholstered furniture, though you should always check manufacturer recommendations before applying heat or solvents. For valuable or delicate furniture, consulting a professional upholstery cleaner is often the wisest choice.
Cleaning Hard Surfaces and Furniture
Hard surfaces like wood furniture, tile floors, and stone countertops generally respond well to wax removal, but each material type requires slightly different approaches to prevent damage.
Hardwood floors and wooden furniture: The freezing method is your safest starting point for wood. Once you’ve removed bulk wax through scraping, any remaining residue can usually be addressed with a wood-specific cleaner. Avoid excessive moisture on wood surfaces, as this can cause swelling or discoloration. If your wooden furniture has a protective finish (varnish, polyurethane, etc.), you have more flexibility with heat and mild solvents. For unfinished or antique wood, stick with gentler methods. If you need comprehensive guidance on wood care, our resource on cleaning bronze and metal surfaces provides insights into protecting finished surfaces.
Tile and grout: Ceramic and porcelain tile can handle more aggressive wax removal techniques than most surfaces. After freezing and scraping, any remaining wax residue can usually be cleaned with warm soapy water or a mild degreaser. Grout lines, however, require special attention because wax can become trapped in the porous grout material. A grout brush and appropriate grout cleaning methods may be necessary for complete removal.
Natural stone surfaces: Marble, granite, limestone, and similar natural stones require the gentlest approach. Always use the freezing method first, then progress to mild heat if necessary. Avoid acidic cleaners on natural stone, as they can etch the surface. For stubborn wax on valuable stone surfaces, professional restoration services are often the safest option to preserve the stone’s appearance and integrity.
Chemical Solvents and When to Use Them
While mechanical removal methods (freezing and scraping) and heat-based techniques handle most candle wax situations, certain stubborn or old deposits may require chemical assistance. Professional cleaners maintain a toolkit of solvents for these challenging scenarios, but it’s important to understand which products work on which surfaces.
Rubbing alcohol: This is one of the safest and most versatile solvents for wax removal. It evaporates quickly, leaves minimal residue, and won’t damage most surfaces. Apply rubbing alcohol directly to wax residue, allow it to sit for a minute or two, then wipe away with a clean cloth. This method works particularly well on glass, tile, and sealed stone surfaces.
Mineral oil and acetone: Professional cleaners sometimes use mineral oil to dissolve wax on certain surfaces. Acetone (found in some nail polish removers) is more aggressive and should only be used on surfaces that can tolerate it. Always test acetone on inconspicuous areas first, as it can damage some finishes and synthetic materials. Never use acetone on plastic surfaces or painted finishes without testing.
Commercial wax removers: Products specifically formulated for wax removal, often based on citrus-derived d-limonene, are safe, effective, and widely available. These products are particularly valuable for automotive applications—if you’re dealing with candle wax on your car’s interior or exterior, consult our guide on DIY car cleaning for comprehensive methods.
Heat gun application: Some professionals use heat guns (similar to hair dryers but more powerful) to melt wax, then immediately wipe it away with lint-free cloths. This method requires care to avoid scorching surfaces or creating safety hazards. Never use heat guns on flammable materials or in enclosed spaces.
Protecting Your Surfaces During Removal
Regardless of which removal method you choose, protecting the underlying surface should be your priority. Professional cleaners follow specific protocols to minimize the risk of damage during the cleaning process.
Test first, always: Before applying any heat, solvent, or mechanical force to a surface you value, test your chosen method on an inconspicuous area. This applies to carpets, upholstery, wood finishes, painted surfaces, and any specialty materials. A small test area takes just minutes and could save you from permanent damage.
Use appropriate tools: Plastic scrapers, wooden implements, and soft-bristled brushes are your friends during wax removal. Metal scrapers and stiff brushes can scratch, gouge, or damage fibers. Similarly, avoid using knives or sharp objects that could cut into surfaces or create splinters.
Ventilation matters: When using solvents or heat-based methods, ensure adequate ventilation. Many chemical solvents produce fumes that can cause discomfort or health issues in poorly ventilated spaces. Open windows, run exhaust fans, and take breaks if you’re working in a confined area for an extended period.
Protective equipment: When working with chemical solvents, wear appropriate protective gear. Rubber gloves protect your hands from skin irritation, and safety glasses prevent splashes from reaching your eyes. For more aggressive chemicals like acetone, consider wearing a respirator mask in addition to other protective equipment.
Addressing residual staining: After removing the physical wax, you may notice discoloration on some surfaces. Different materials require different approaches—fabric may need professional stain treatment, while hard surfaces might respond to appropriate cleaners for that specific material type. The staining is often separate from the wax removal process and may require additional treatment.
Understanding how to properly maintain and care for cleaning tools is also important. If you’ve used brushes or cloths during the removal process, clean them promptly before wax hardens again. For specialized cleaning tools like boar bristle brushes, our guide on cleaning boar bristle brushes provides detailed maintenance instructions.
Similarly, if you’ve used brushes or tools on decorative items, proper maintenance extends their lifespan. For example, if your candleholders are bronze or other metals, our resource on how to clean bronze offers guidance for post-removal care and maintenance.
One often-overlooked consideration is footwear—if wax has gotten onto the soles of shoes or into the textured footbeds of footwear, the freezing method works excellently. For specialty footwear like Birkenstocks, our detailed guide on cleaning Birkenstock footbeds provides specific techniques appropriate for these materials.
FAQ
How long does it take to remove candle wax?
The timeline depends entirely on your chosen method and the amount of wax involved. The freezing method typically requires fifteen to twenty minutes of freezing time plus a few minutes for scraping. Heat-based methods may take ten to thirty minutes depending on how much wax you’re removing. Chemical solvents usually work within five to fifteen minutes. Fresh wax spills can often be completely removed in under an hour, while old, stubborn deposits might require multiple treatment sessions over several hours or even days.
Can I use a microwave to heat wax for removal?
Microwaving is not recommended for candle wax removal, particularly on surfaces you care about. Microwave heat is difficult to control precisely, and the wax can heat unevenly, potentially causing damage. Additionally, if wax is on an item with metal components (like decorative candle holders), microwaving could create safety hazards. Stick with hair dryers, irons with cloth barriers, or hot water immersion for safer, more controlled heat application.
What’s the difference between removing soy and paraffin wax?
Soy-based candle wax actually tends to be slightly harder and more brittle than paraffin wax, which means the freezing method often works even better for soy wax. However, soy wax is more susceptible to staining on porous surfaces because it contains natural oils that can penetrate deep into fibers. Both types respond well to the same general removal methods, but you may need to spend more time on residual staining after removing soy wax.
Is it safe to use a heat gun on all surfaces?
Heat guns should be used cautiously and are not appropriate for all surfaces. Avoid heat guns on painted surfaces (the paint can bubble or peel), plastic materials (they can melt or warp), or near flammable materials. Heat guns are best reserved for robust surfaces like tile, concrete, or sealed wood where the intense heat won’t cause damage. Always maintain a safe distance and move the heat gun constantly to prevent localized overheating.
Should I remove wax immediately or wait for it to fully harden?
This depends on your situation. Removing wax while it’s still warm (but cool enough to handle) is often easiest because you can sometimes just peel it away. However, if you’re uncertain about the best removal method for your specific surface, waiting until the wax hardens completely is often safer—it prevents the risk of spreading warm wax to unaffected areas. Once hardened, you can assess the situation calmly and choose your method carefully.
What if my chosen removal method isn’t working?
If your initial approach isn’t producing results, progress to your next method. Start with freezing and scraping, then move to heat-based techniques if needed, and finally resort to chemical solvents only if other methods fail. Patience is crucial—rushing and applying excessive force can damage surfaces. If you’re dealing with valuable items or surfaces, professional cleaning services are often worth the investment to ensure no damage occurs.
Can I prevent candle wax spills in the future?
Absolutely. Use candle holders with deep cups that prevent wax from dripping onto surfaces. Keep candles away from drafts, which can cause uneven burning and excessive dripping. Never leave burning candles unattended, and trim wicks to one-quarter inch to reduce the amount of wax consumed and potential for spilling. Using candle containers specifically designed to catch wax drips is an excellent preventive strategy.
Is professional wax removal necessary for valuable surfaces?
For valuable antiques, specialty materials, or surfaces with significant sentimental value, professional cleaning services are often the wisest choice. Professional cleaners have experience with unusual materials and can often remove wax without any risk of damage. The cost of professional service is usually far less than the cost of repairing or replacing a damaged valuable item.


