How to Build a Shed: Expert Tips Inside
Building a shed is one of the most rewarding DIY projects you can undertake on your property. Whether you need extra storage space, a workshop, or a garden retreat, constructing your own shed gives you complete control over the design, materials, and functionality. This comprehensive guide walks you through every step of the process, from initial planning and foundation work to framing, roofing, and finishing touches.
A well-built shed not only adds practical value to your home but also increases property appeal and provides a dedicated space for hobbies, tools, and seasonal items. With proper planning and attention to detail, most homeowners can complete a basic shed project in 4-8 weeks, depending on size and complexity. This guide incorporates expert recommendations and best practices to ensure your shed stands the test of time.

Planning and Site Selection
Before you break ground on your shed project, invest time in thorough planning. Start by determining the shed’s purpose—storage, workshop, garden studio, or recreation space—as this influences size requirements and interior layout. Most residential sheds range from 8×10 feet to 12×16 feet, though larger structures require different planning considerations than smaller outbuildings.
Check local building codes and zoning regulations before selecting your site. Many jurisdictions have setback requirements specifying how far structures must be from property lines, and some require permits for sheds over a certain size. Contact your local building department or visit the International Code Council (ICC) for guidance on applicable building standards in your area.
Site selection is critical for longevity. Choose a location with good drainage to prevent water accumulation around the foundation. Avoid areas with overhanging trees that drop debris and create moisture problems. Ensure the ground is relatively level—significant slopes require additional foundation work. Consider sun exposure; south-facing sheds may require additional ventilation, while north-facing locations stay cooler but may accumulate moisture.
Create detailed plans including dimensions, door placement, window locations, and roof pitch. Even simple sketches help you visualize the project and calculate material quantities accurately. Consider using Builder Online resources for design inspiration and technical specifications.
Foundation and Base Preparation
A solid foundation prevents shifting, rotting, and structural failure. You have several options depending on your soil conditions, climate, and budget. The most common approaches include concrete pads, gravel beds, concrete piers, and full concrete slabs.
Concrete Pad Foundation: This economical option involves pouring concrete footings below the frost line (depth varies by region, typically 12-48 inches) with concrete pads at ground level. Posts rest on these pads, elevating the structure above soil and moisture. This method works well in most climates and allows for good drainage underneath.
Gravel Bed Foundation: A compacted gravel base works for temporary or portable sheds in well-draining areas. Layer landscape fabric, then 4-6 inches of compacted gravel. This allows drainage but offers less protection against frost heave in cold climates. Install pressure-treated skids or concrete blocks to support the frame.
Concrete Slab: A full concrete slab provides excellent durability and a finished floor, ideal for workshops or climate-controlled spaces. However, it’s more expensive and makes future relocation impossible. Ensure proper slope for drainage (1/8 inch per foot) and consider a vapor barrier beneath the slab.
Regardless of foundation type, ensure the base is level within 1/4 inch over 10 feet. Use a laser level or transit for accuracy. Proper leveling prevents door binding, roof stress, and water infiltration. The Builders Guild of America provides detailed foundation specifications for residential structures.
Before construction begins, mark utilities. Call 811 or your local utility locating service to identify buried gas, electric, water, and communication lines. This critical safety step prevents dangerous accidents and costly repairs.
Framing the Structure
Framing creates your shed’s skeleton and determines its strength and longevity. Most residential sheds use conventional wood frame construction with 2×4 or 2×6 lumber, depending on span and snow load requirements.
Wall Framing Basics: Build walls on the ground, then raise them into position. Standard wall construction includes bottom plates, vertical studs spaced 16 inches on center, and top plates. Studs should be 8-10 feet tall for adequate headroom. Install diagonal bracing or plywood sheathing for lateral stability before raising walls.
When raising walls, use temporary diagonal bracing to hold them plumb and square. Have helpers available—walls are heavy and dangerous if they fall. Check plumb and level at every stage. Use a 6-foot level for accuracy, and verify diagonal measurements are equal to confirm square corners.
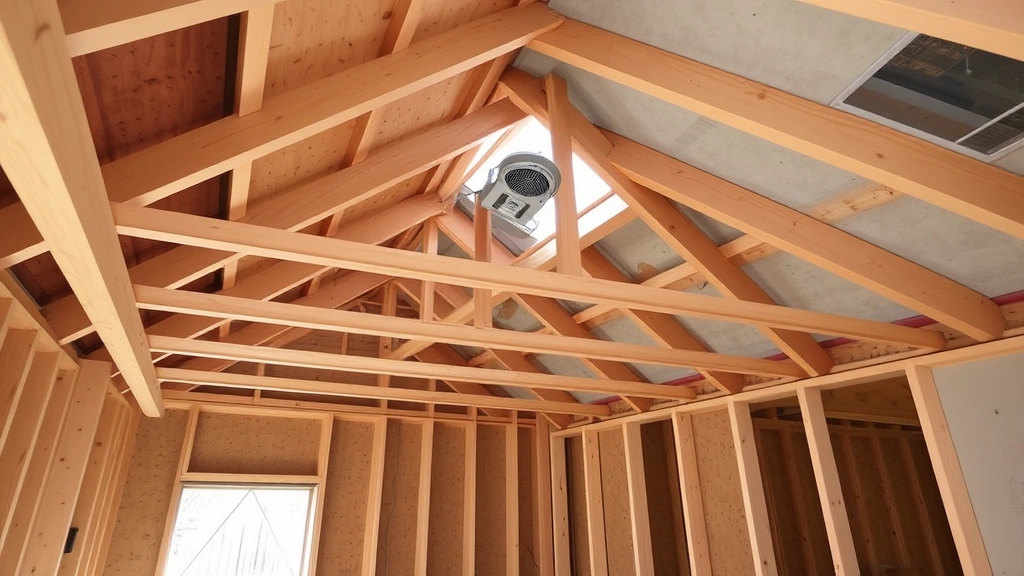
Roof Framing: Roof design significantly impacts durability and weather resistance. Common options include simple gable roofs, shed roofs, and gambrel designs. Gable roofs (two sloping sides meeting at a peak) shed water effectively and provide attic space. Shed roofs (single slope) are simpler to build but require careful pitch selection for drainage.
Roof pitch (slope) should be at least 4:12 (4 inches of rise per 12 inches of run) for adequate water shedding. Steeper pitches (6:12 to 8:12) shed snow and ice more effectively in northern climates. Flatter pitches (3:12 to 4:12) work in drier regions but require better shingles and flashing.
Rafters, trusses, or engineered roof systems distribute roof loads to walls and foundation. Trusses (pre-built triangular frames) offer advantages—they’re faster to install, require less carpentry skill, and distribute loads more evenly than site-built rafters. However, they’re more expensive and limit attic usage. Site-built rafters offer more flexibility but require precise calculations and carpentry skills.
Ensure adequate ventilation in the roof cavity to prevent moisture accumulation. Install soffit vents (intake) and ridge vents (exhaust) with a minimum 1:150 ventilation ratio (1 square foot of vent per 150 square feet of attic space). This prevents ice dams, mold growth, and premature shingle deterioration.
Roofing Installation
Proper roofing is essential for protection against weather. After framing is complete and roof sheathing is installed, you’re ready for underlayment and shingles.
Underlayment and Flashing: Install roofing underlayment (felt or synthetic) over sheathing before shingles. This provides a secondary water barrier if shingles fail. Synthetic underlayment offers advantages over felt—better moisture management, longer lifespan, and improved traction for workers. Install flashing at all penetrations (vent pipes, chimneys) and valleys where water concentrates.
Flashing details are critical. Improperly installed flashing is a primary source of roof leaks. Follow manufacturer specifications exactly, ensuring proper overlap direction and fastener placement. The National Roofing Contractors Association (NRCA) provides detailed flashing guidelines.
Shingle Installation: Asphalt shingles are the most common roofing material for sheds—affordable, durable, and available in many colors. Begin at the eaves with a starter course, then work upward in overlapping rows. Nail shingles properly with 4 nails per shingle placed in the manufacturer’s specified locations. Improper nailing reduces wind resistance and causes premature failure.
Shingle quality varies significantly. Three-tab shingles are economical but less durable (15-20 year lifespan). Architectural shingles offer better appearance and durability (25-30 years). Premium shingles provide superior wind resistance and longevity. Choose based on your climate and budget. GAF Materials offers detailed shingle specifications and installation guidance.
Proper roof ventilation extends shingle life by reducing heat and moisture buildup. Similar to how wood stain requires proper drying conditions, roofing materials perform best with adequate air circulation and moisture management.
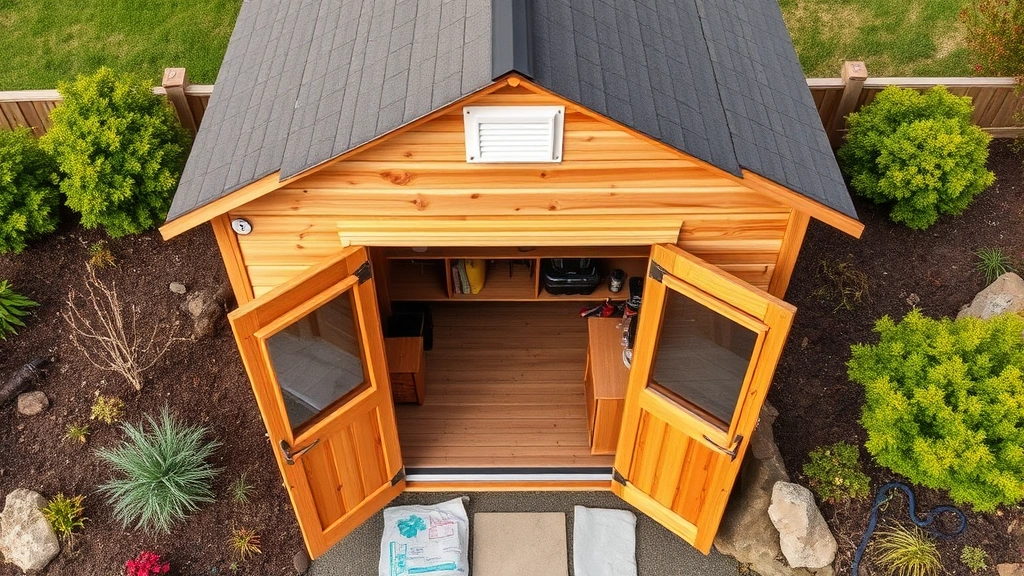
Doors, Windows, and Ventilation
Doors and windows provide access, light, and ventilation while protecting against weather. Plan door placement for convenience and functionality. Standard single doors are 32-36 inches wide; double doors (48-72 inches combined width) accommodate larger equipment or vehicles.
Door Installation: Install door frames before exterior sheathing when possible. Use pressure-treated lumber for door sills to resist rot. Ensure frames are square and level—use shims and a level for accuracy. Install weatherstripping around door frames to prevent drafts and water infiltration. Apply caulk at all exterior seams and penetrations.
Window Selection: Windows provide light and ventilation. Position them to capture prevailing breezes for natural cooling. Consider fixed windows (less expensive, better security) versus operable windows (better ventilation). Double-pane windows provide better insulation if you’ll use the shed in cold months. Install windows with proper flashing and caulking to prevent leaks.
Ventilation Strategy: Adequate ventilation prevents moisture accumulation, which causes mold, rot, and structural damage. Install soffit vents (low) and gable or ridge vents (high) to create air circulation. For workshop sheds, consider exhaust fans for tool dust and fumes. Louvers or vents should total at least 1/150 of the attic space area.
Finishing and Maintenance
Exterior finishing protects against weather and enhances appearance. Choose durable materials suitable for your climate.
Siding Options: Pressure-treated wood siding offers traditional aesthetics but requires regular maintenance. Metal siding is durable and low-maintenance but can dent. Vinyl siding resists rot and requires minimal upkeep but may crack in extreme cold. Composite materials offer durability and low maintenance but cost more initially.
Apply quality exterior paint or stain to wood siding every 3-5 years depending on climate. This protects against UV damage and moisture penetration. Use exterior-grade products designed for wood. Proper surface preparation—cleaning and sanding—ensures good adhesion and longevity.
Interior Finishing: Interior finishing depends on intended use. Workshops benefit from insulation and drywall for dust control and temperature regulation. Storage sheds may only need shelving and organization systems. Install outlets and lighting if you’ll use the shed for work or evening activities. Ensure electrical work complies with local codes—hire a licensed electrician if unsure.
Long-Term Maintenance: Regular maintenance extends your shed’s lifespan significantly. Inspect roofing annually for damaged shingles and flashing. Clean gutters seasonally to prevent water damage. Check for signs of rot, pest damage, or structural issues. Maintain proper grading around the foundation to direct water away. Reapply exterior finishes as needed to protect wood from weathering.
If you’re undertaking other home improvement projects, consider comprehensive home security measures to protect your valuable tools and equipment stored in the shed.
FAQ
How long does it take to build a shed?
A typical 10×12 shed takes 4-8 weeks for an experienced DIYer working part-time. This includes planning, site preparation, foundation, framing, roofing, and finishing. Complex designs or poor weather conditions extend the timeline. Like building a custom PC, shed construction requires patience and attention to detail.
Do I need a permit for a shed?
Permit requirements vary by jurisdiction. Most areas require permits for sheds over 100-120 square feet or structures within setback distances from property lines. Check with your local building department before starting. Permits ensure your shed meets safety codes and prevents legal issues if you sell your home.
What’s the best foundation for a shed?
The best foundation depends on your climate and soil conditions. Concrete piers work well in most situations, providing good drainage and frost protection. Full concrete slabs suit workshops but limit future relocation. Gravel beds work for temporary structures in well-draining areas. Consult local building codes for frost line depth and requirements in your region.
Can I build a shed without framing experience?
Yes, but take time to learn proper techniques. Start with simpler designs and consider kit sheds if you’re uncomfortable with framing. Watch instructional videos, read detailed guides from the DIY Network, and don’t hesitate to hire professionals for complex aspects like roofing or electrical work.
How should I ventilate my shed?
Install soffit vents for intake and ridge or gable vents for exhaust. Aim for at least 1 square foot of vent per 150 square feet of enclosed space. This prevents moisture buildup, mold growth, and premature material deterioration. Proper ventilation is especially important in humid climates or if you’ll store moisture-sensitive items.
What’s the most durable roofing material?
Architectural asphalt shingles offer excellent durability and value for most sheds (25-30 year lifespan). Metal roofing lasts 40+ years but costs more. Slate and tile last longest but are expensive and heavy, requiring reinforced framing. Choose based on your climate, budget, and aesthetic preferences.


